Now available on the Microsoft Store
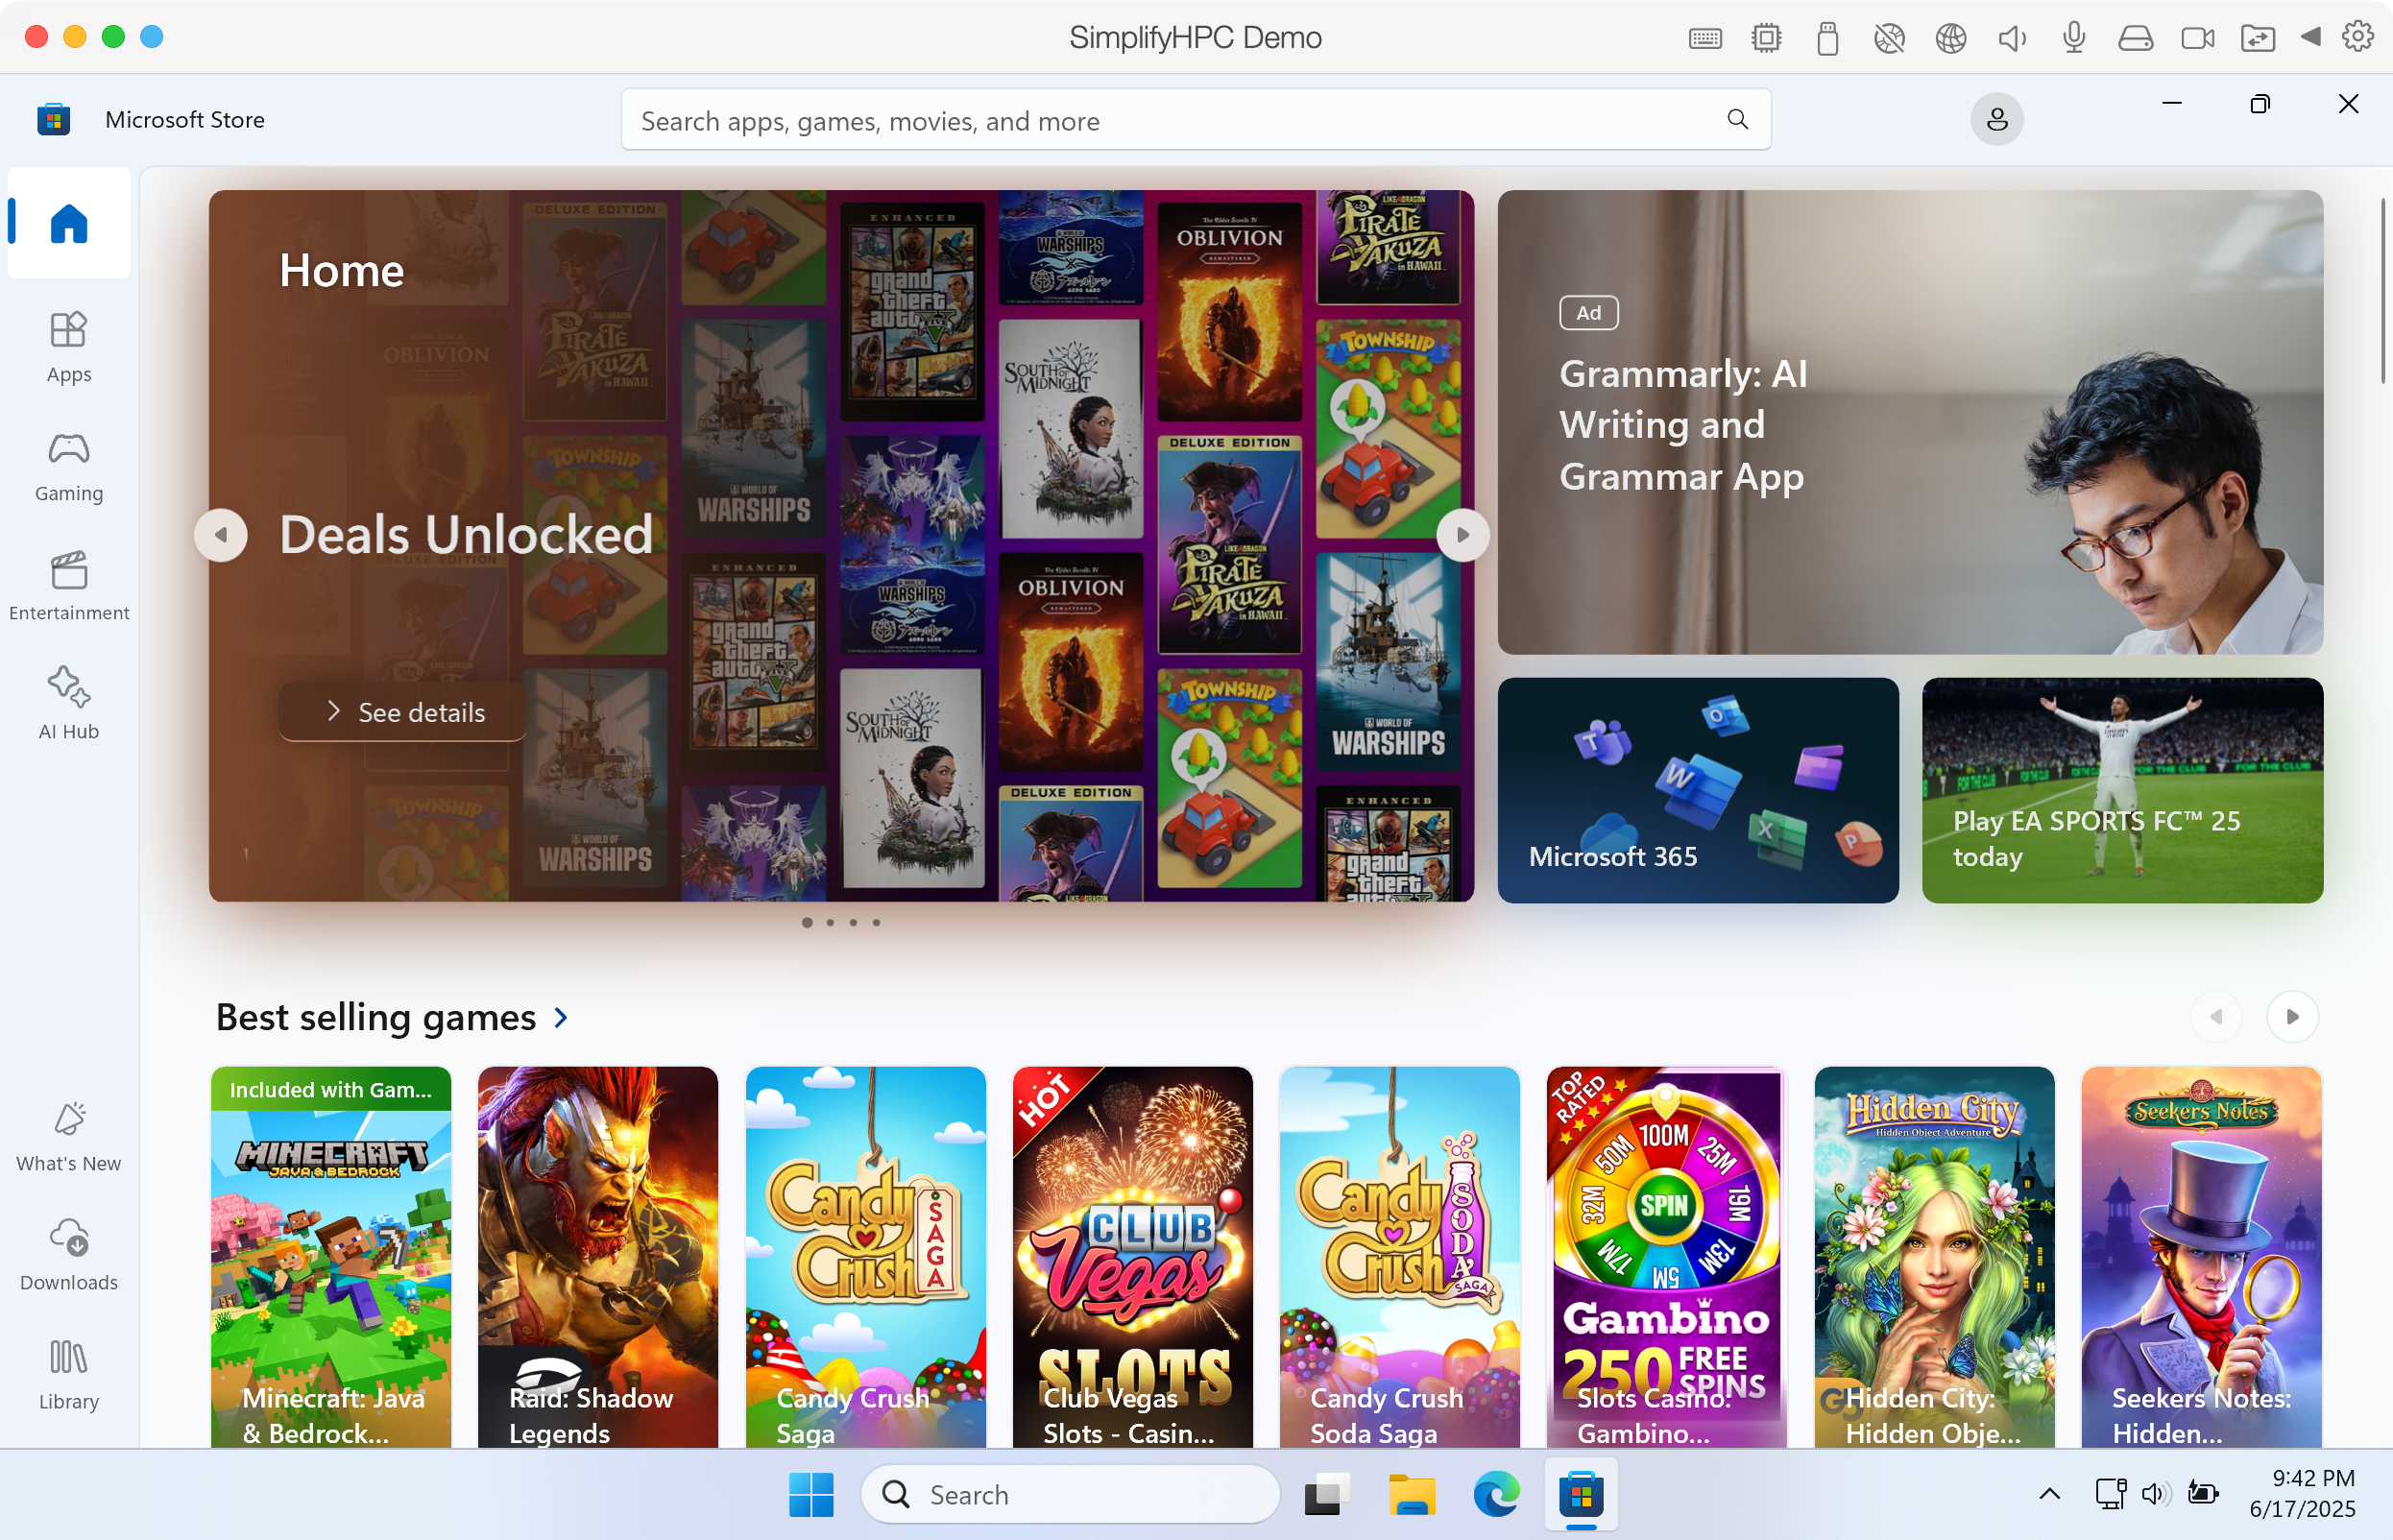
Step 1. Navigate to the Microsoft Store.
Click image to enlarge in a new tab/window
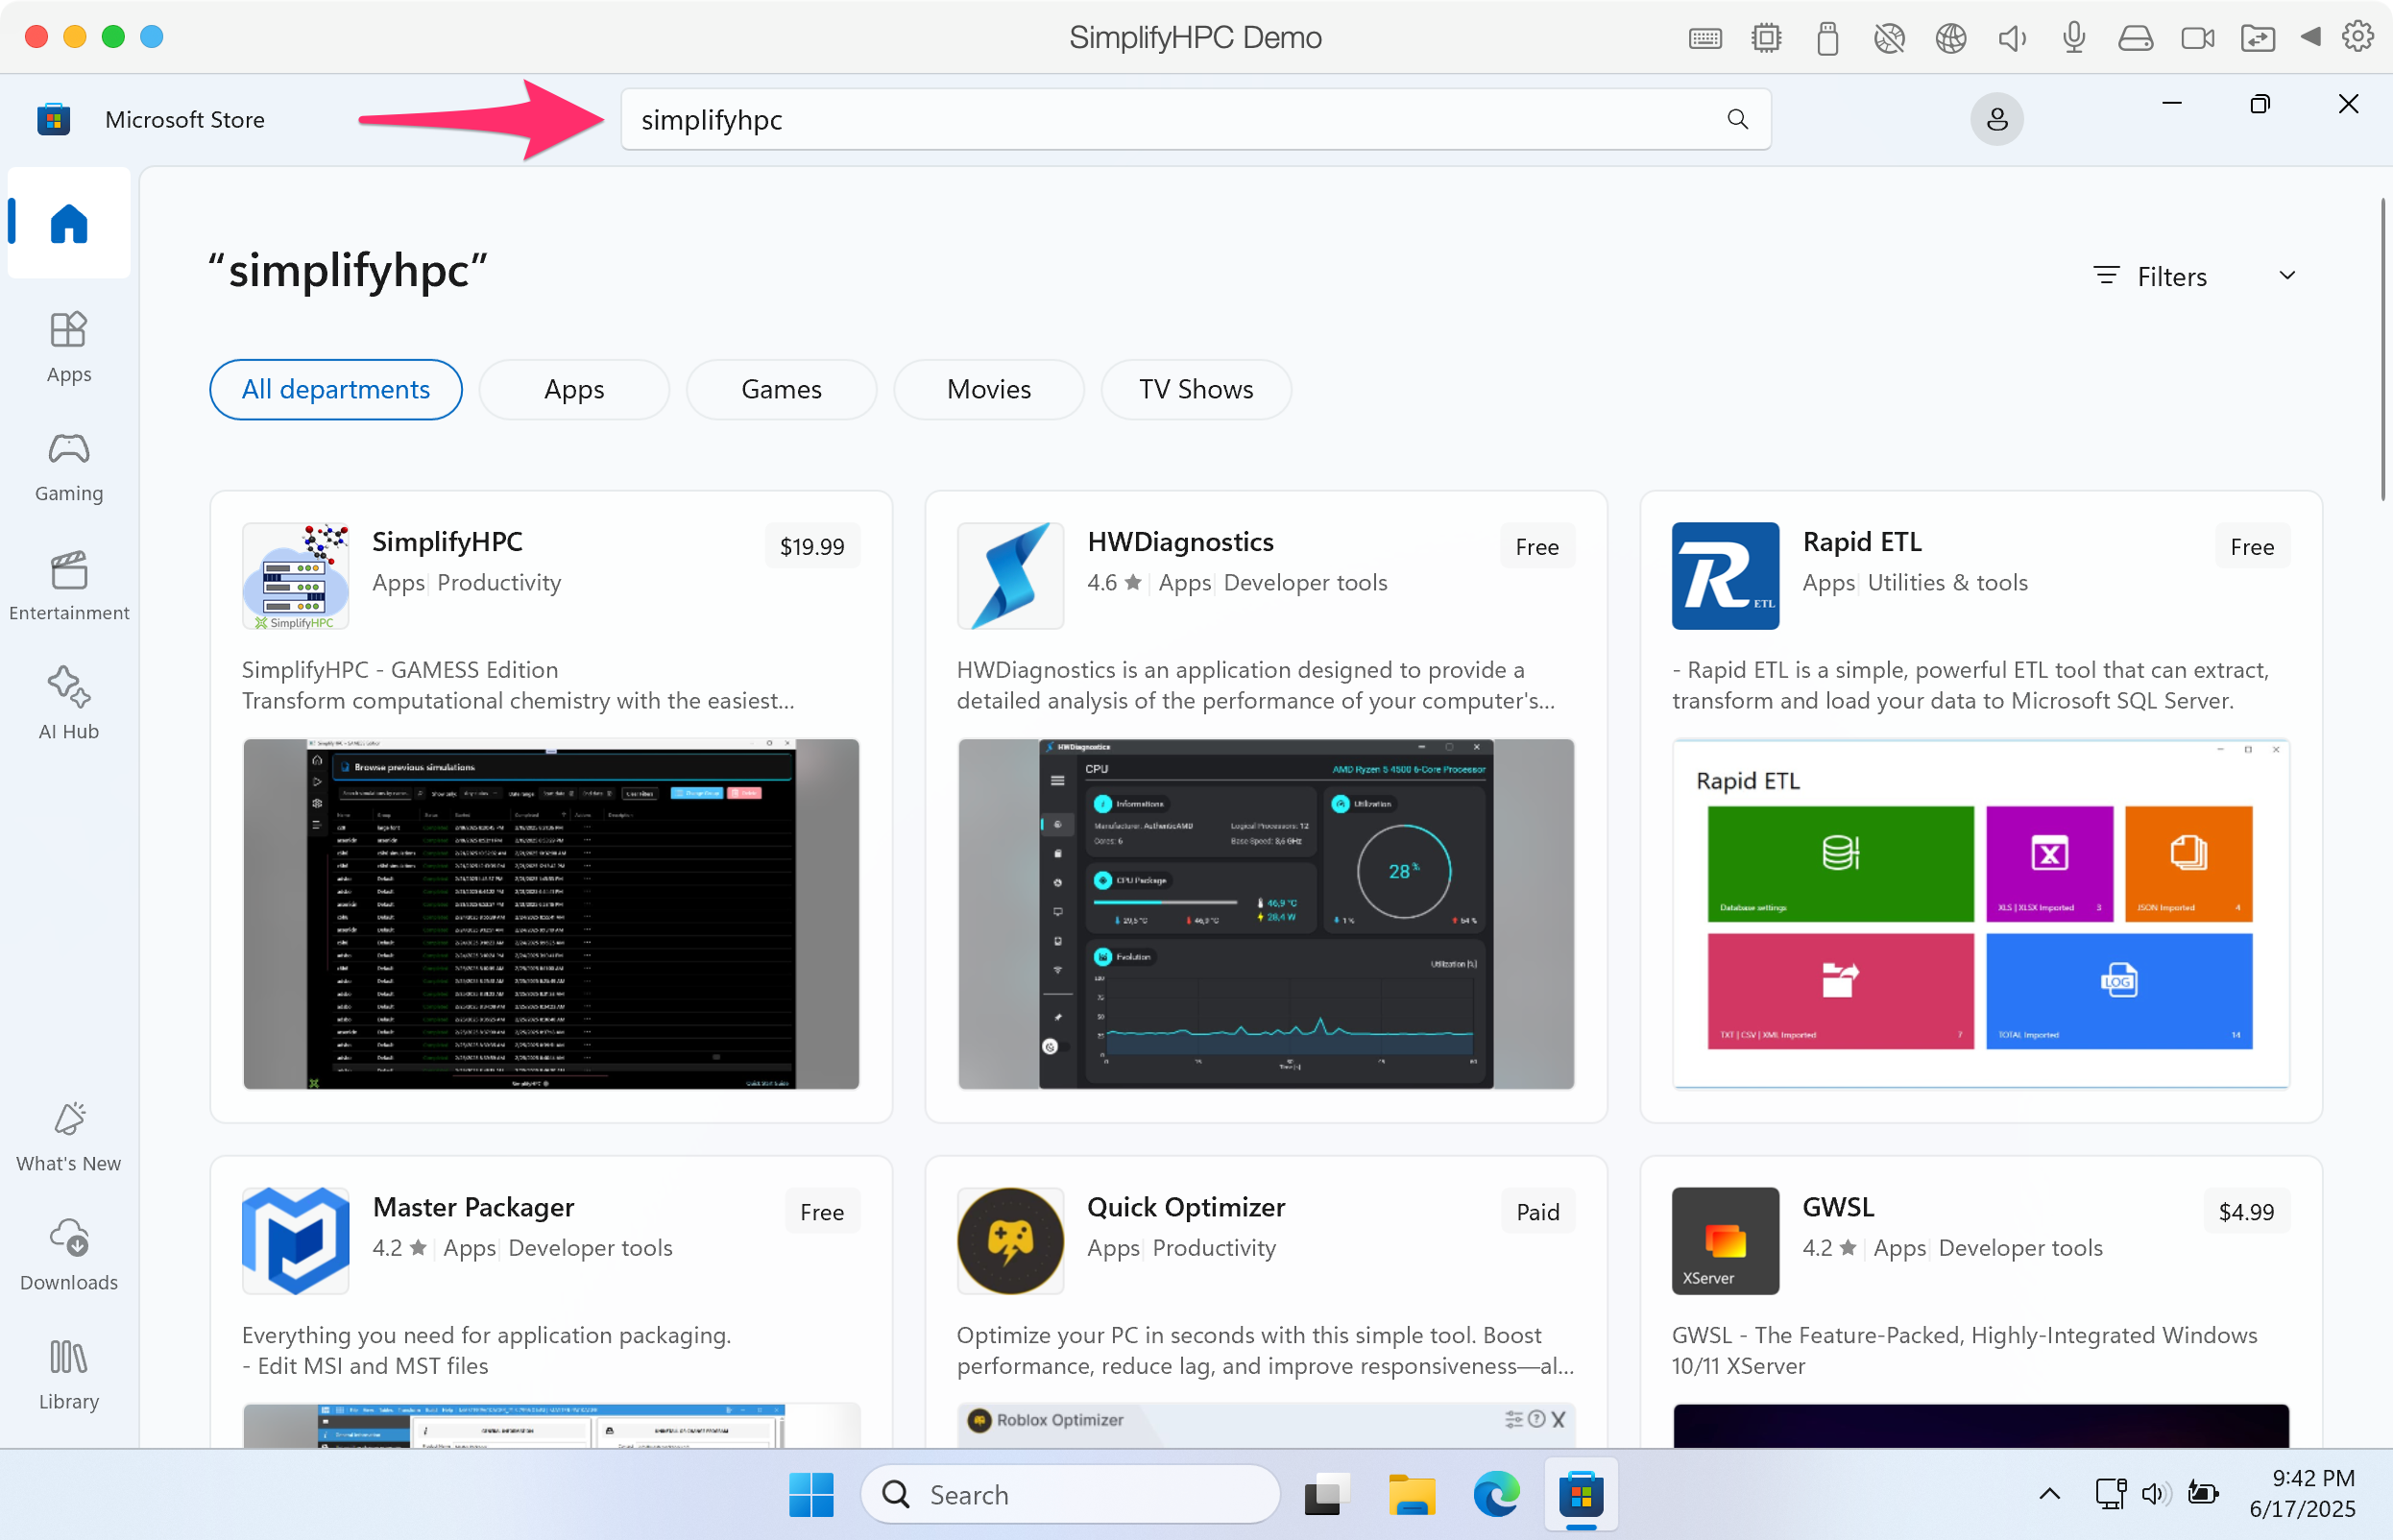
Step 2. Search for simplifyhpc in the search bar.
Alternatively, you can open the following URL in a browser and launch the Microsoft Store:
https://apps.microsoft.com/detail/9n8m9drkldph
Click image to enlarge in a new tab/window
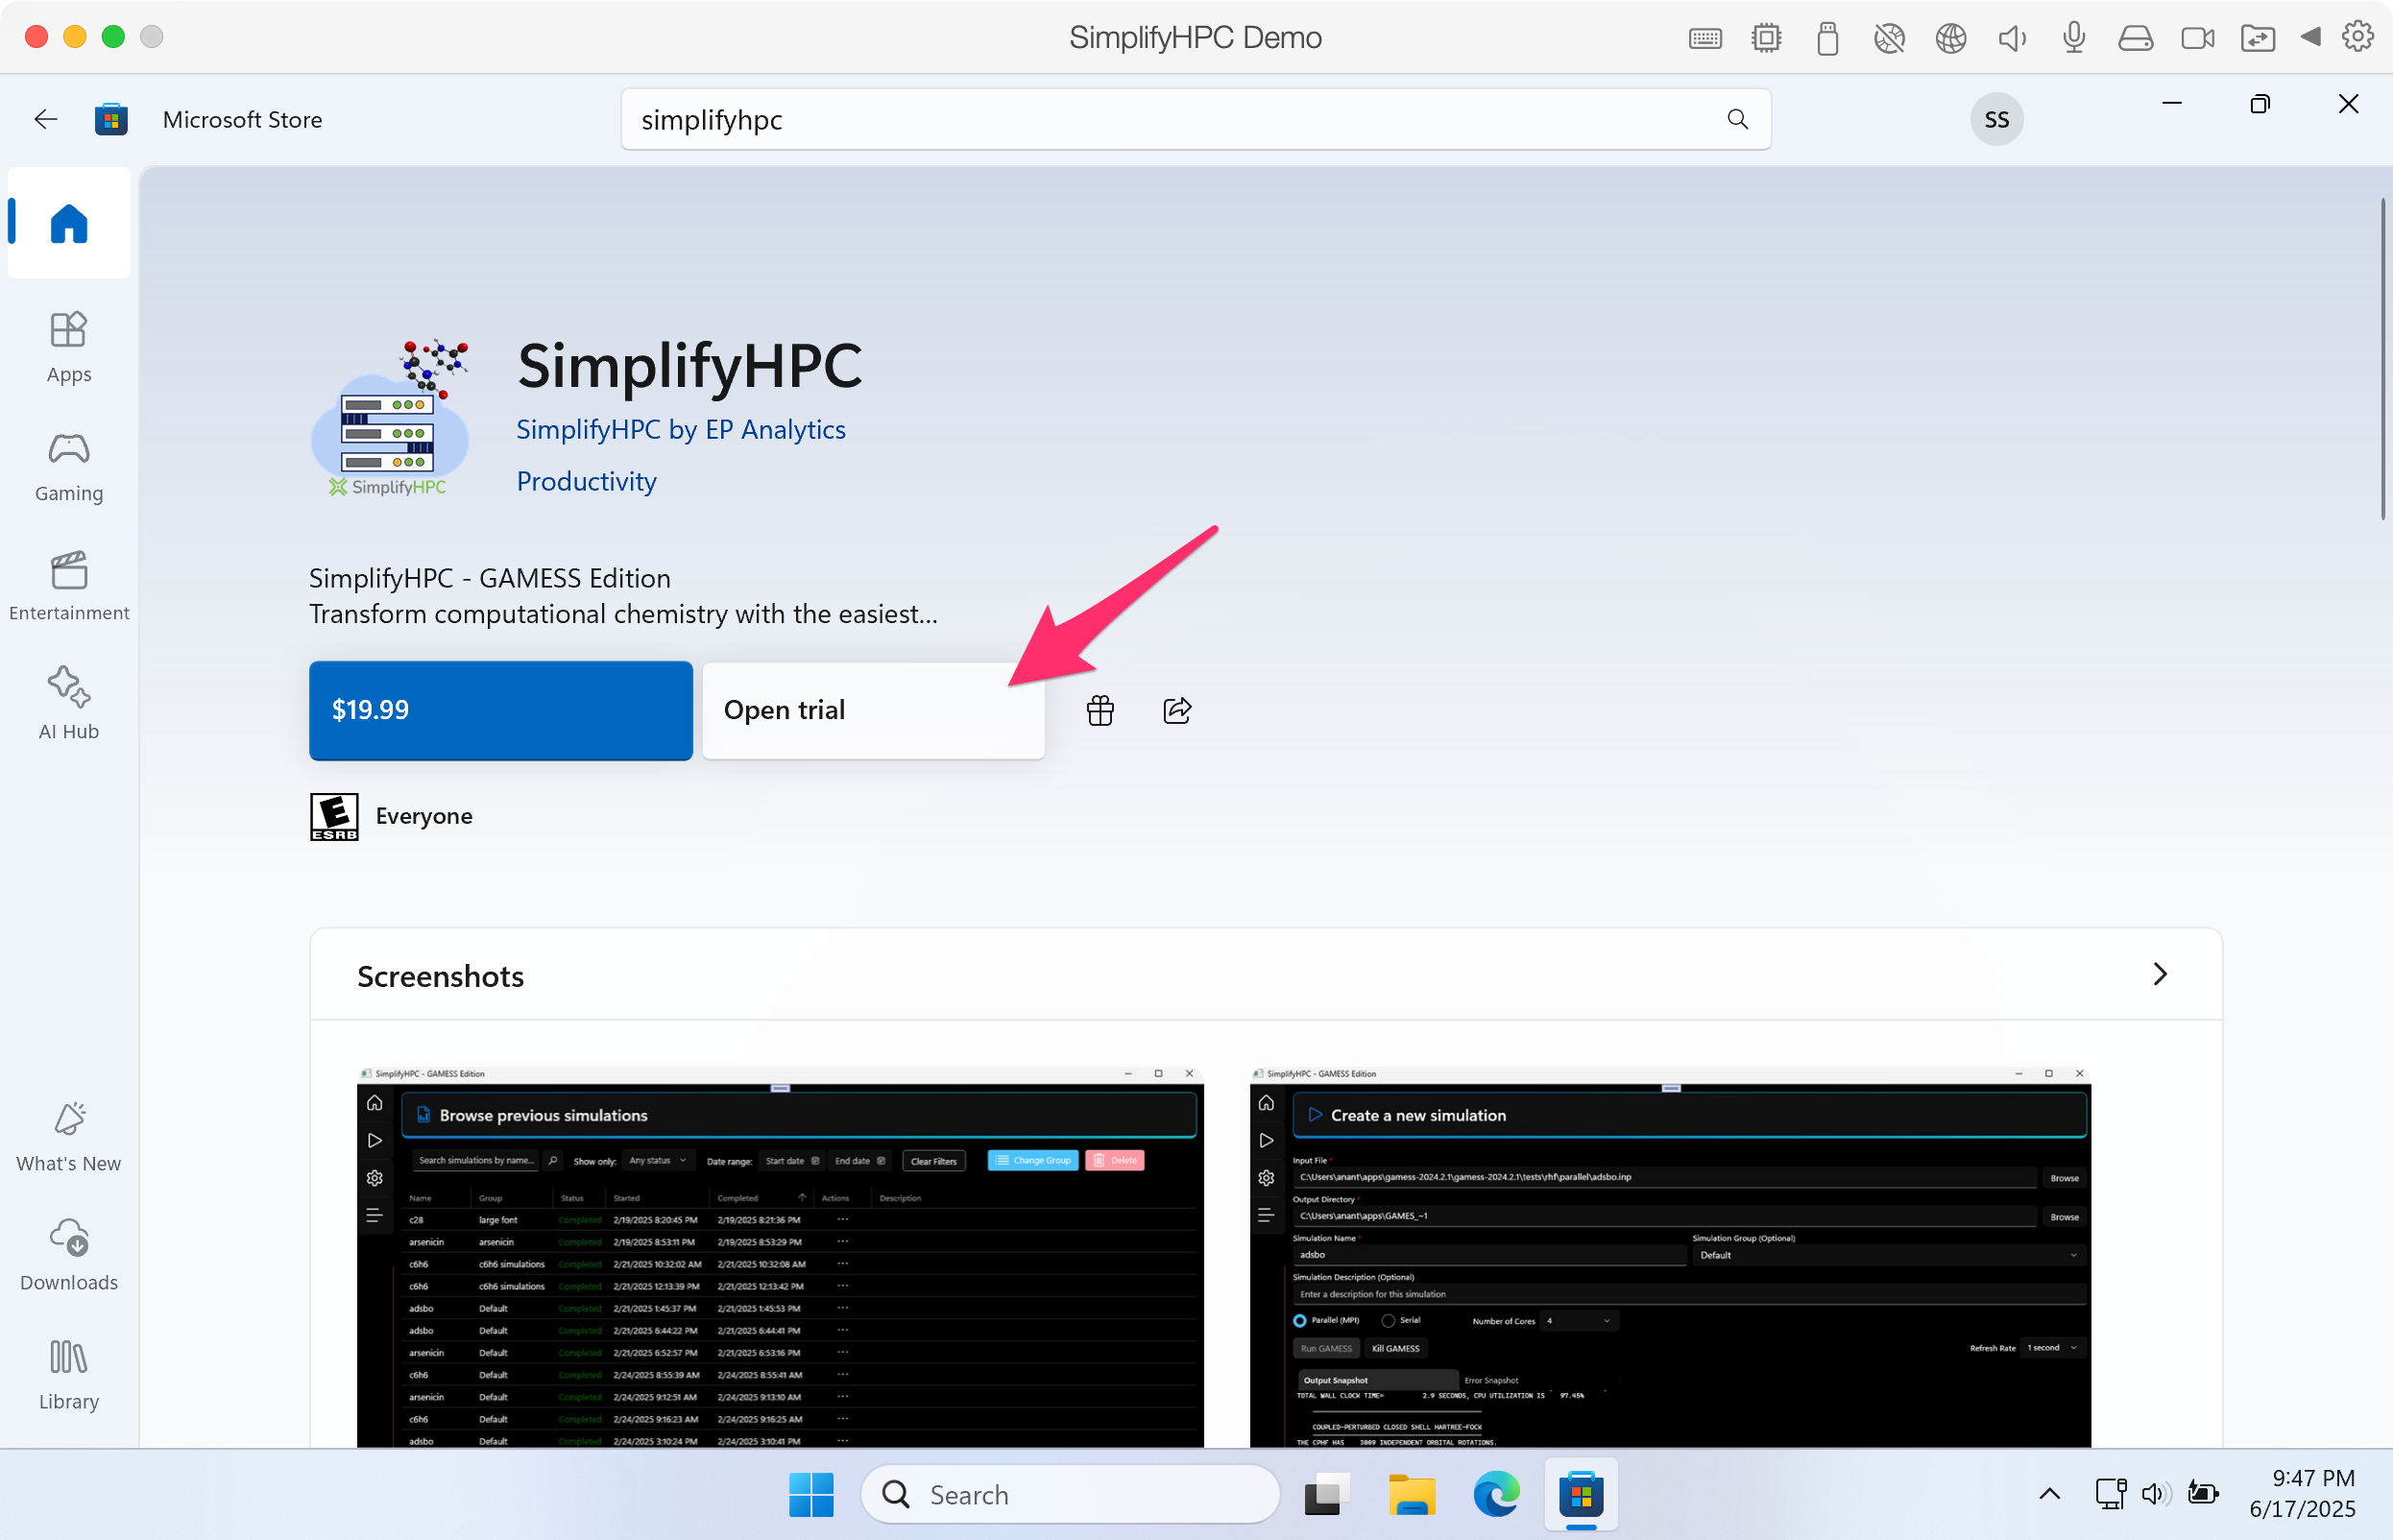
Step 3. Click on the Free trial for a free 7-day trial of SimplifyHPC.

Click image to enlarge in a new tab/window
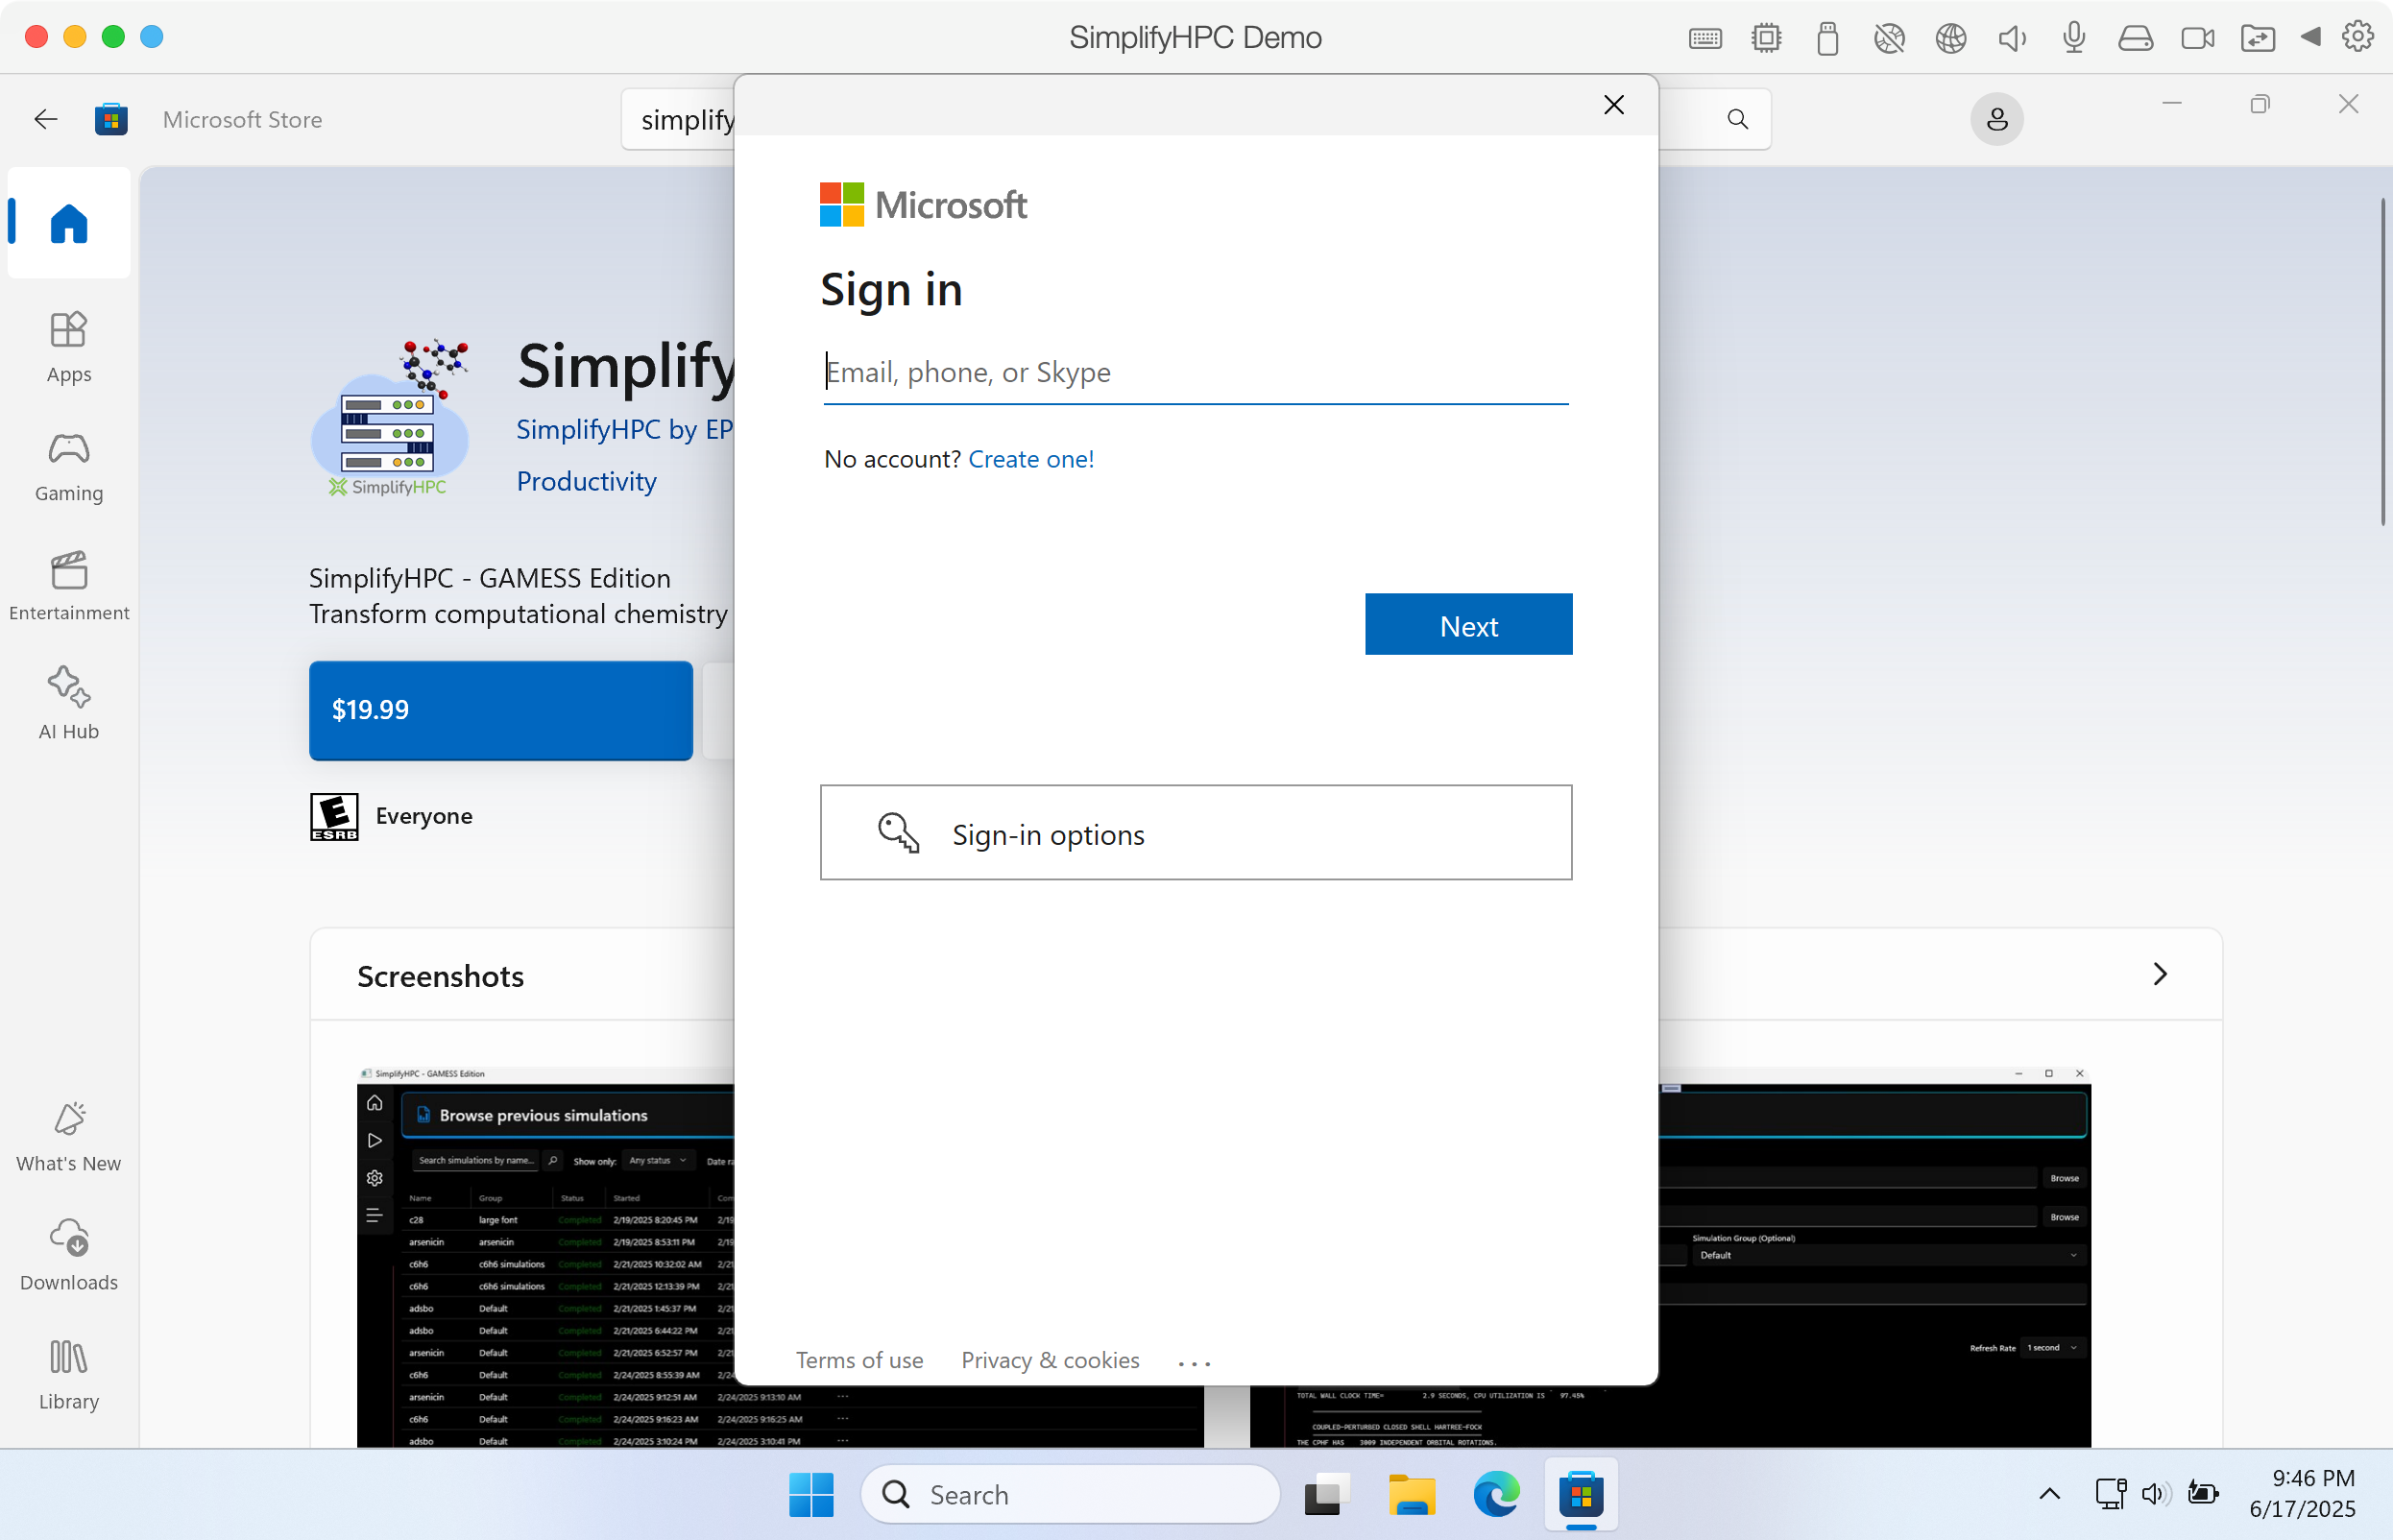
You may need to sign into your Microsoft account in order to install SimplifyHPC.
Click image to enlarge in a new tab/window
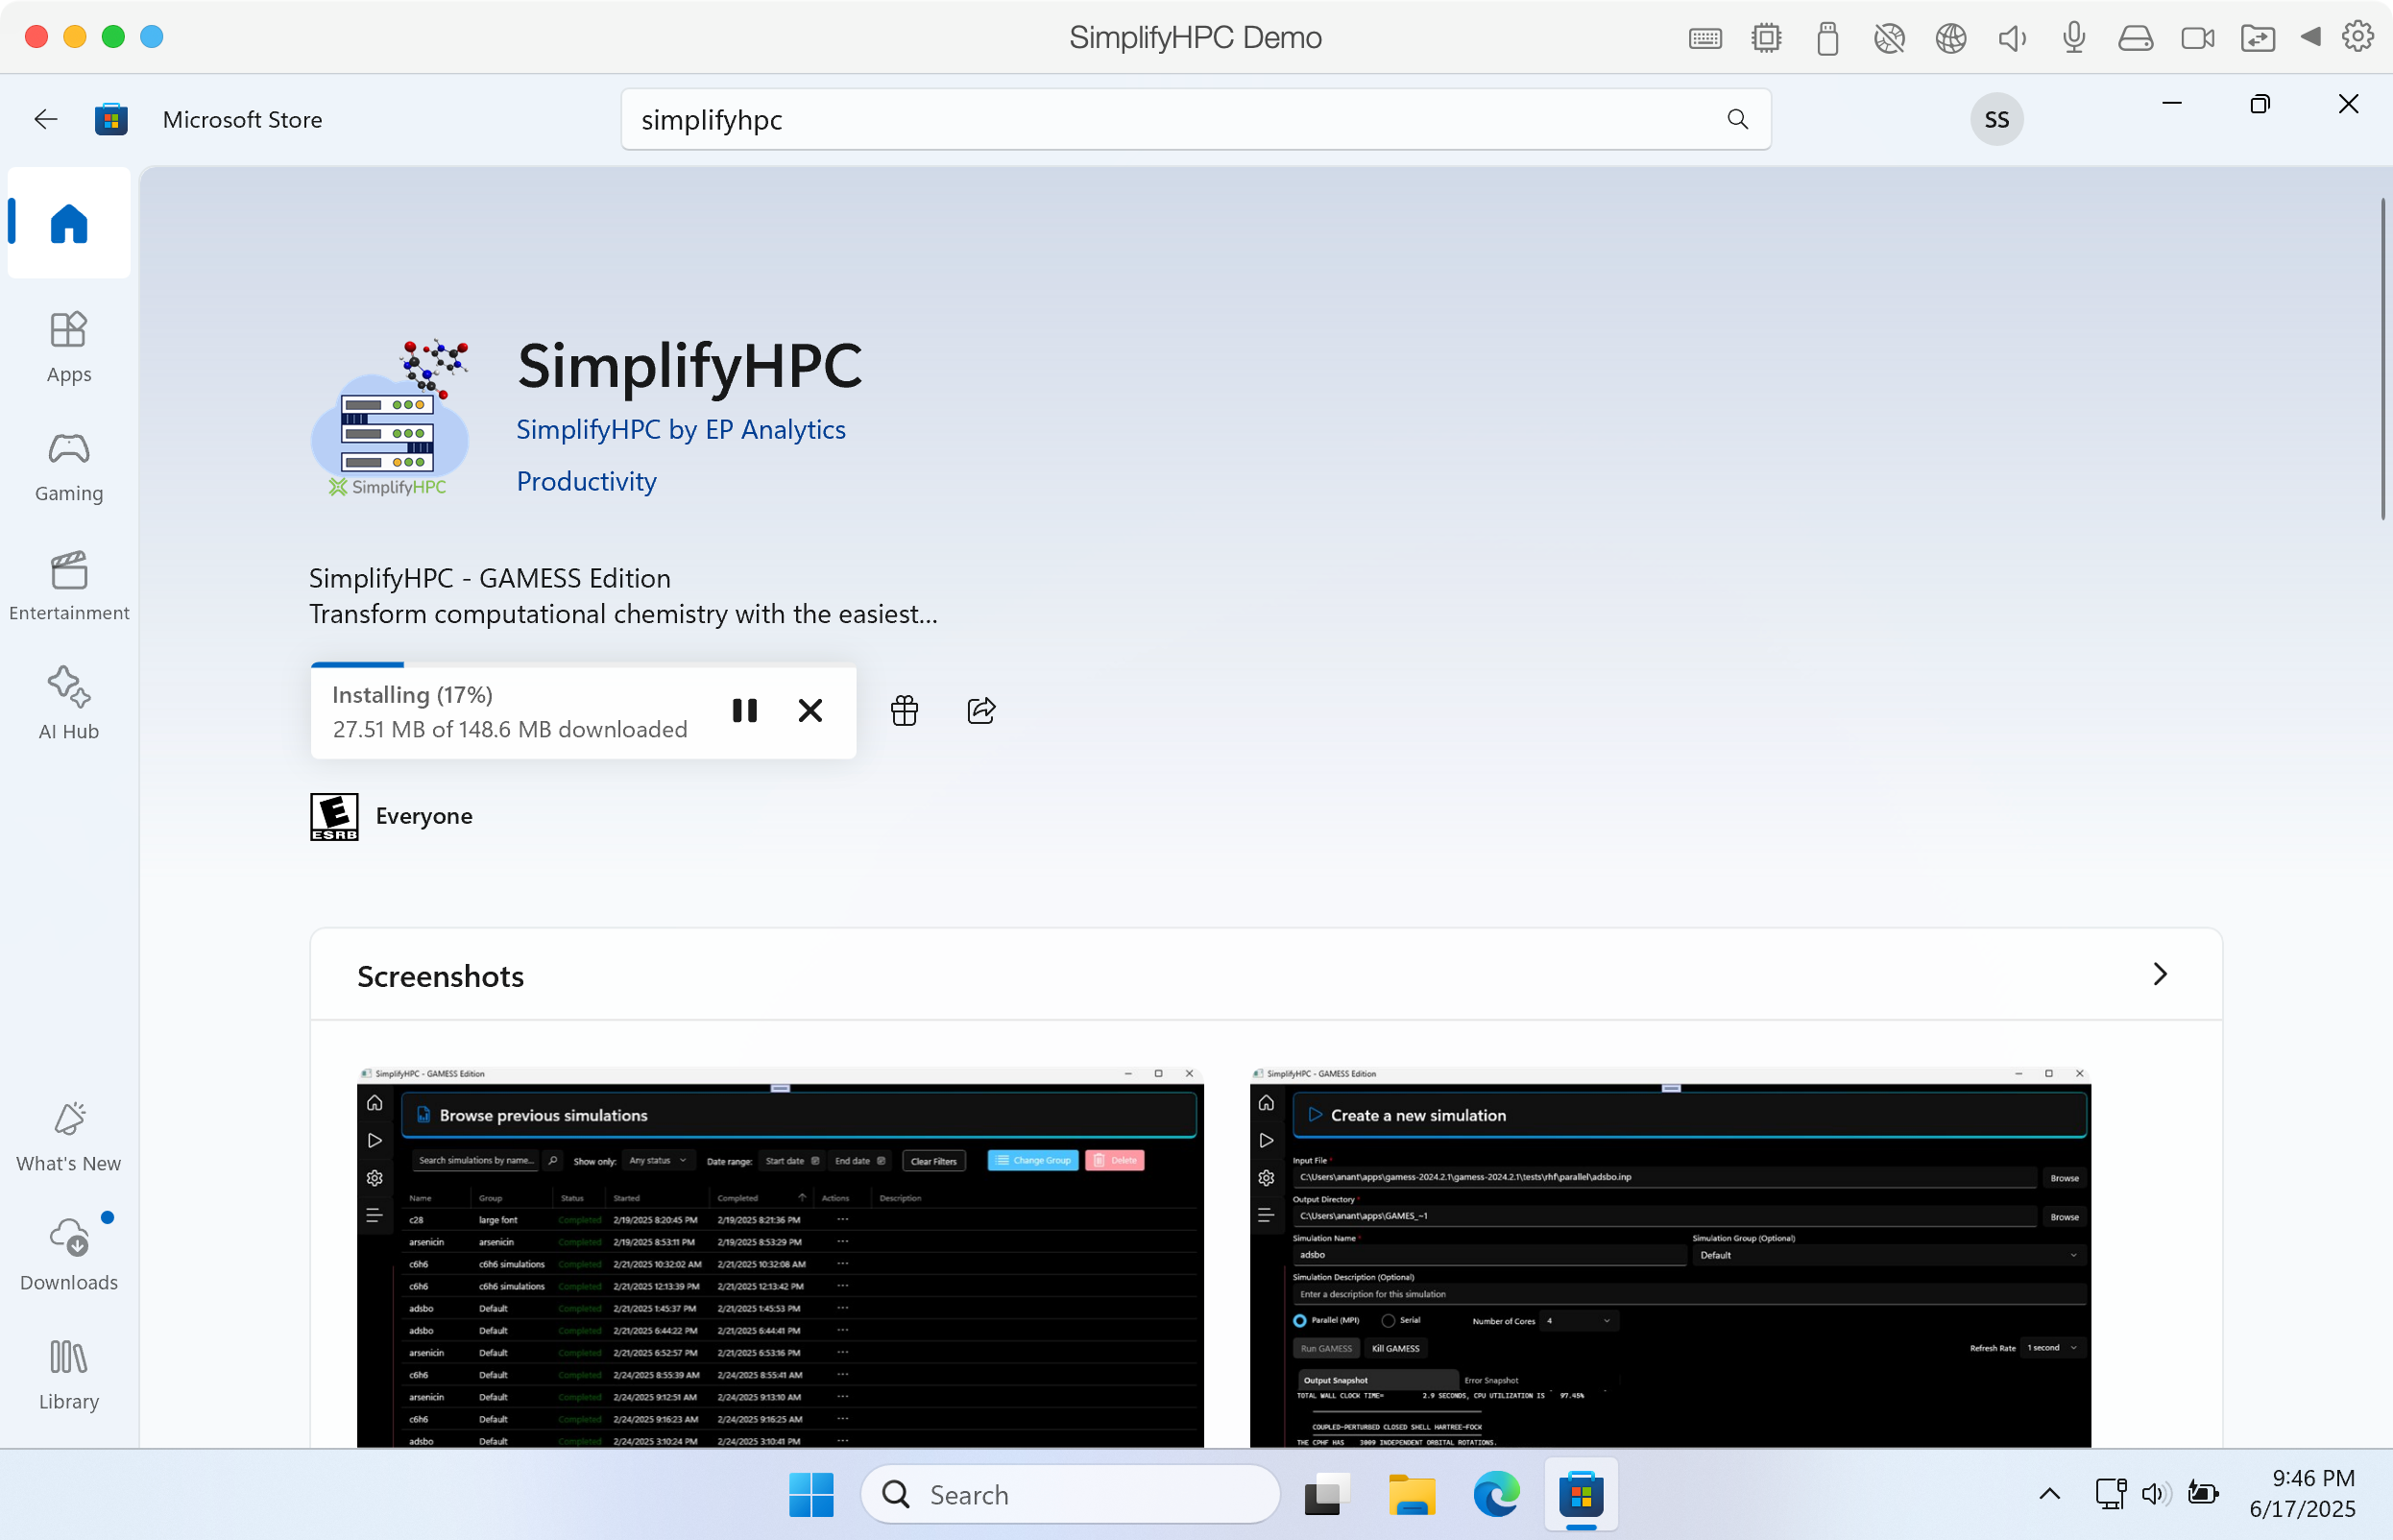
Step 4. Wait for the installation process to finish.
Step 5. Click on Open trial to launch SimplifyHPC from the Microsoft Store.
Alternatively, you could also launch SimplifyHPC from the Windows 11 Start Menu.
Click image to enlarge in a new tab/window
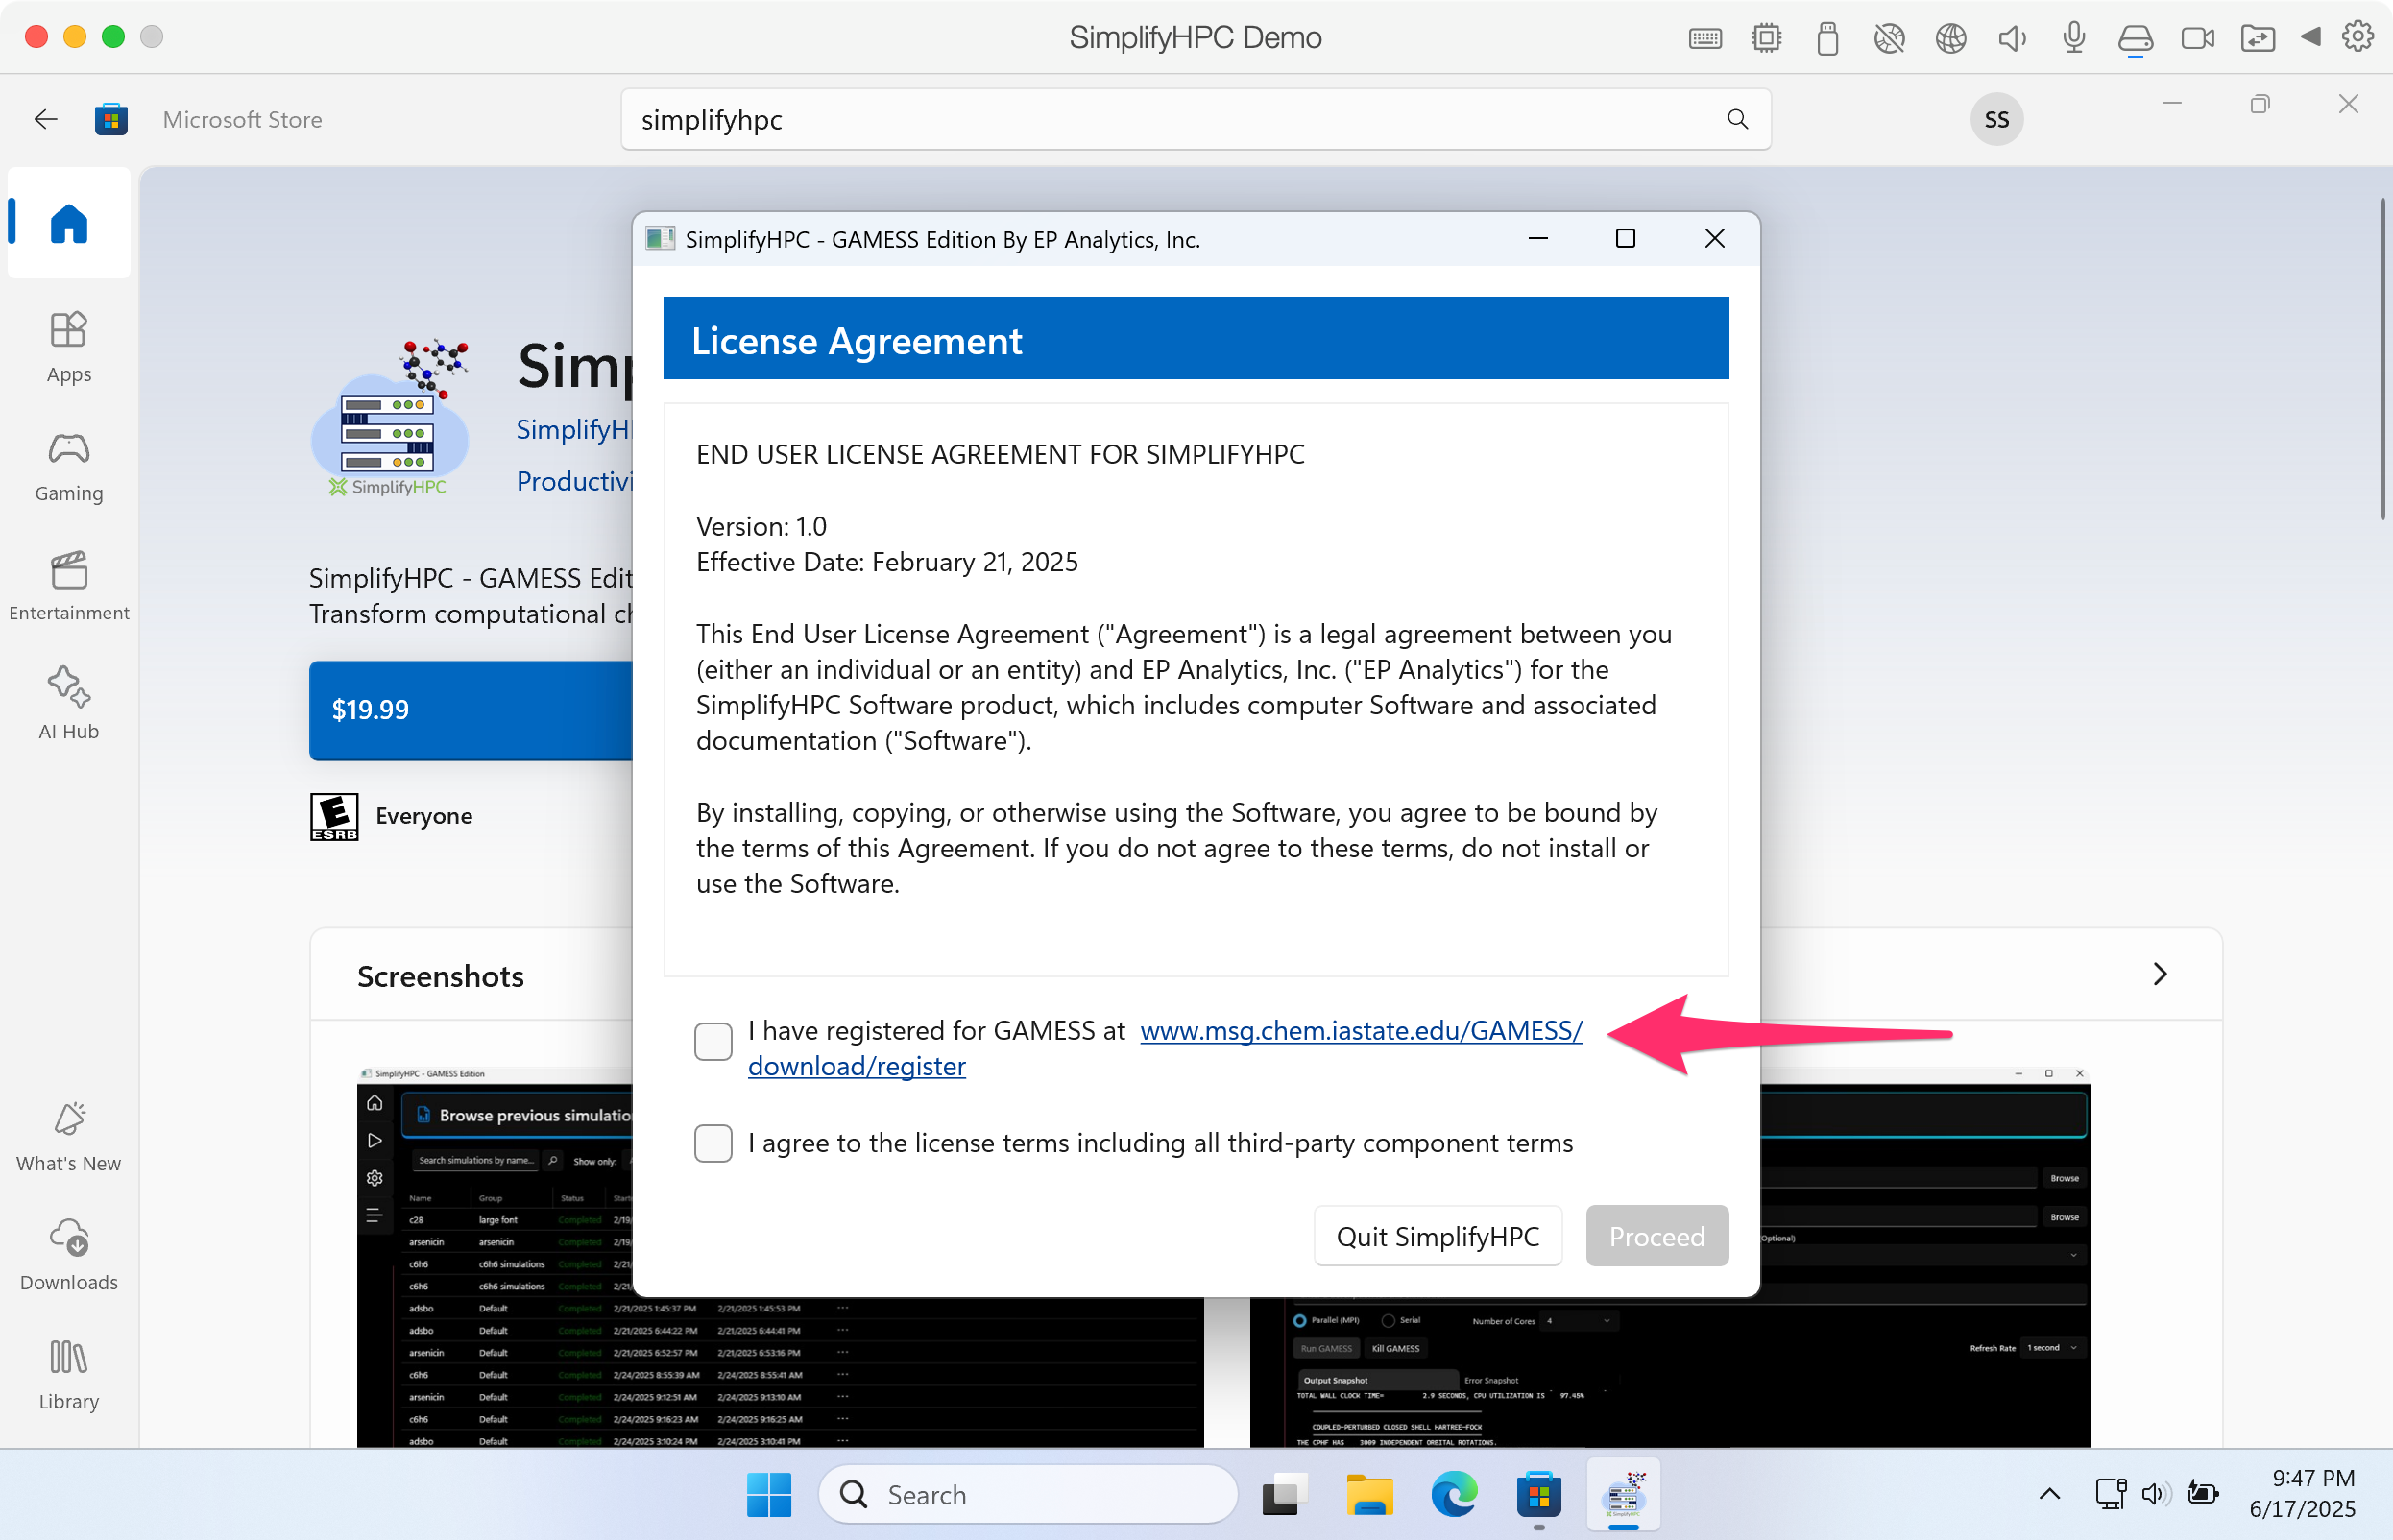
Step 6. If this is your first time using SimplifyHPC, you will need to register at the GAMESS website.
https://www.msg.chem.iastate.edu/GAMESS/download/register
The registration information is collected by the GAMESS organization. It is NOT collected by EP Analytics.
Click image to enlarge in a new tab/window
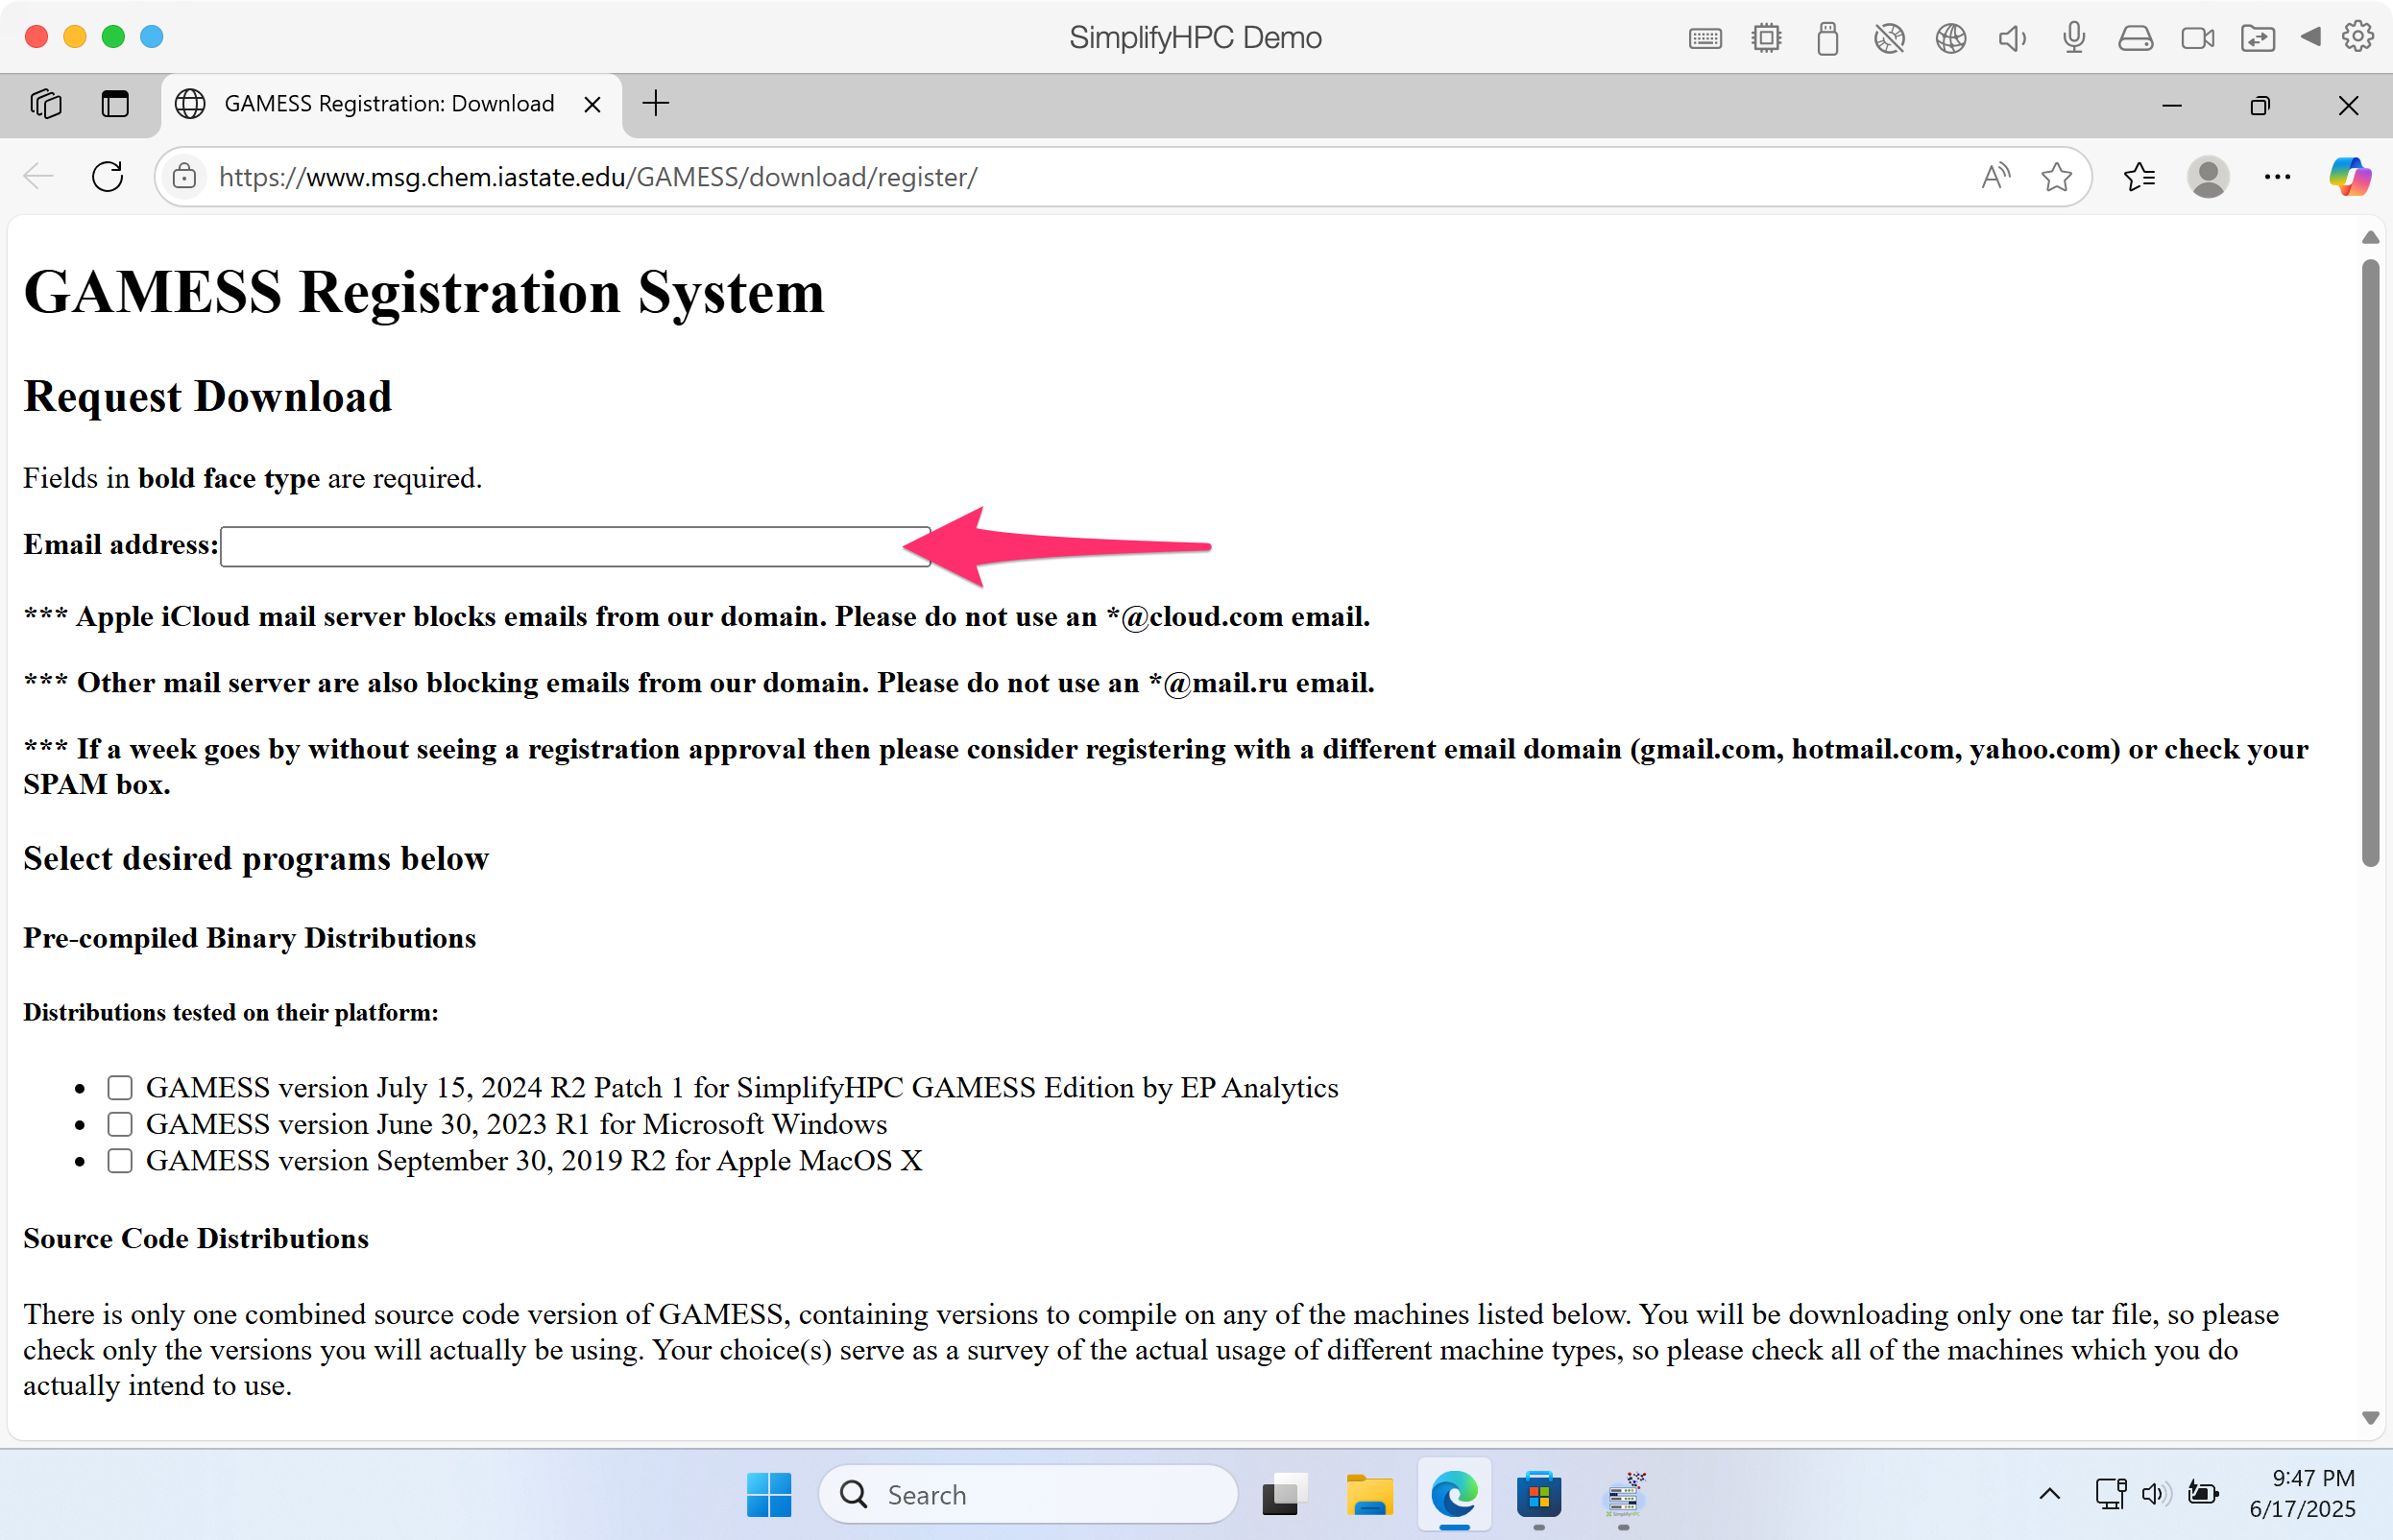
Provide your email address.
Click image to enlarge in a new tab/window
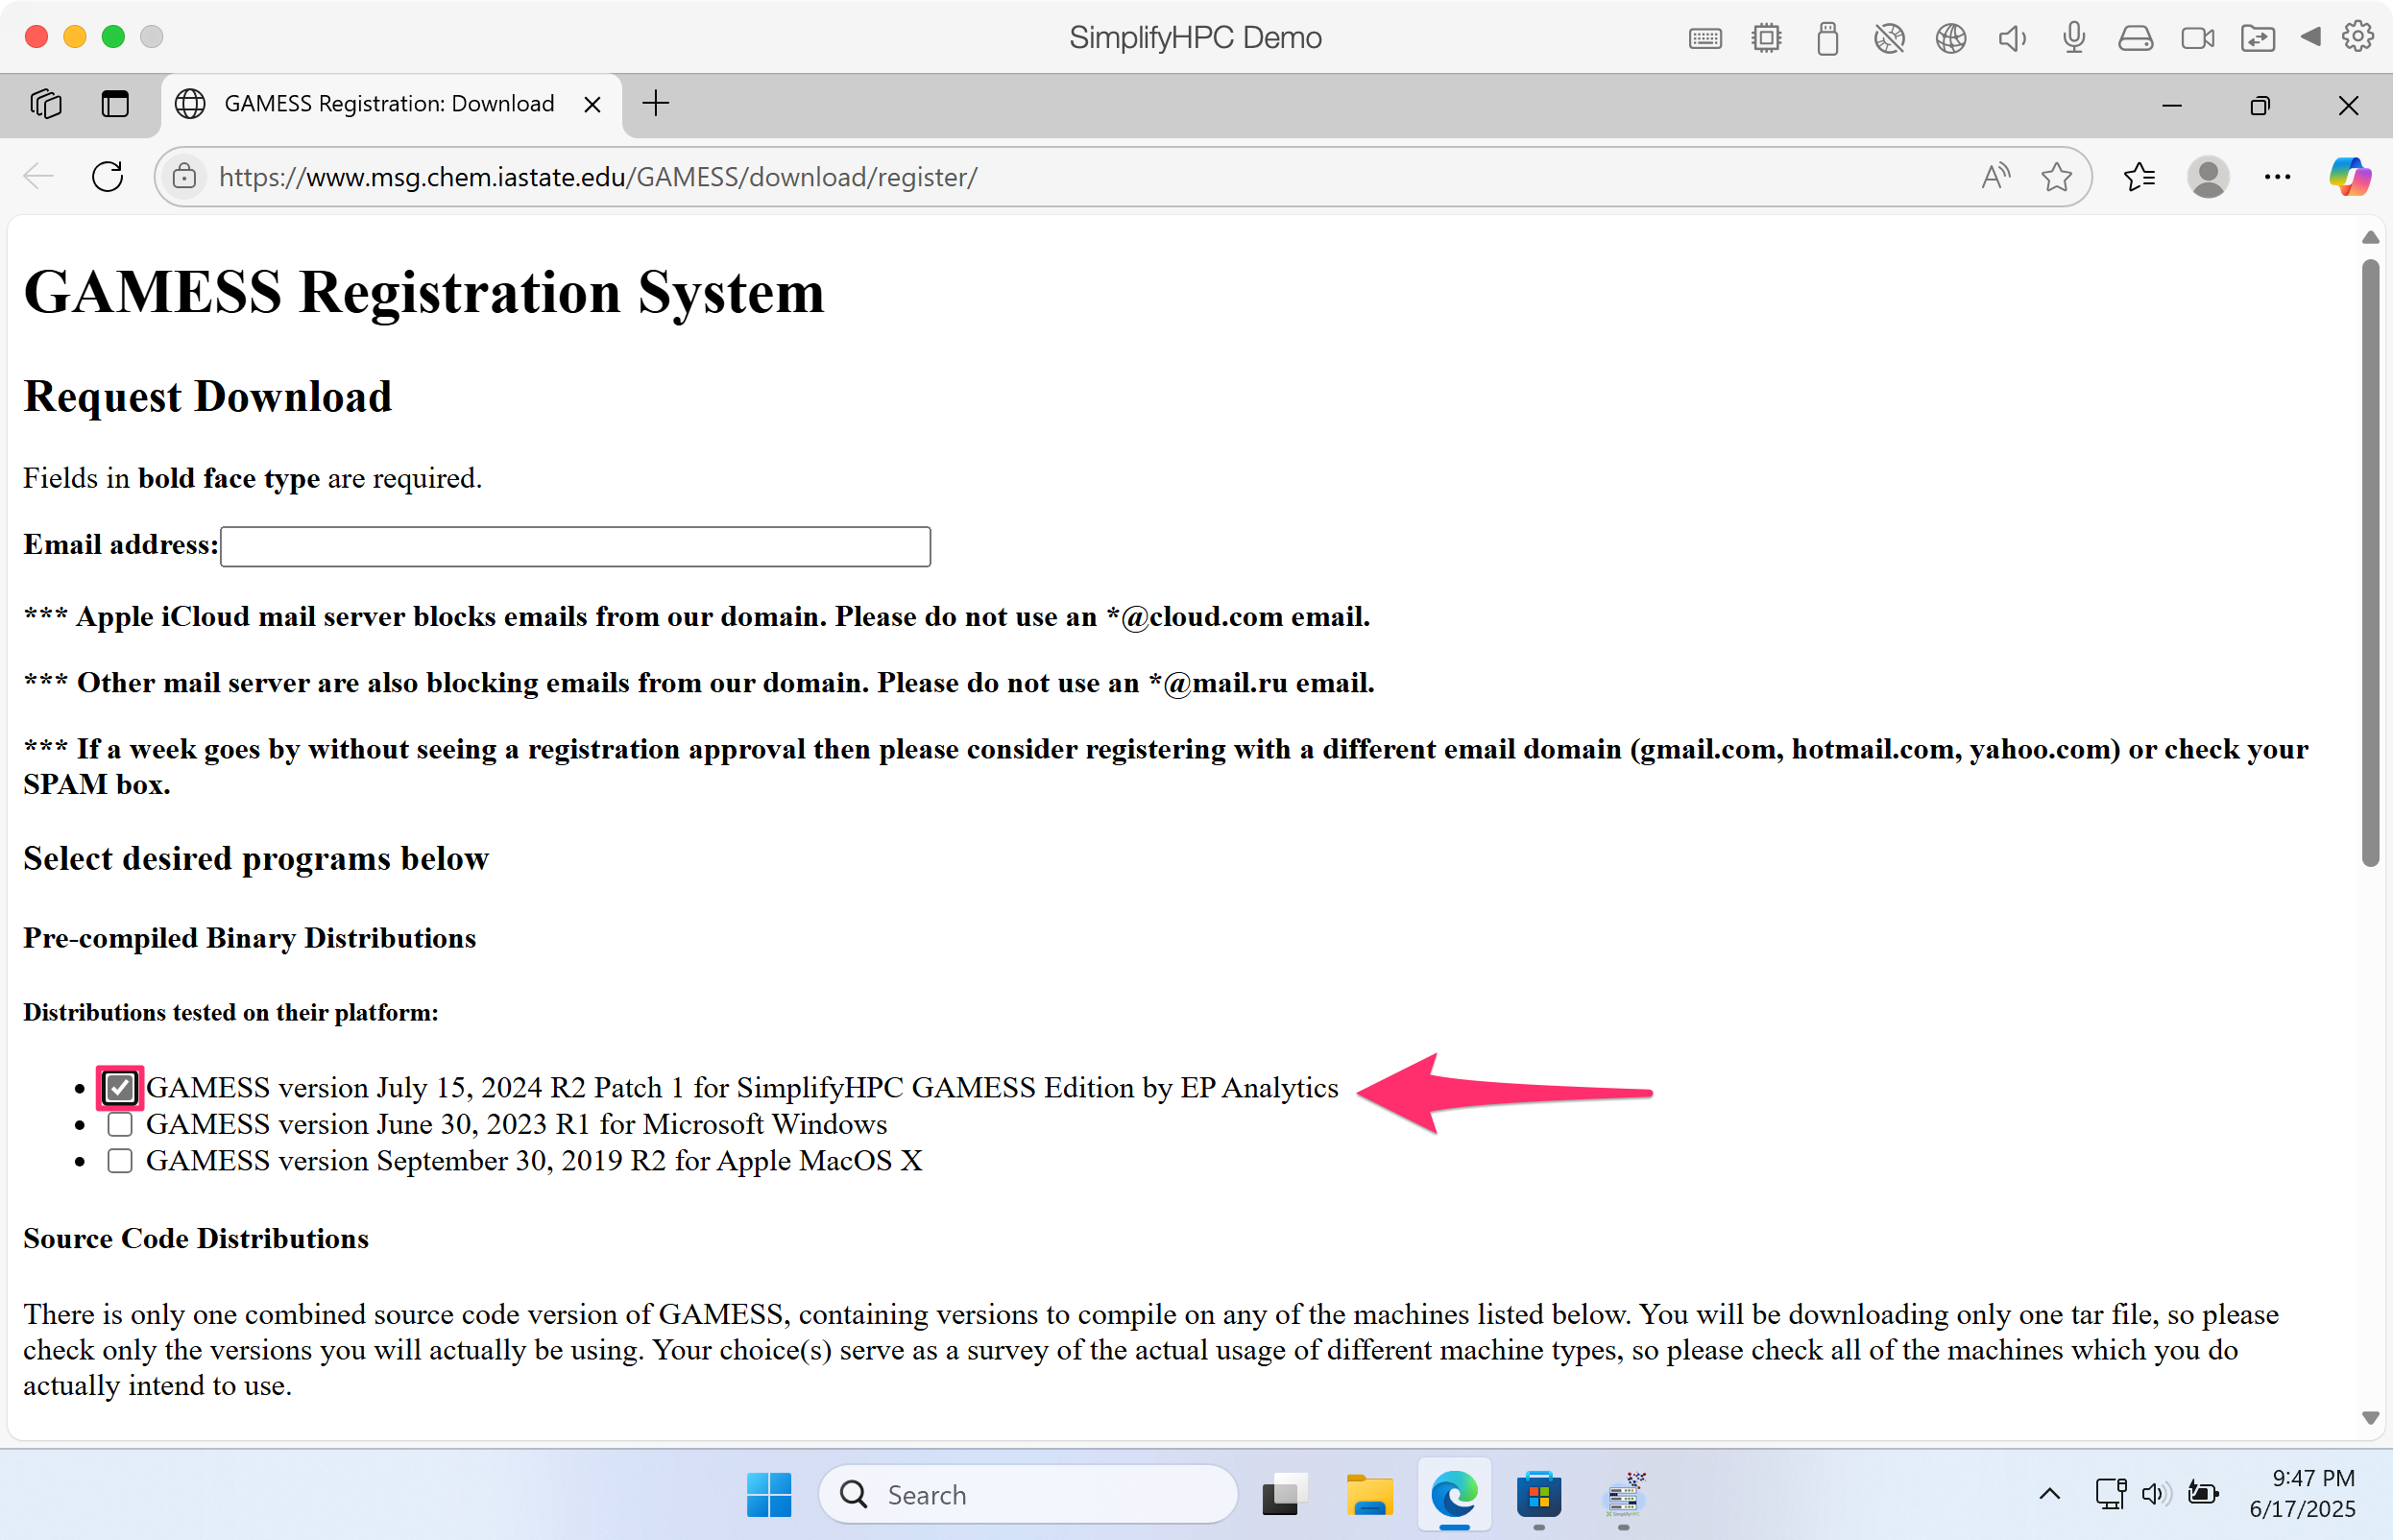
Click on GAMESS version July 15, 2024 R2 Patch 1 for SimplifyHPC GAMESS Edition by EP Analytics
.
Click image to enlarge in a new tab/window
Scroll to the bottom and click Submit Request

Click image to enlarge in a new tab/window
If successful, you should get the following acknowledgement page.
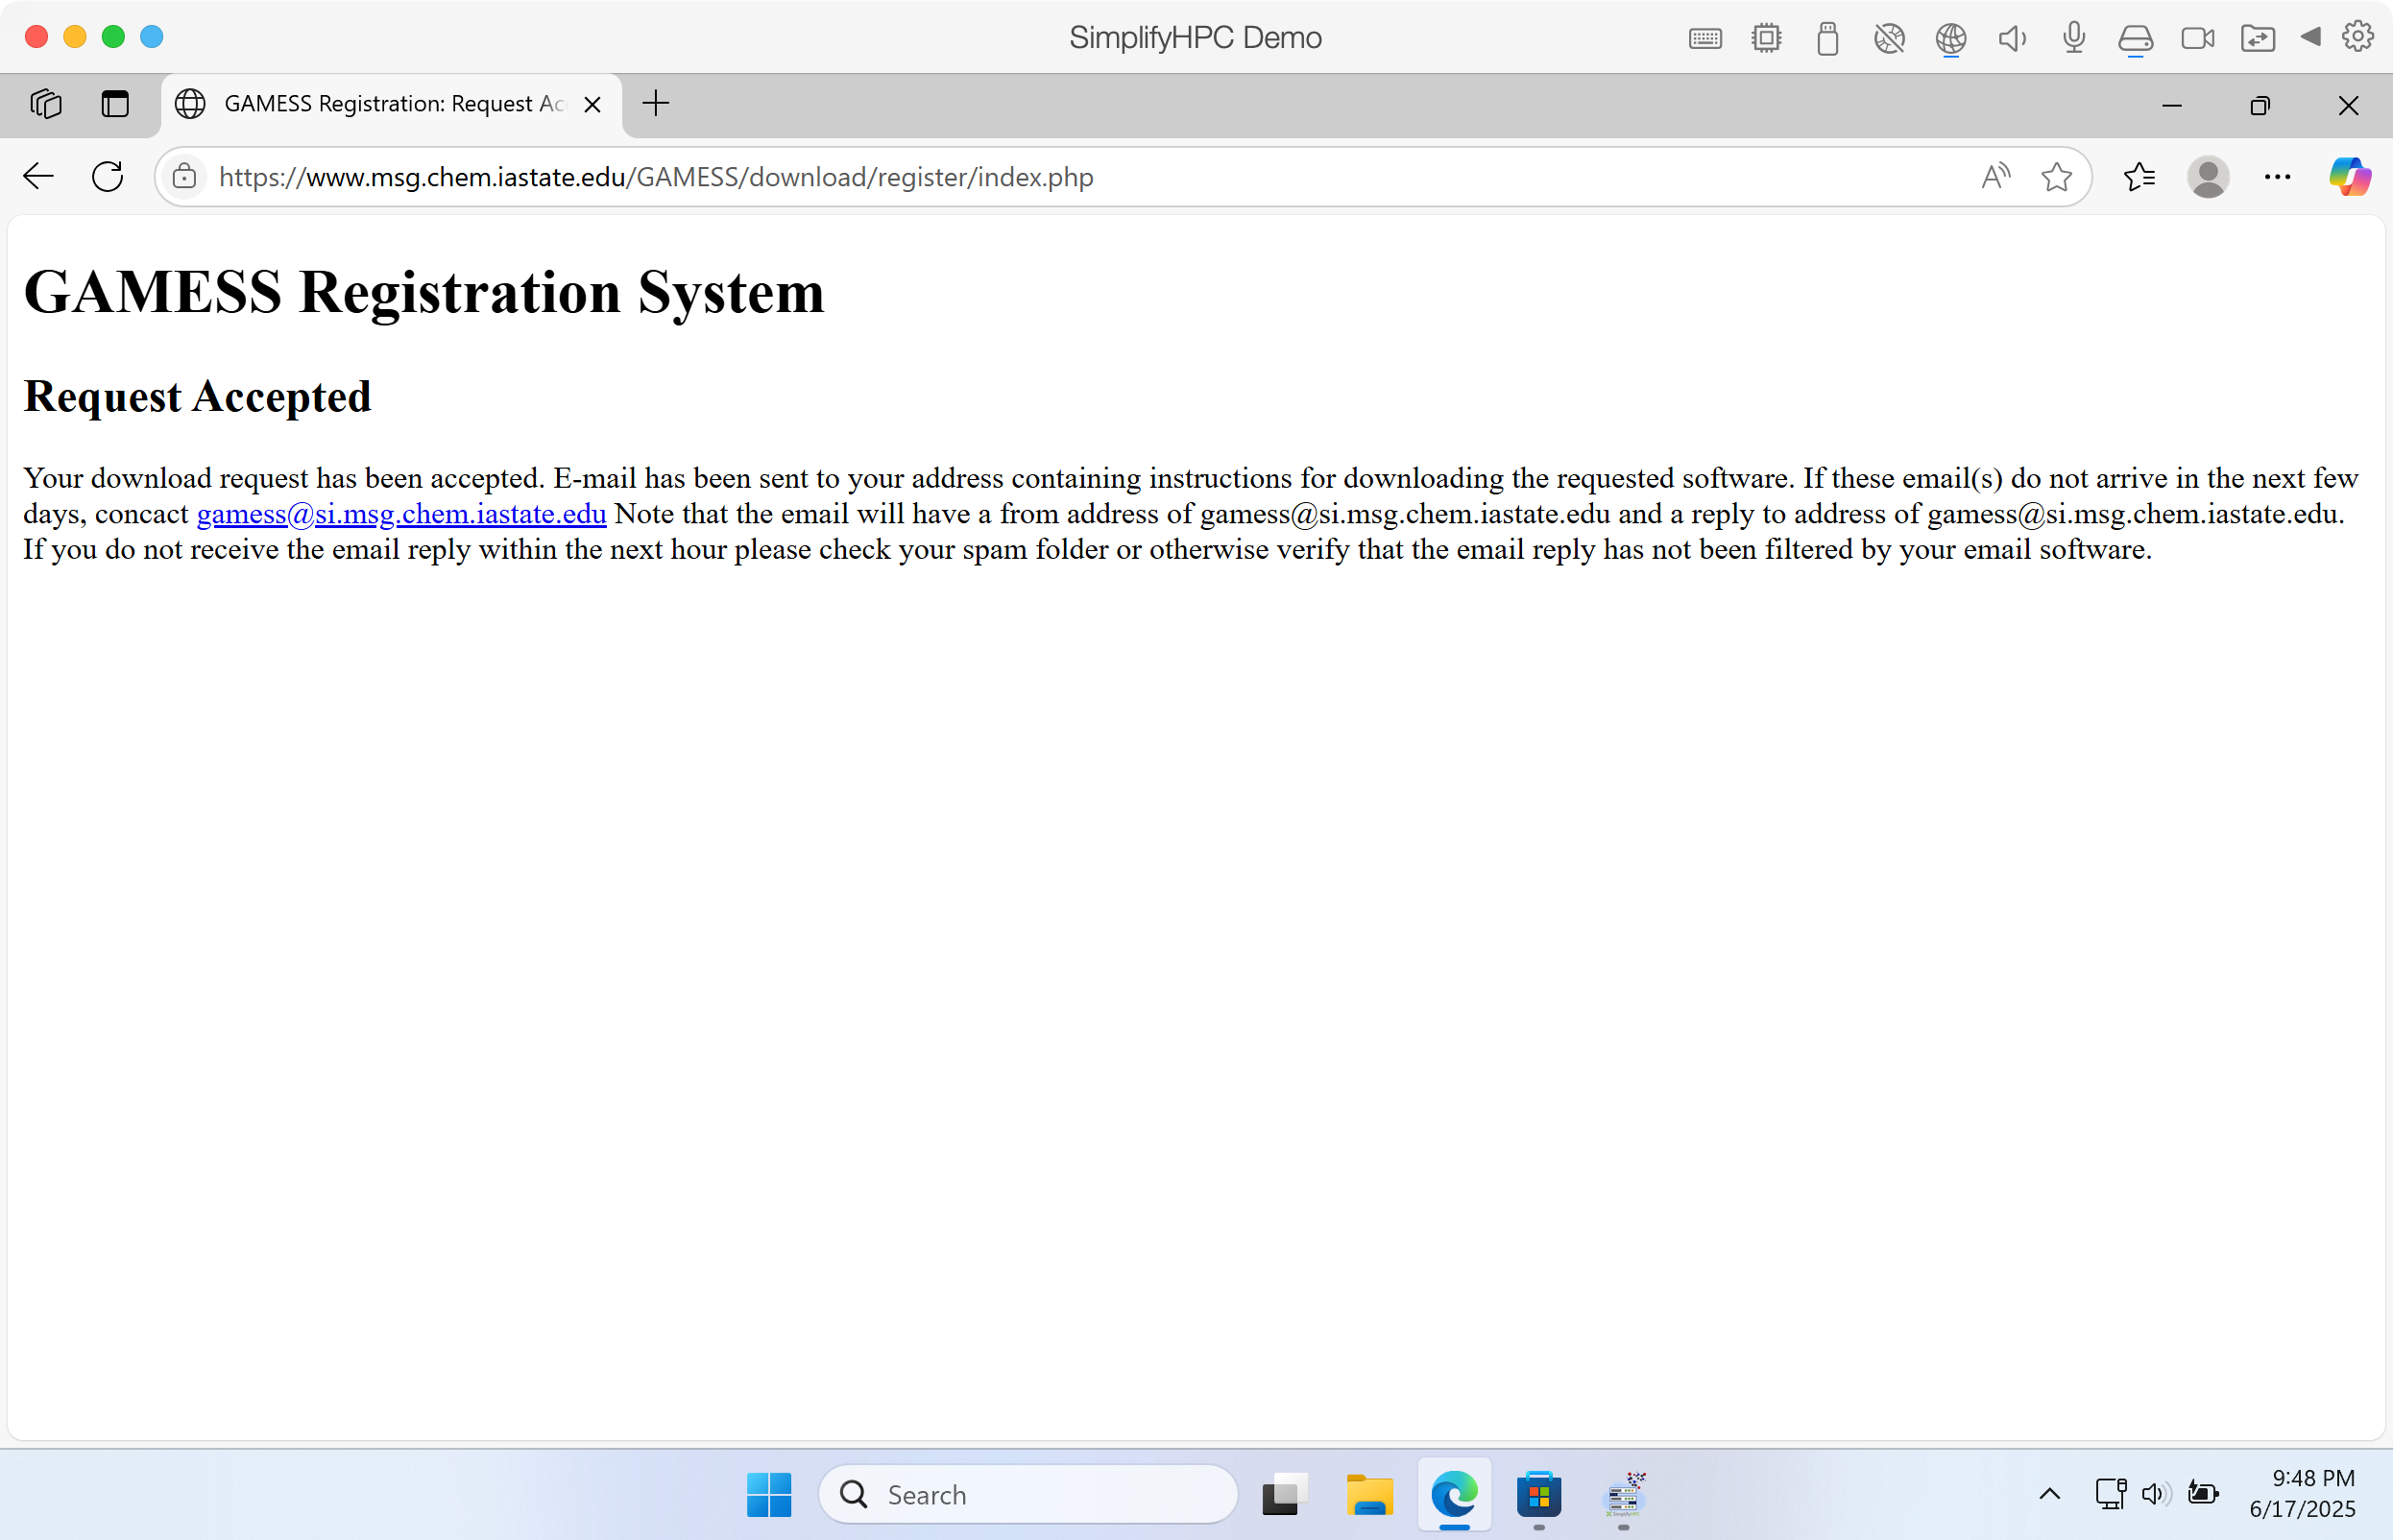
Click image to enlarge in a new tab/window
Step 7. Navigate back to SimplifyHPC and click the first checkbox.
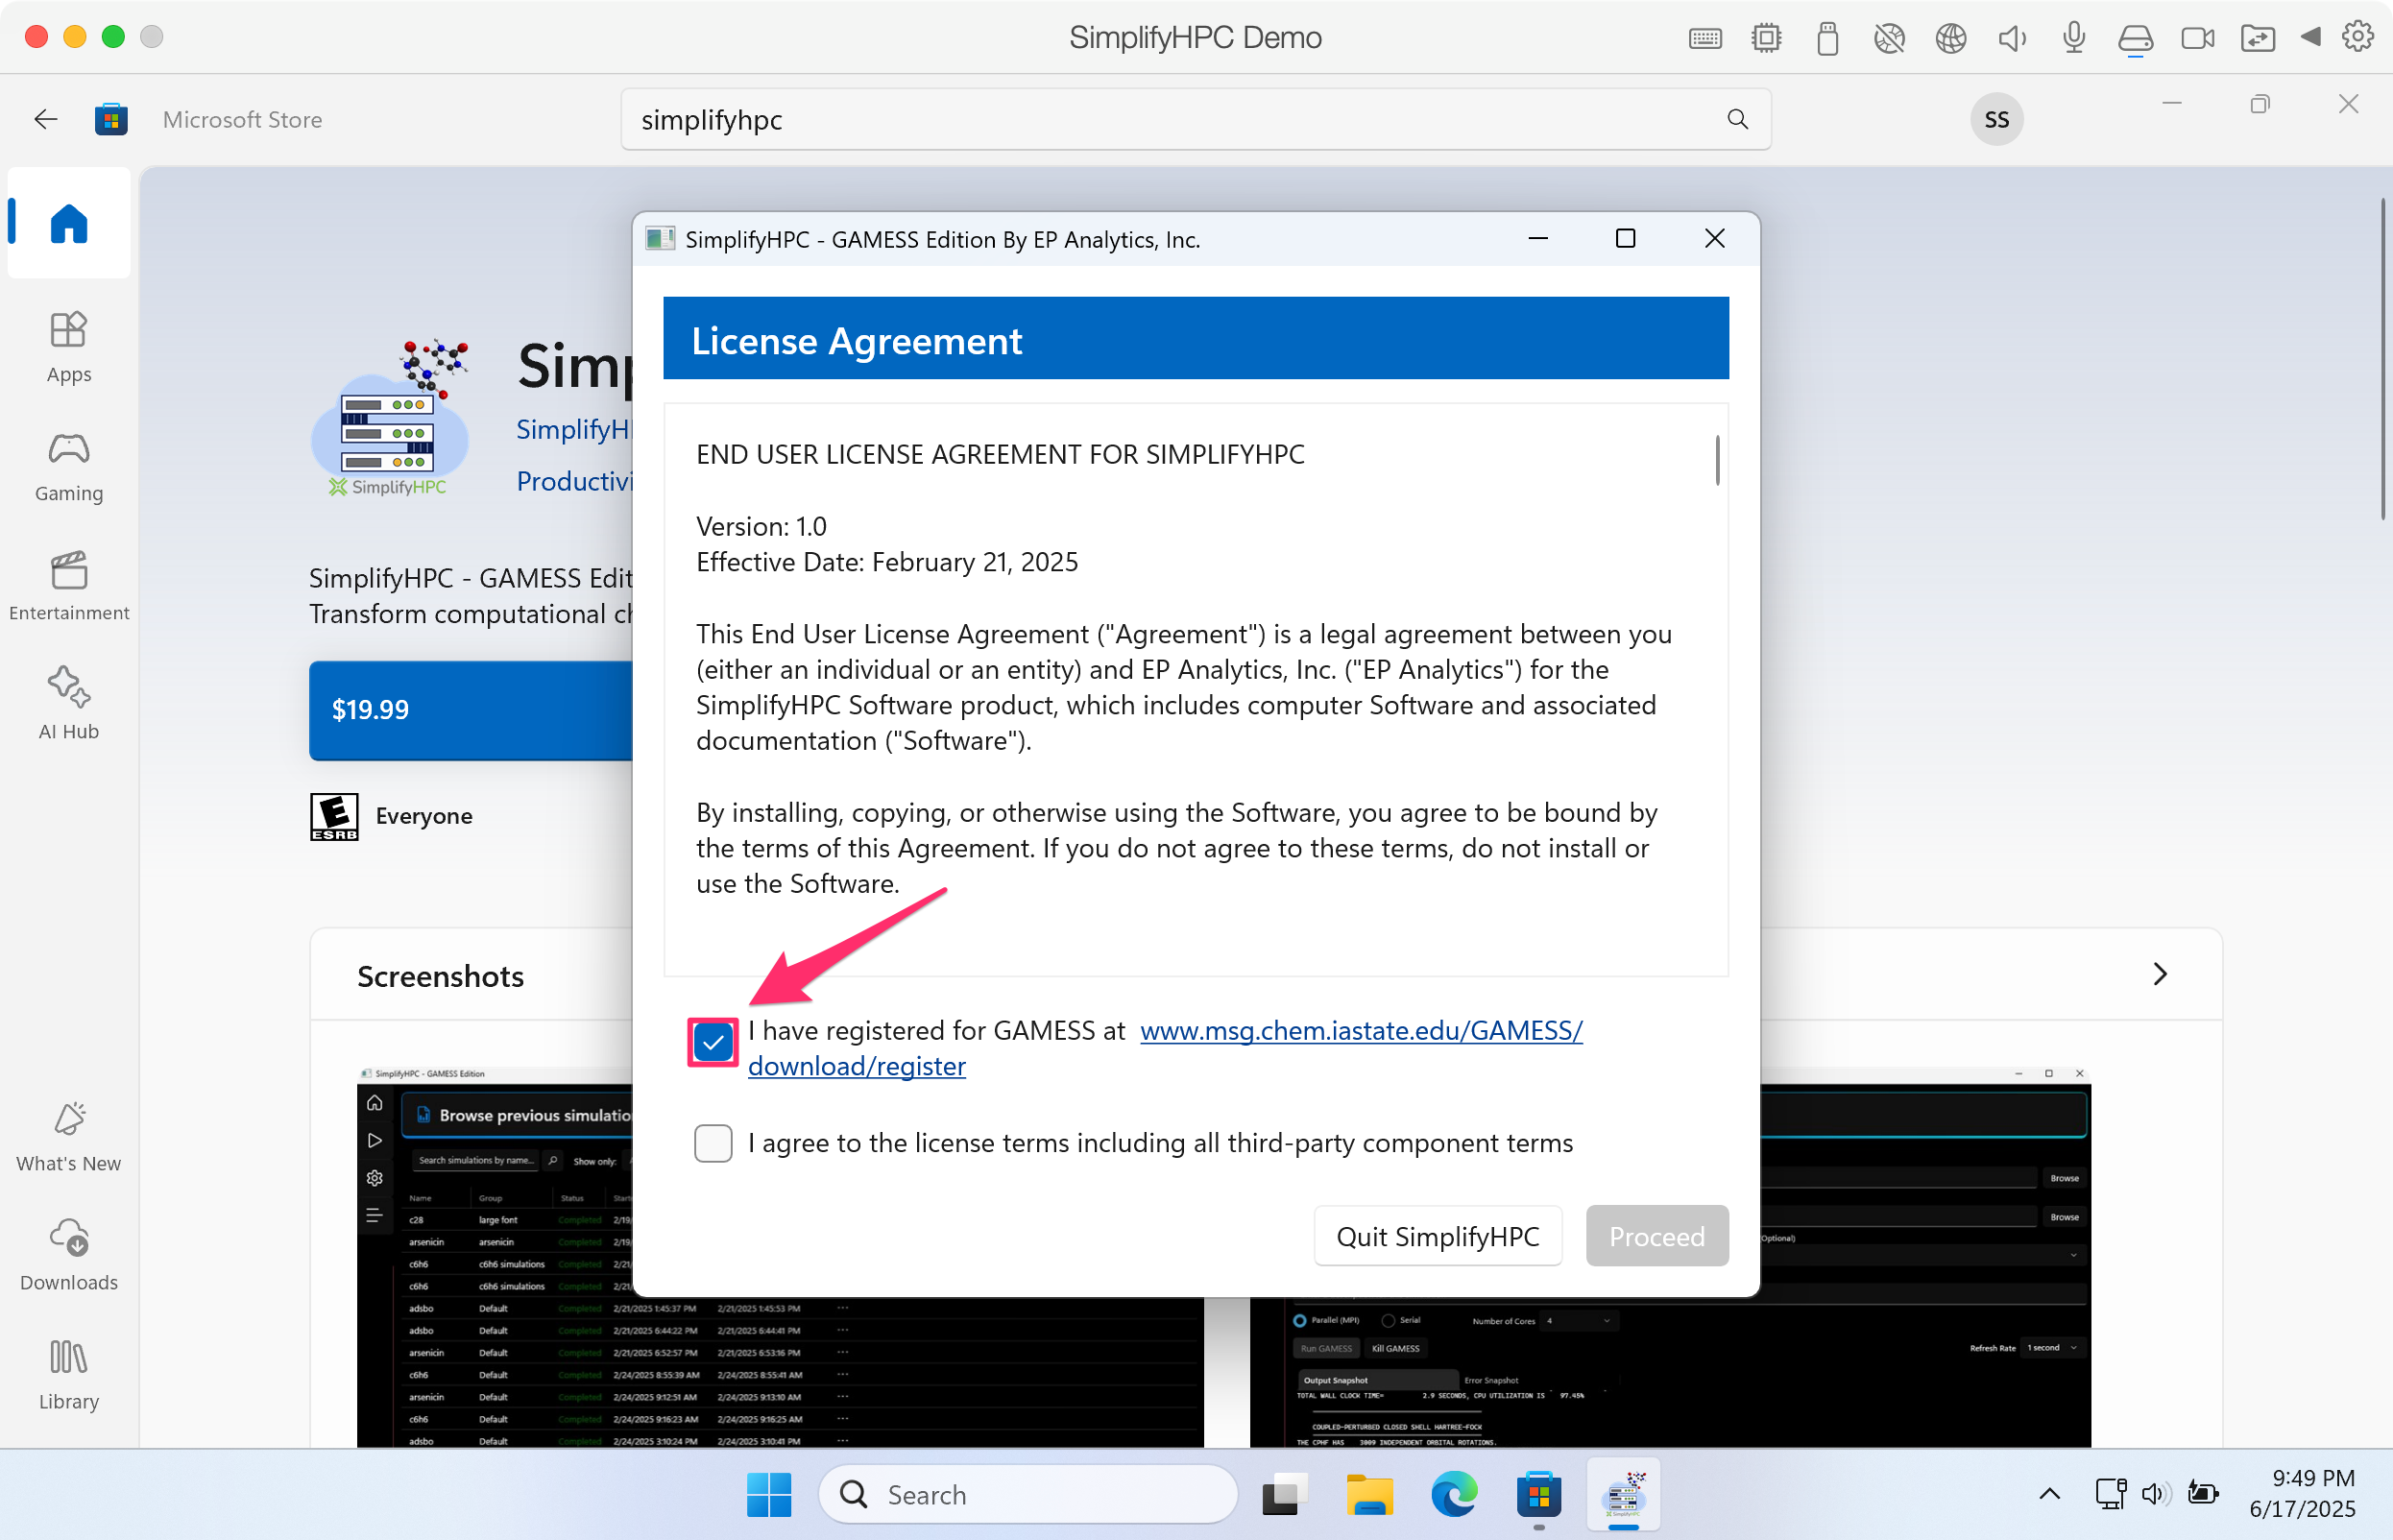
Click image to enlarge in a new tab/window
Step 8. Then read through the SimplifyHPC License Agreement.

Click image to enlarge in a new tab/window
Step 9. Click the second checkbox if you agree to the licensing terms then click on Proceed.
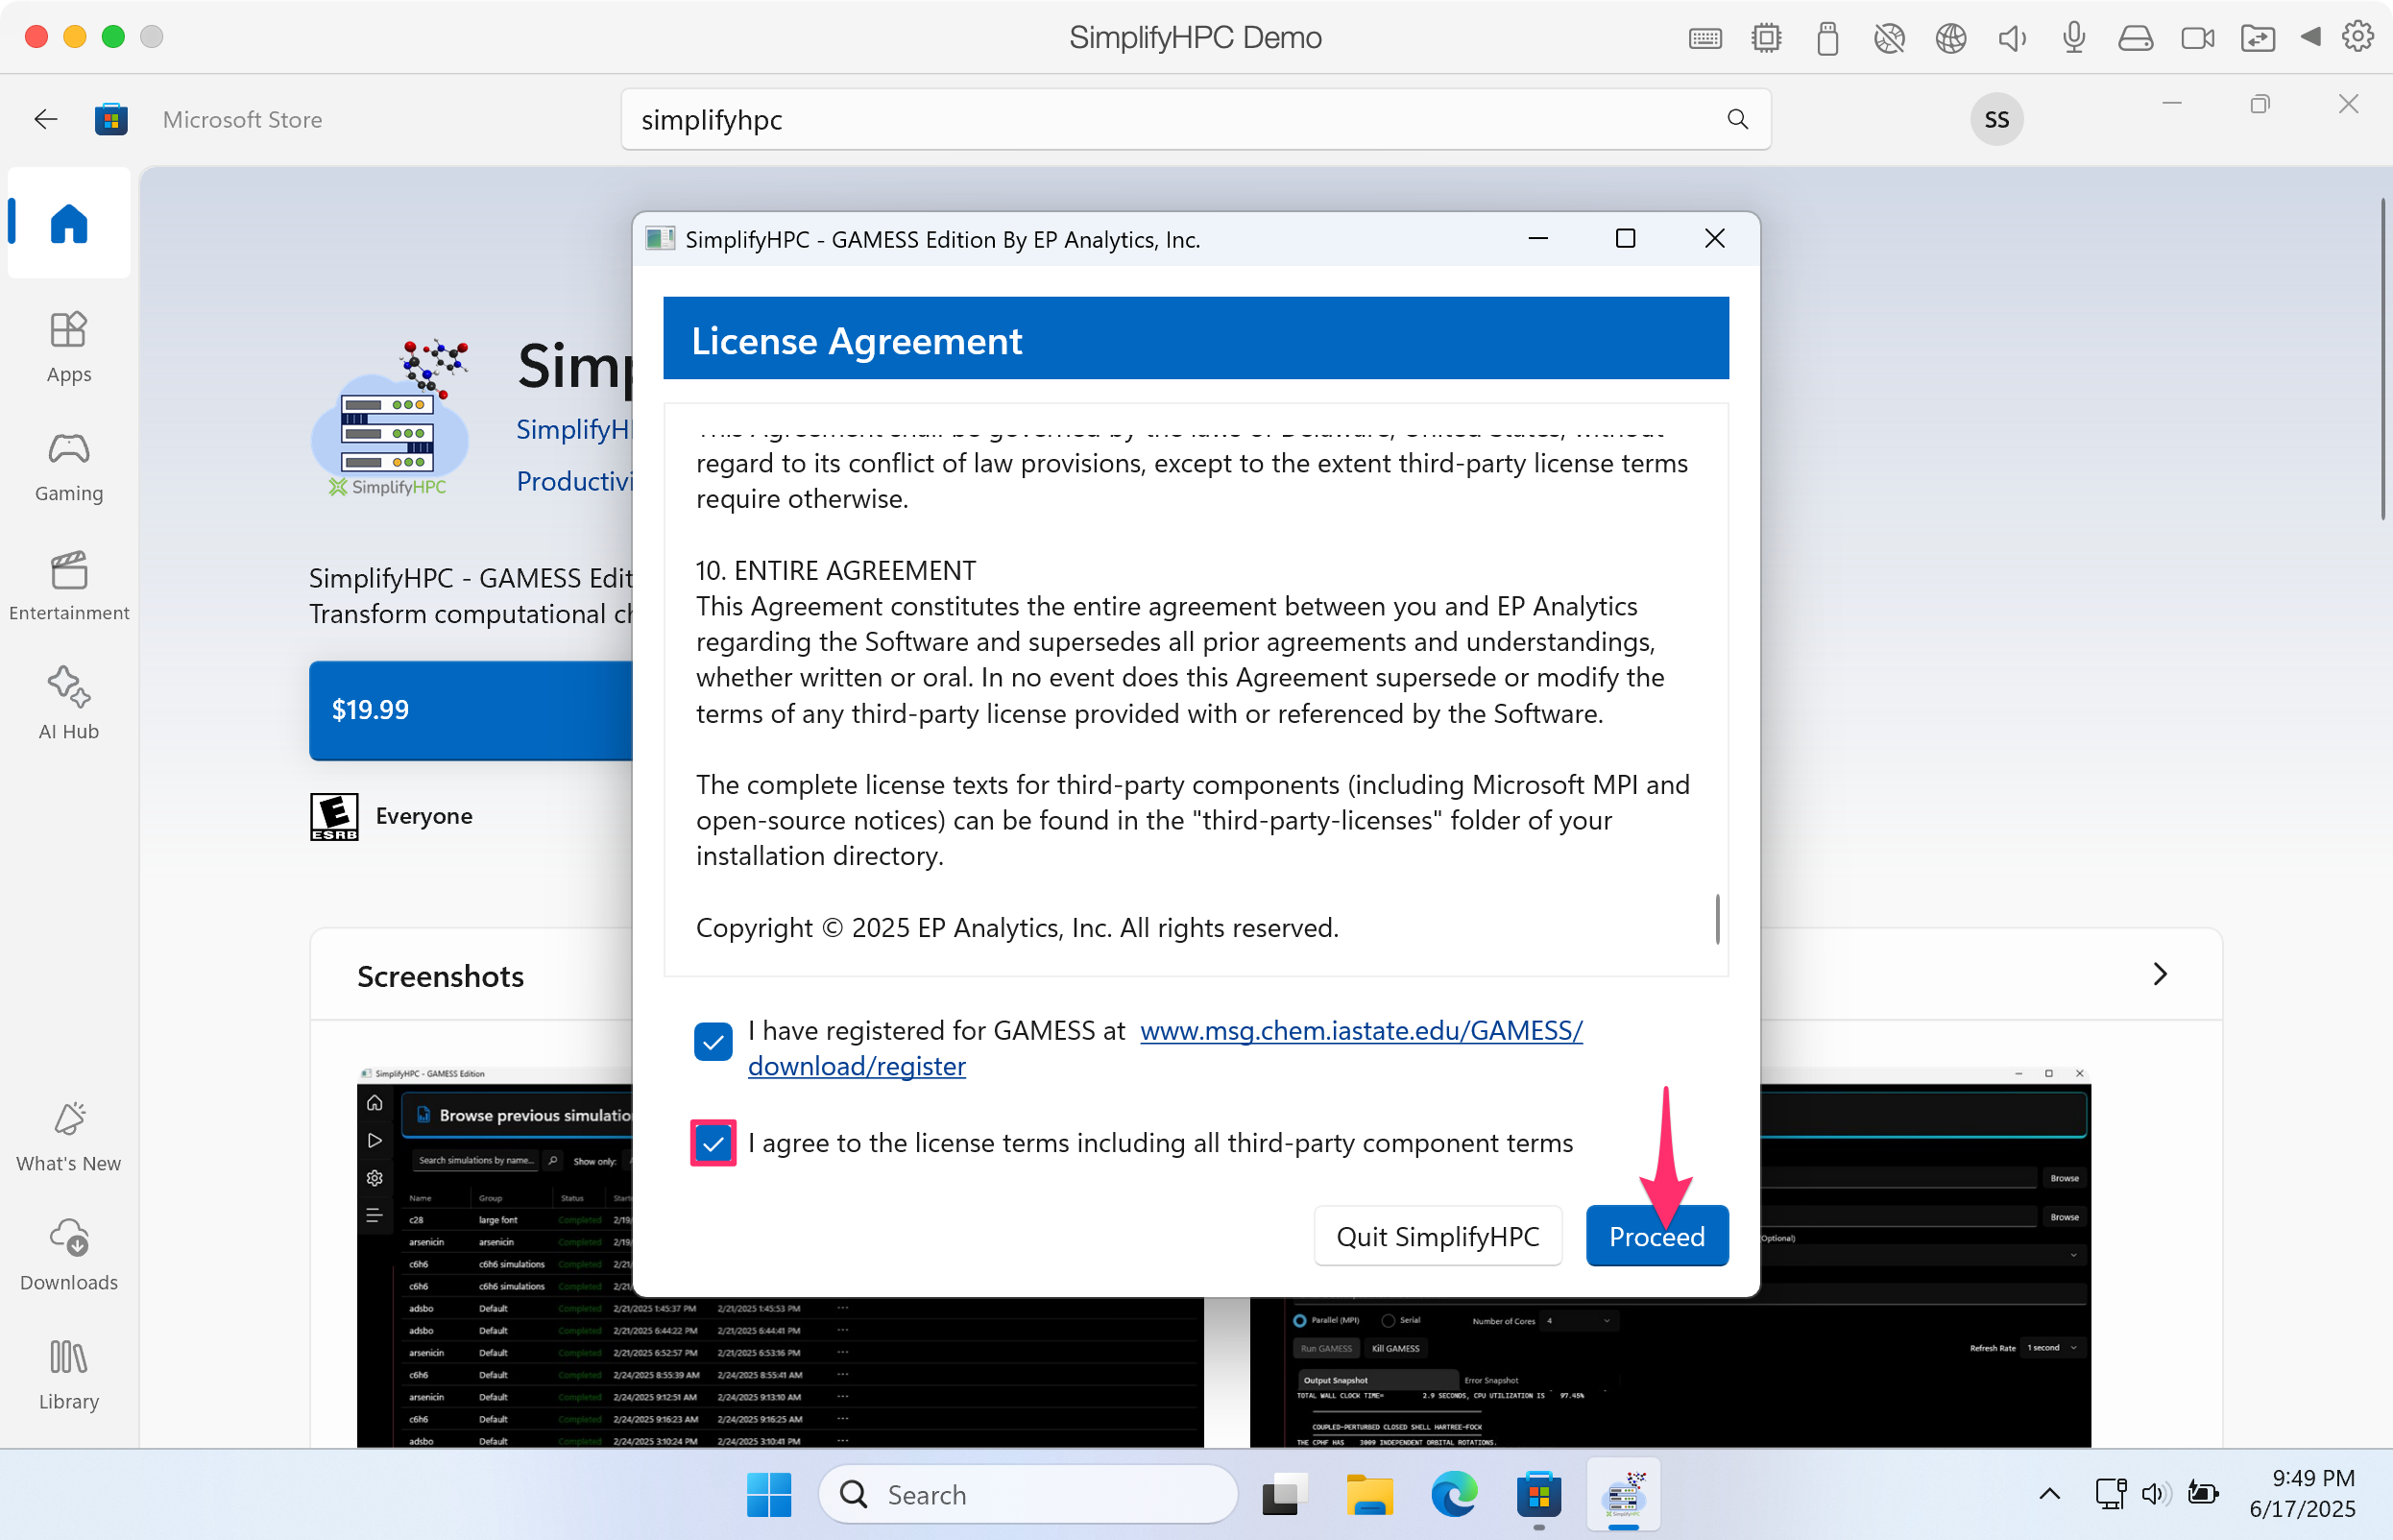
Click image to enlarge in a new tab/window
Step 10. You must now decide on the directory location to store the SimplifyHPC database. Click on the Browse button to proceed.
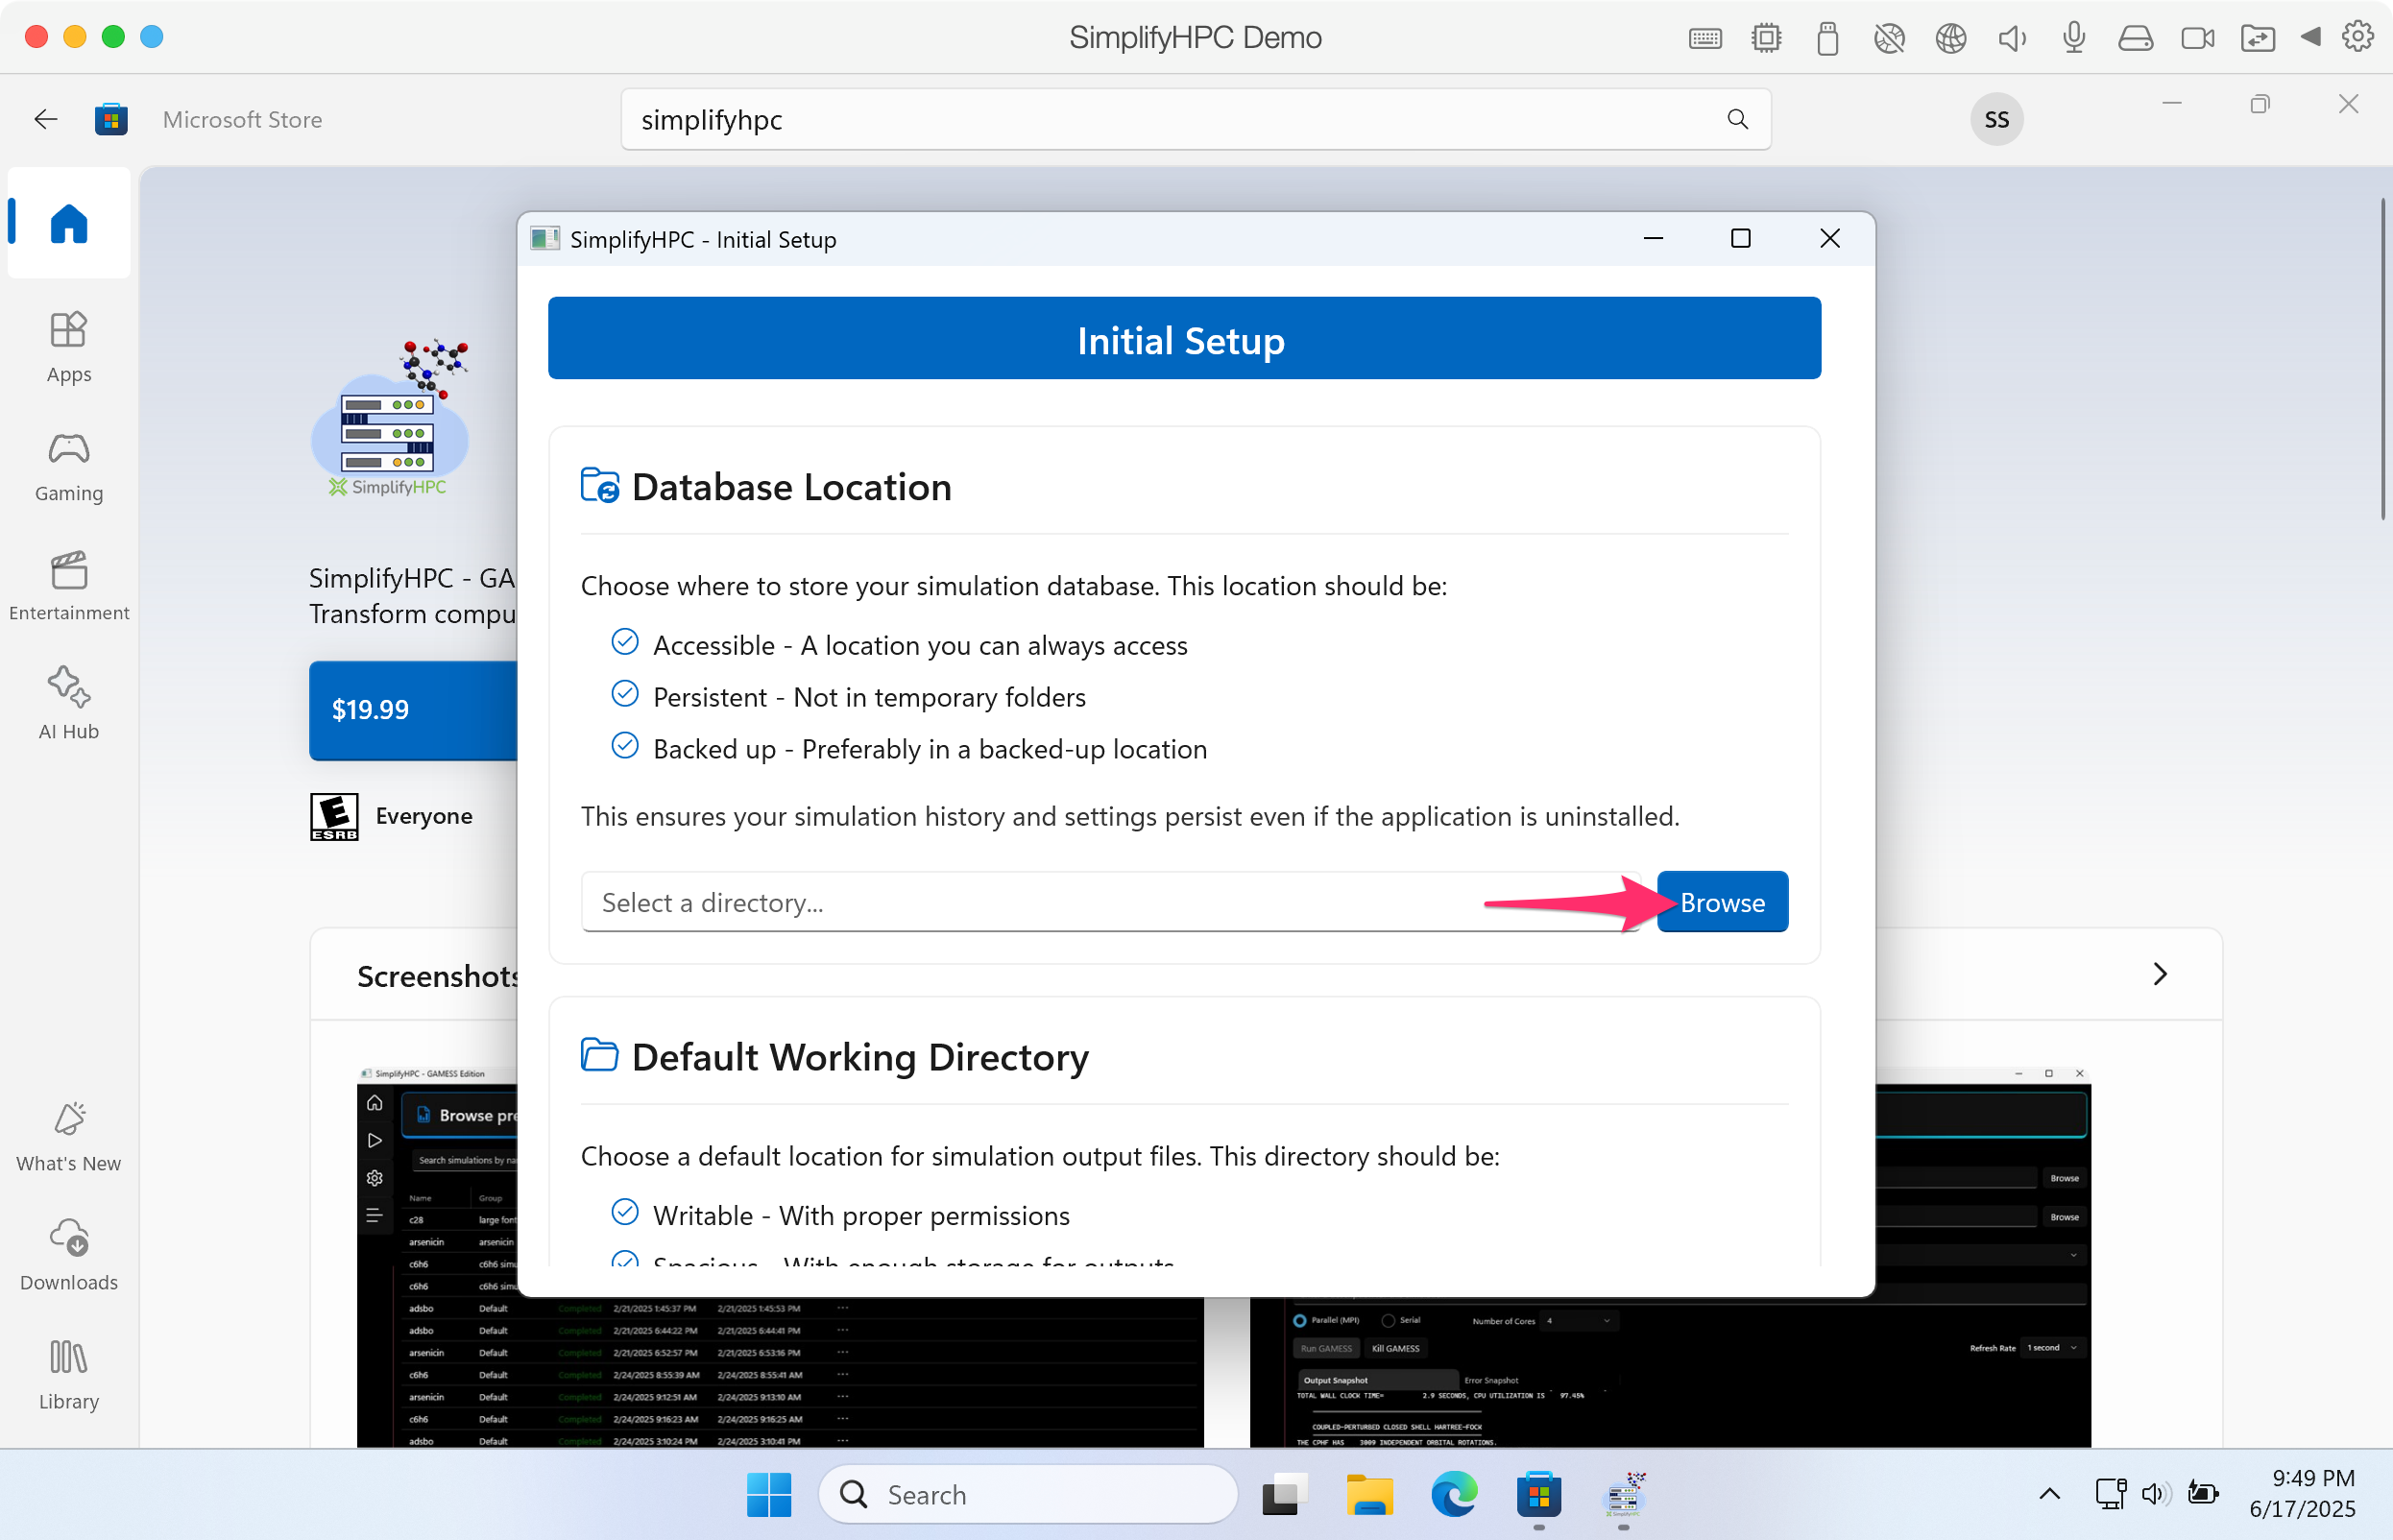
Click image to enlarge in a new tab/window
Step 11. Navigate to your directory of choice. Then click on Select Database Location to make your selection.
You have the ability to change the database location at anytime.
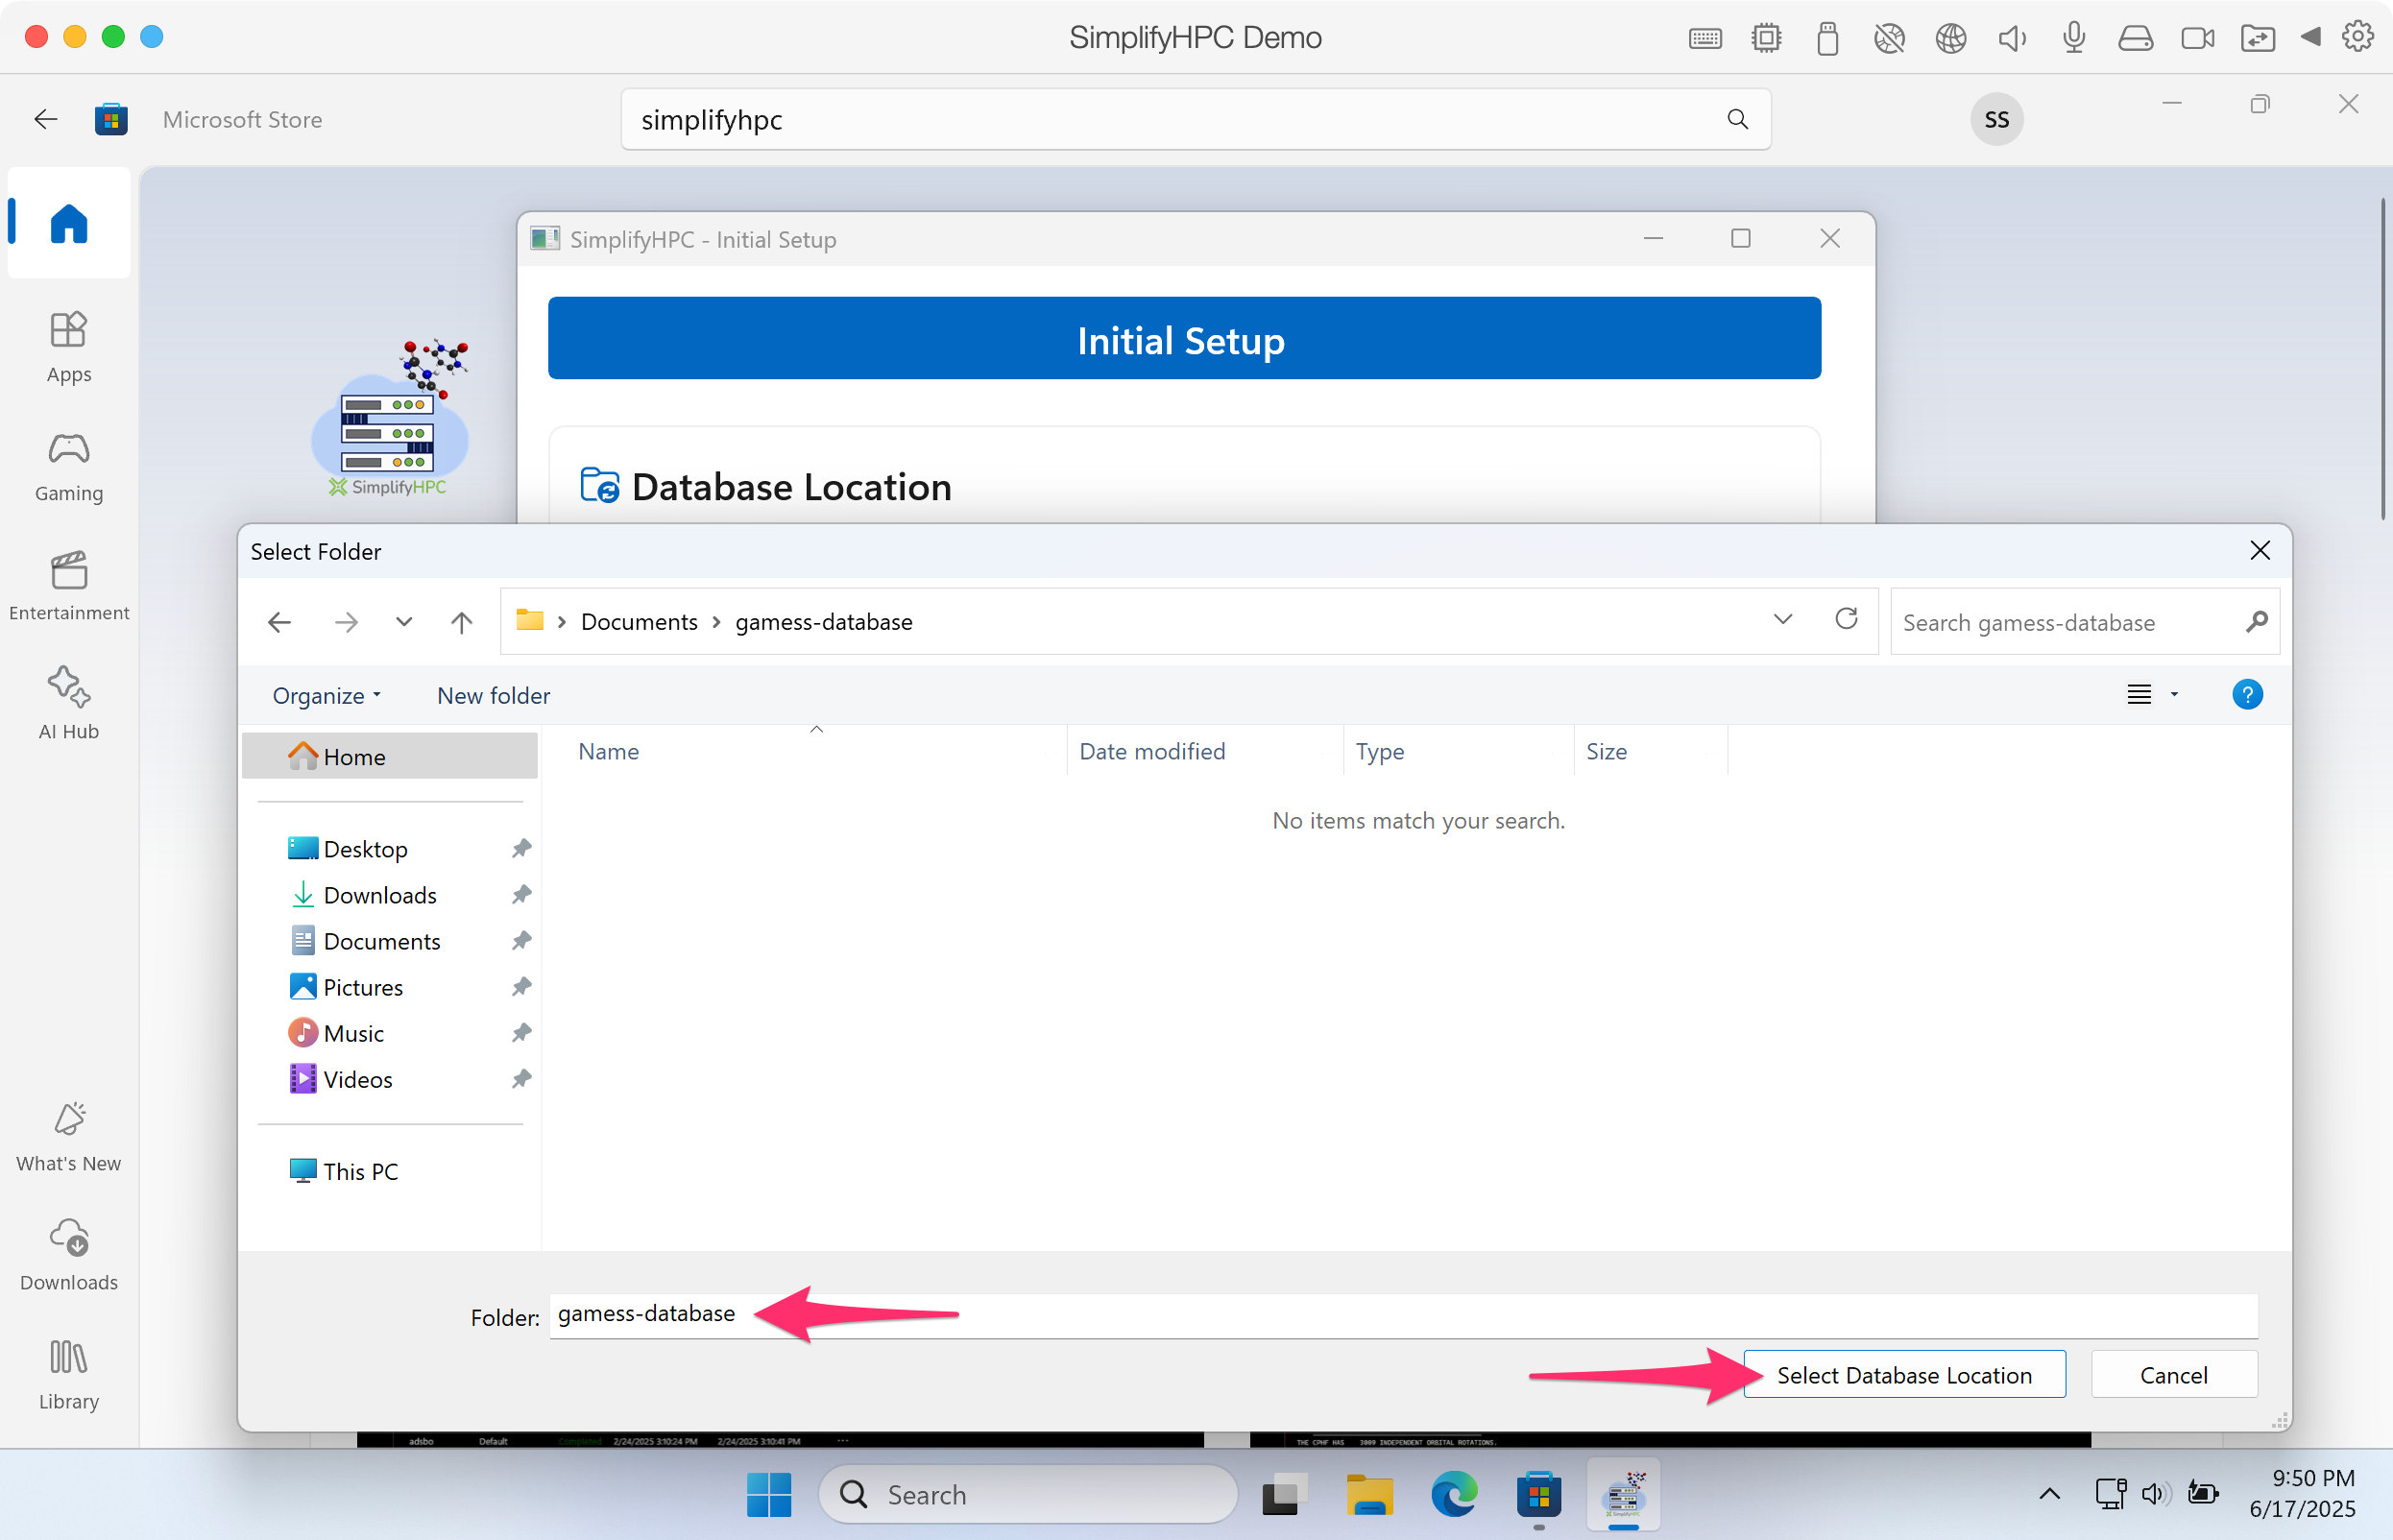
Click image to enlarge in a new tab/window
Step 12. Scroll to the bottom. You must also decide on the directory location to store the output. Click on the Browse button to proceed.
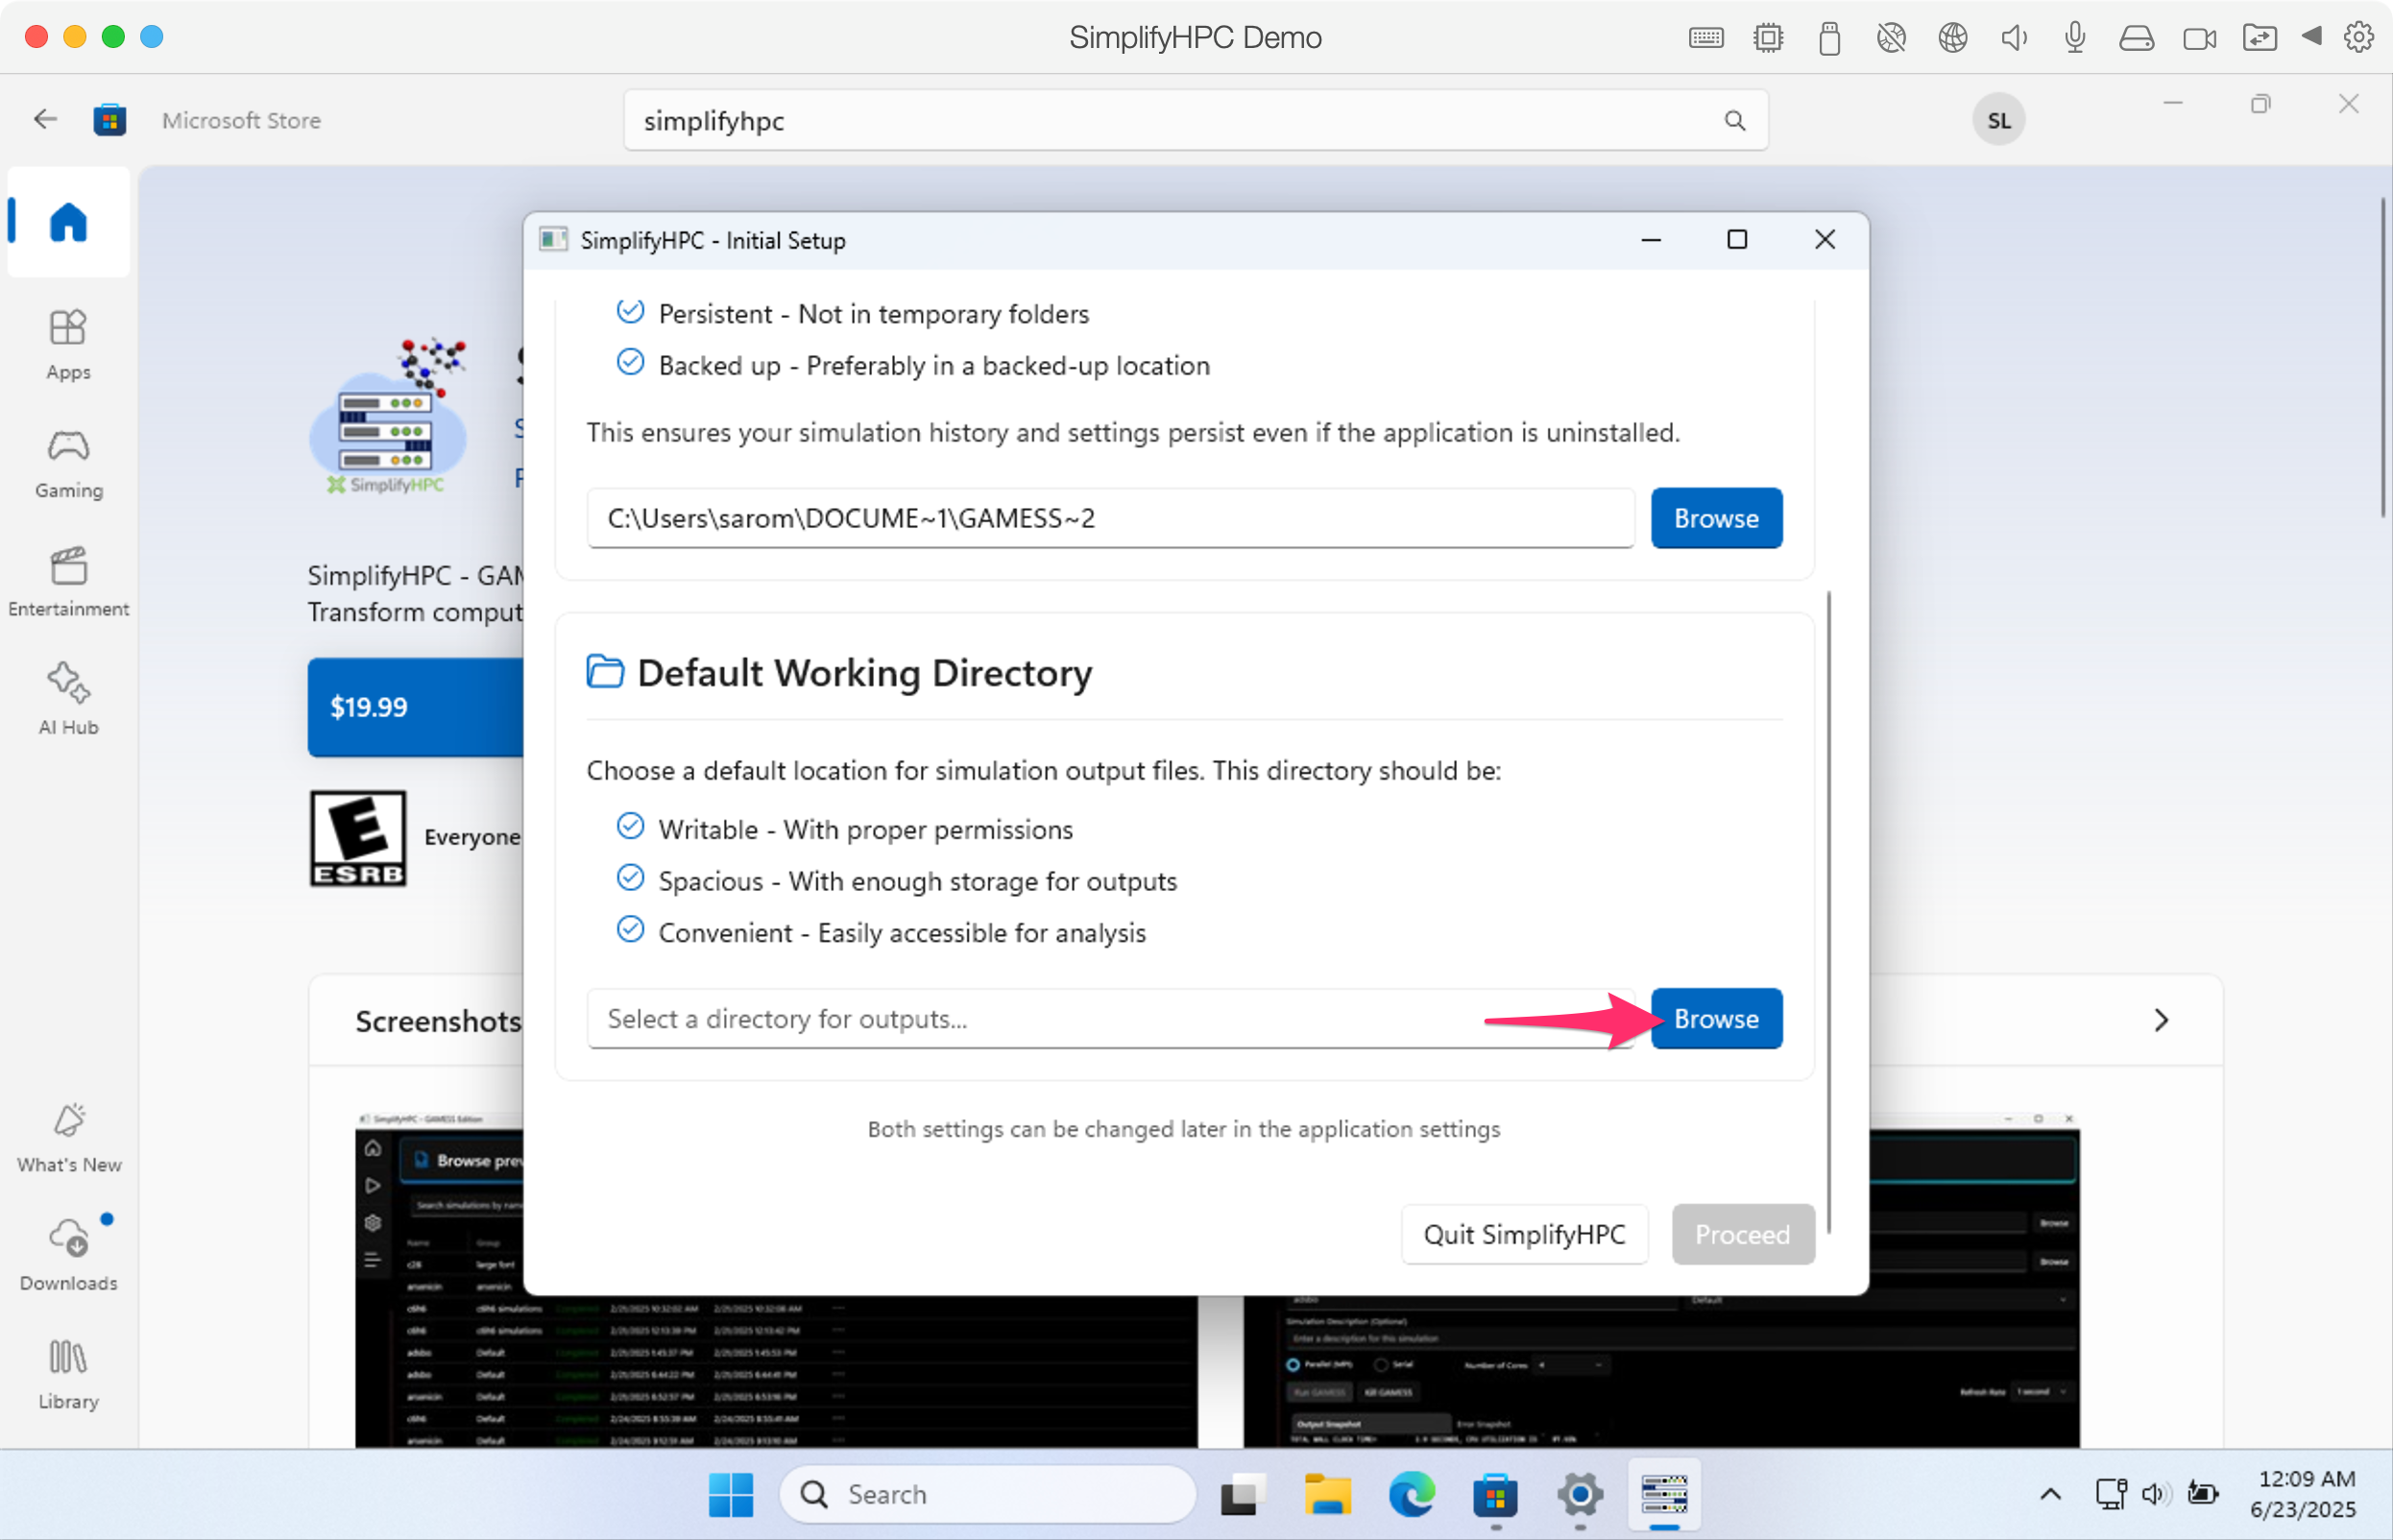
Click image to enlarge in a new tab/window
Step 13. Navigate to your directory of choice. Then click on Select Working Directory to make your selection.
You have the ability to change the Working Directory location at anytime.
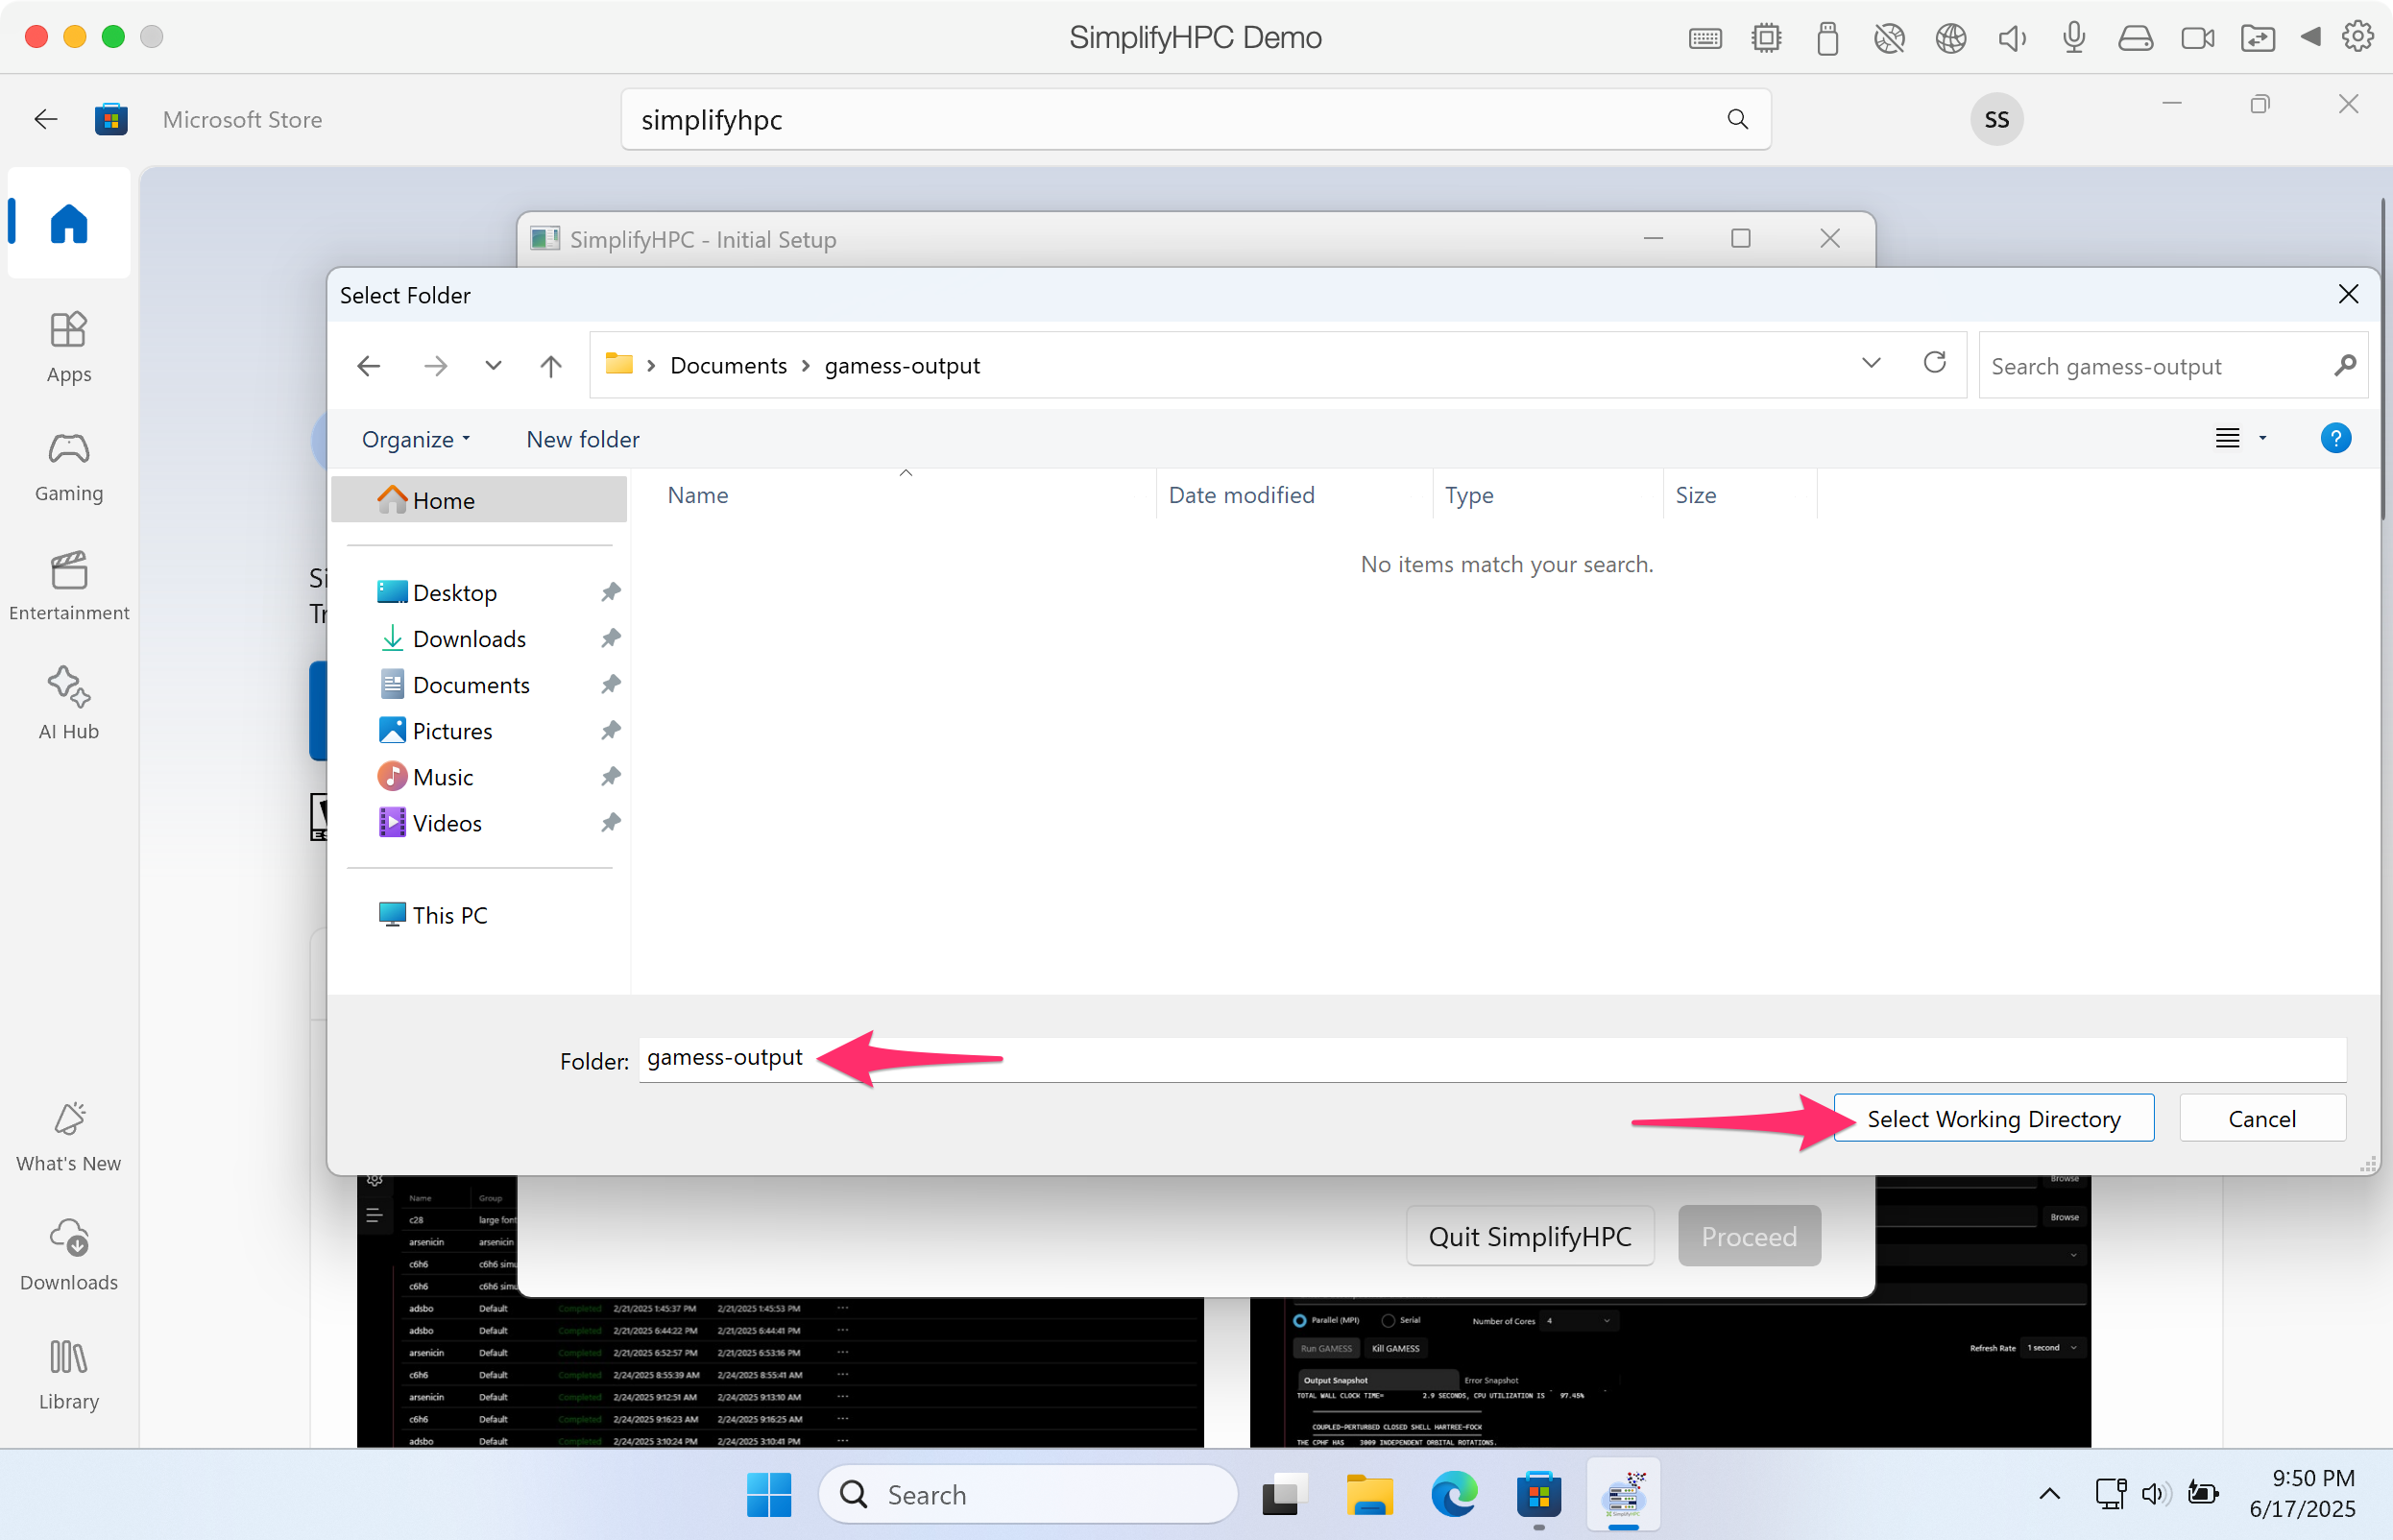
Click image to enlarge in a new tab/window
Step 14. Click on Proceed.
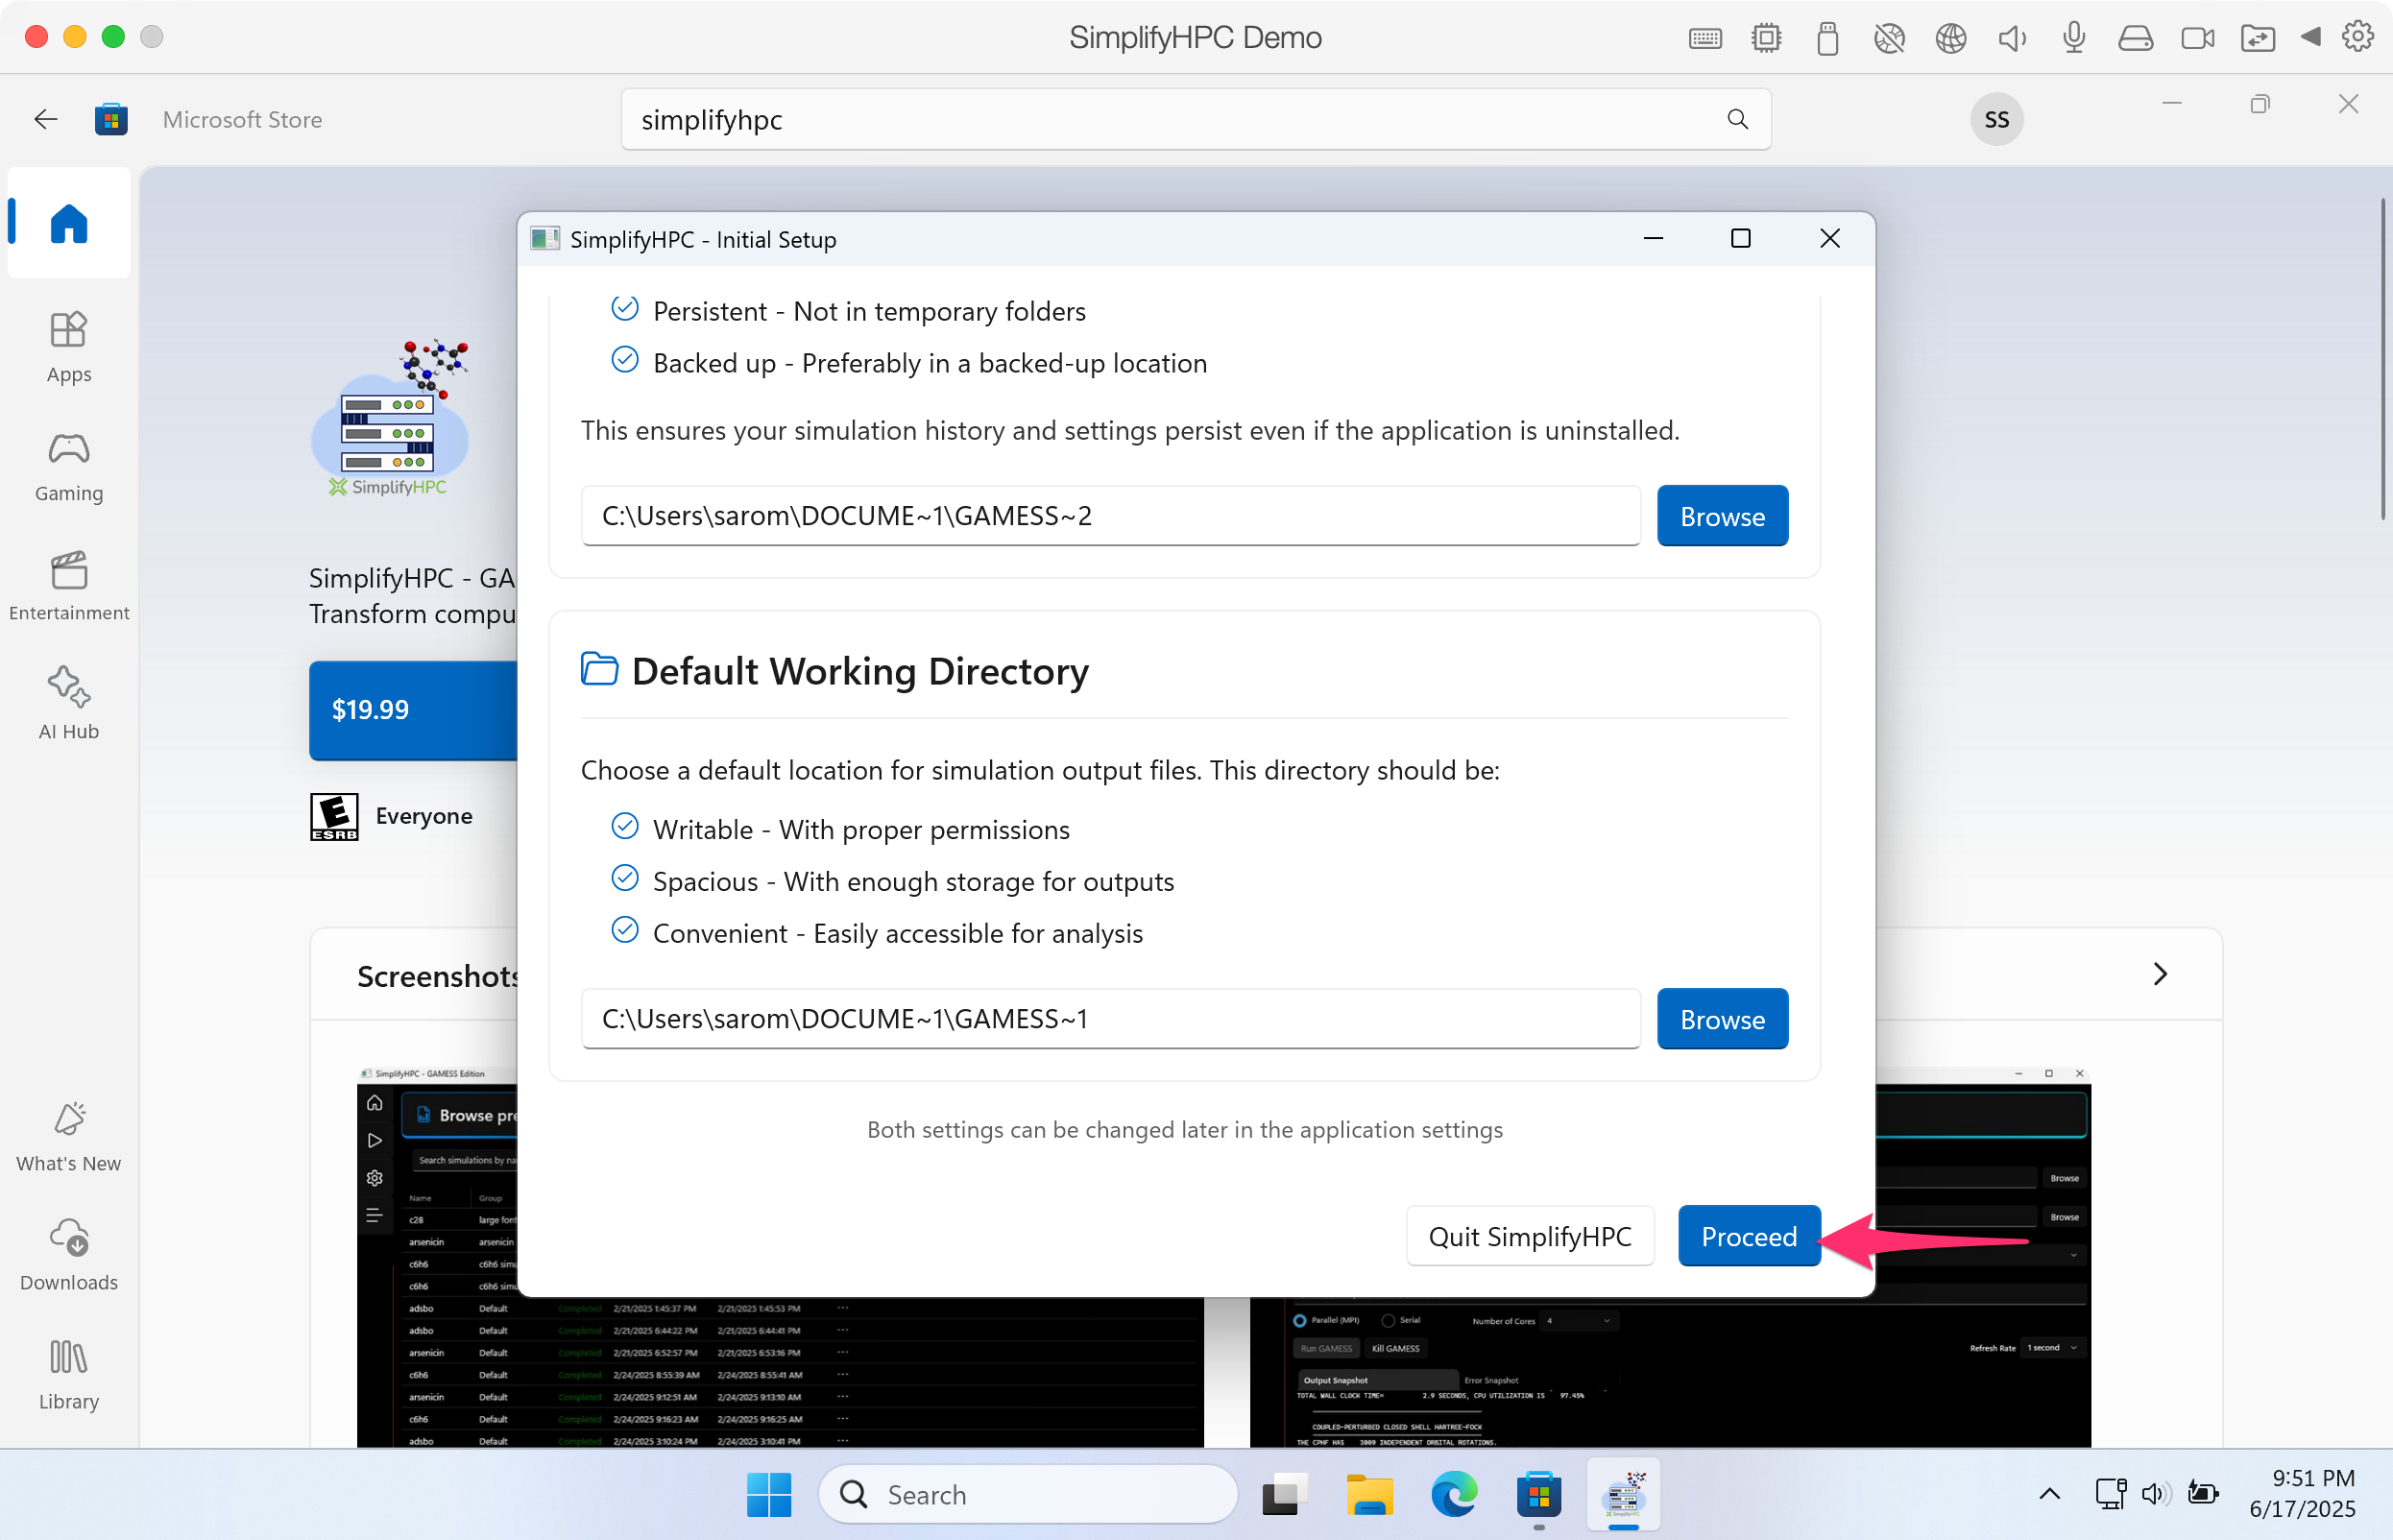
Click image to enlarge in a new tab/window
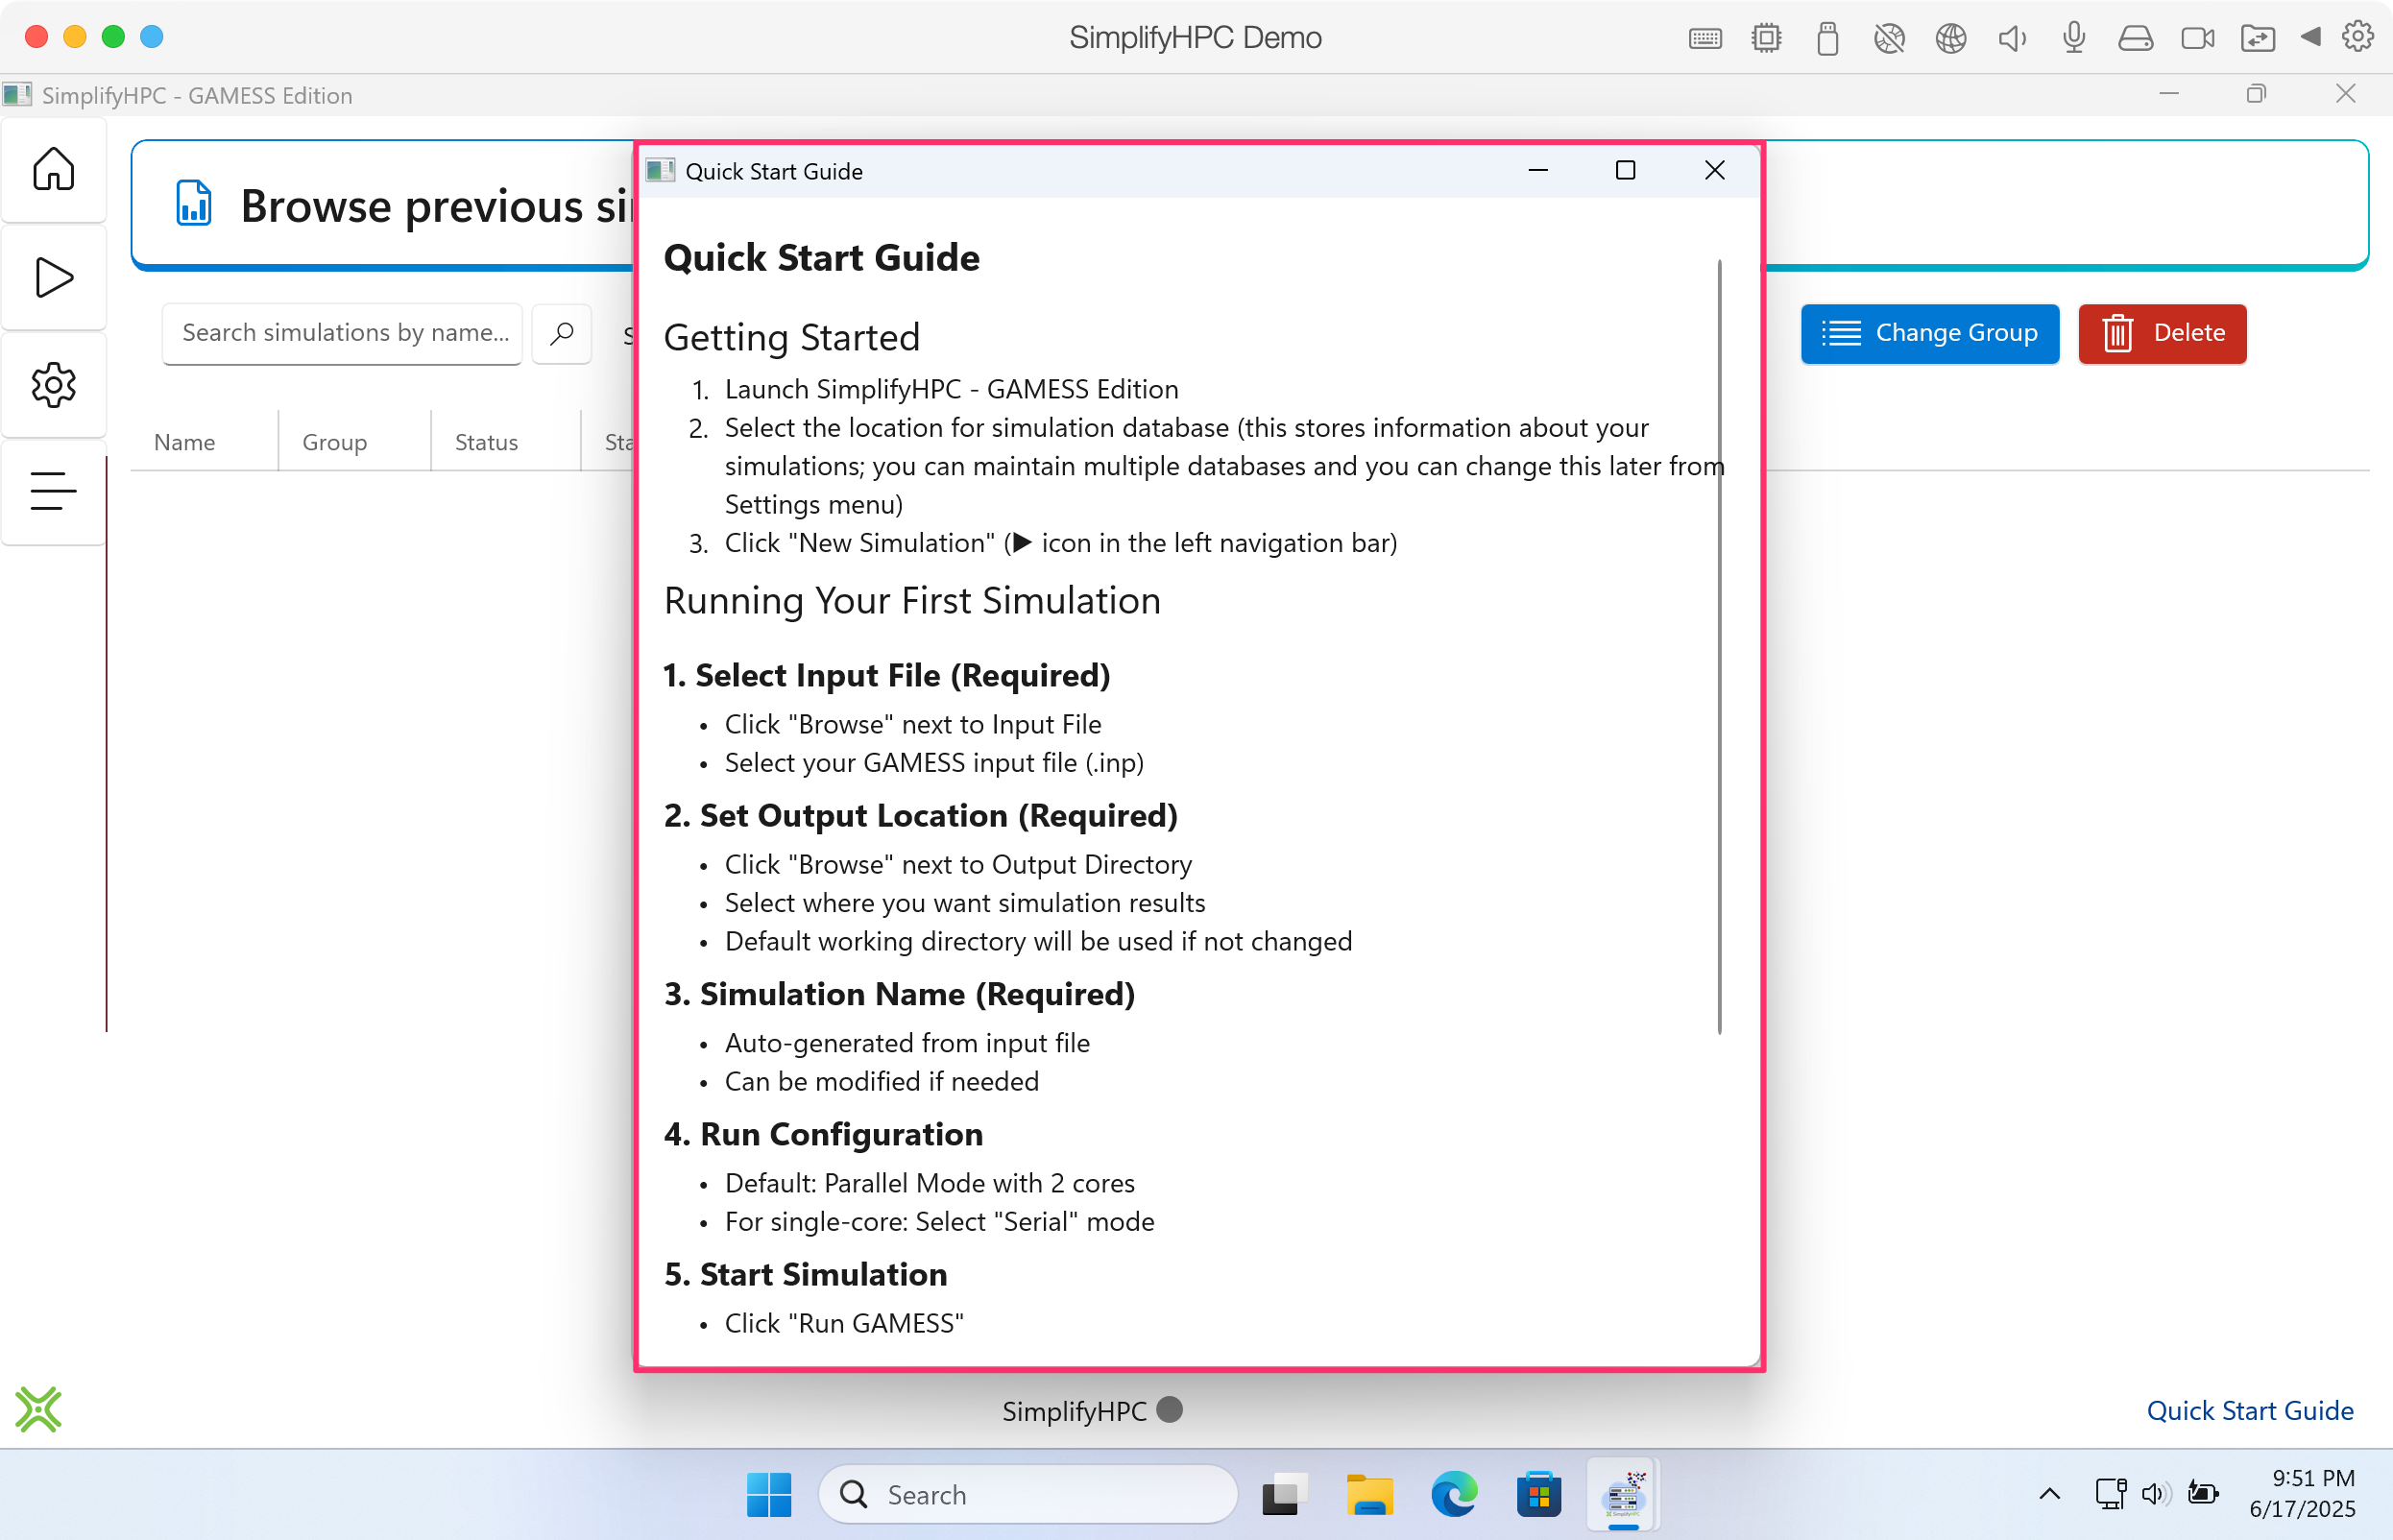
You will be presented with a Quick Start Guide on how to use SimplifyHPC. You can access this guide at anytime by clicking the Quick Start Guide link at the bottom-right of the main window
Click image to enlarge in a new tab/window
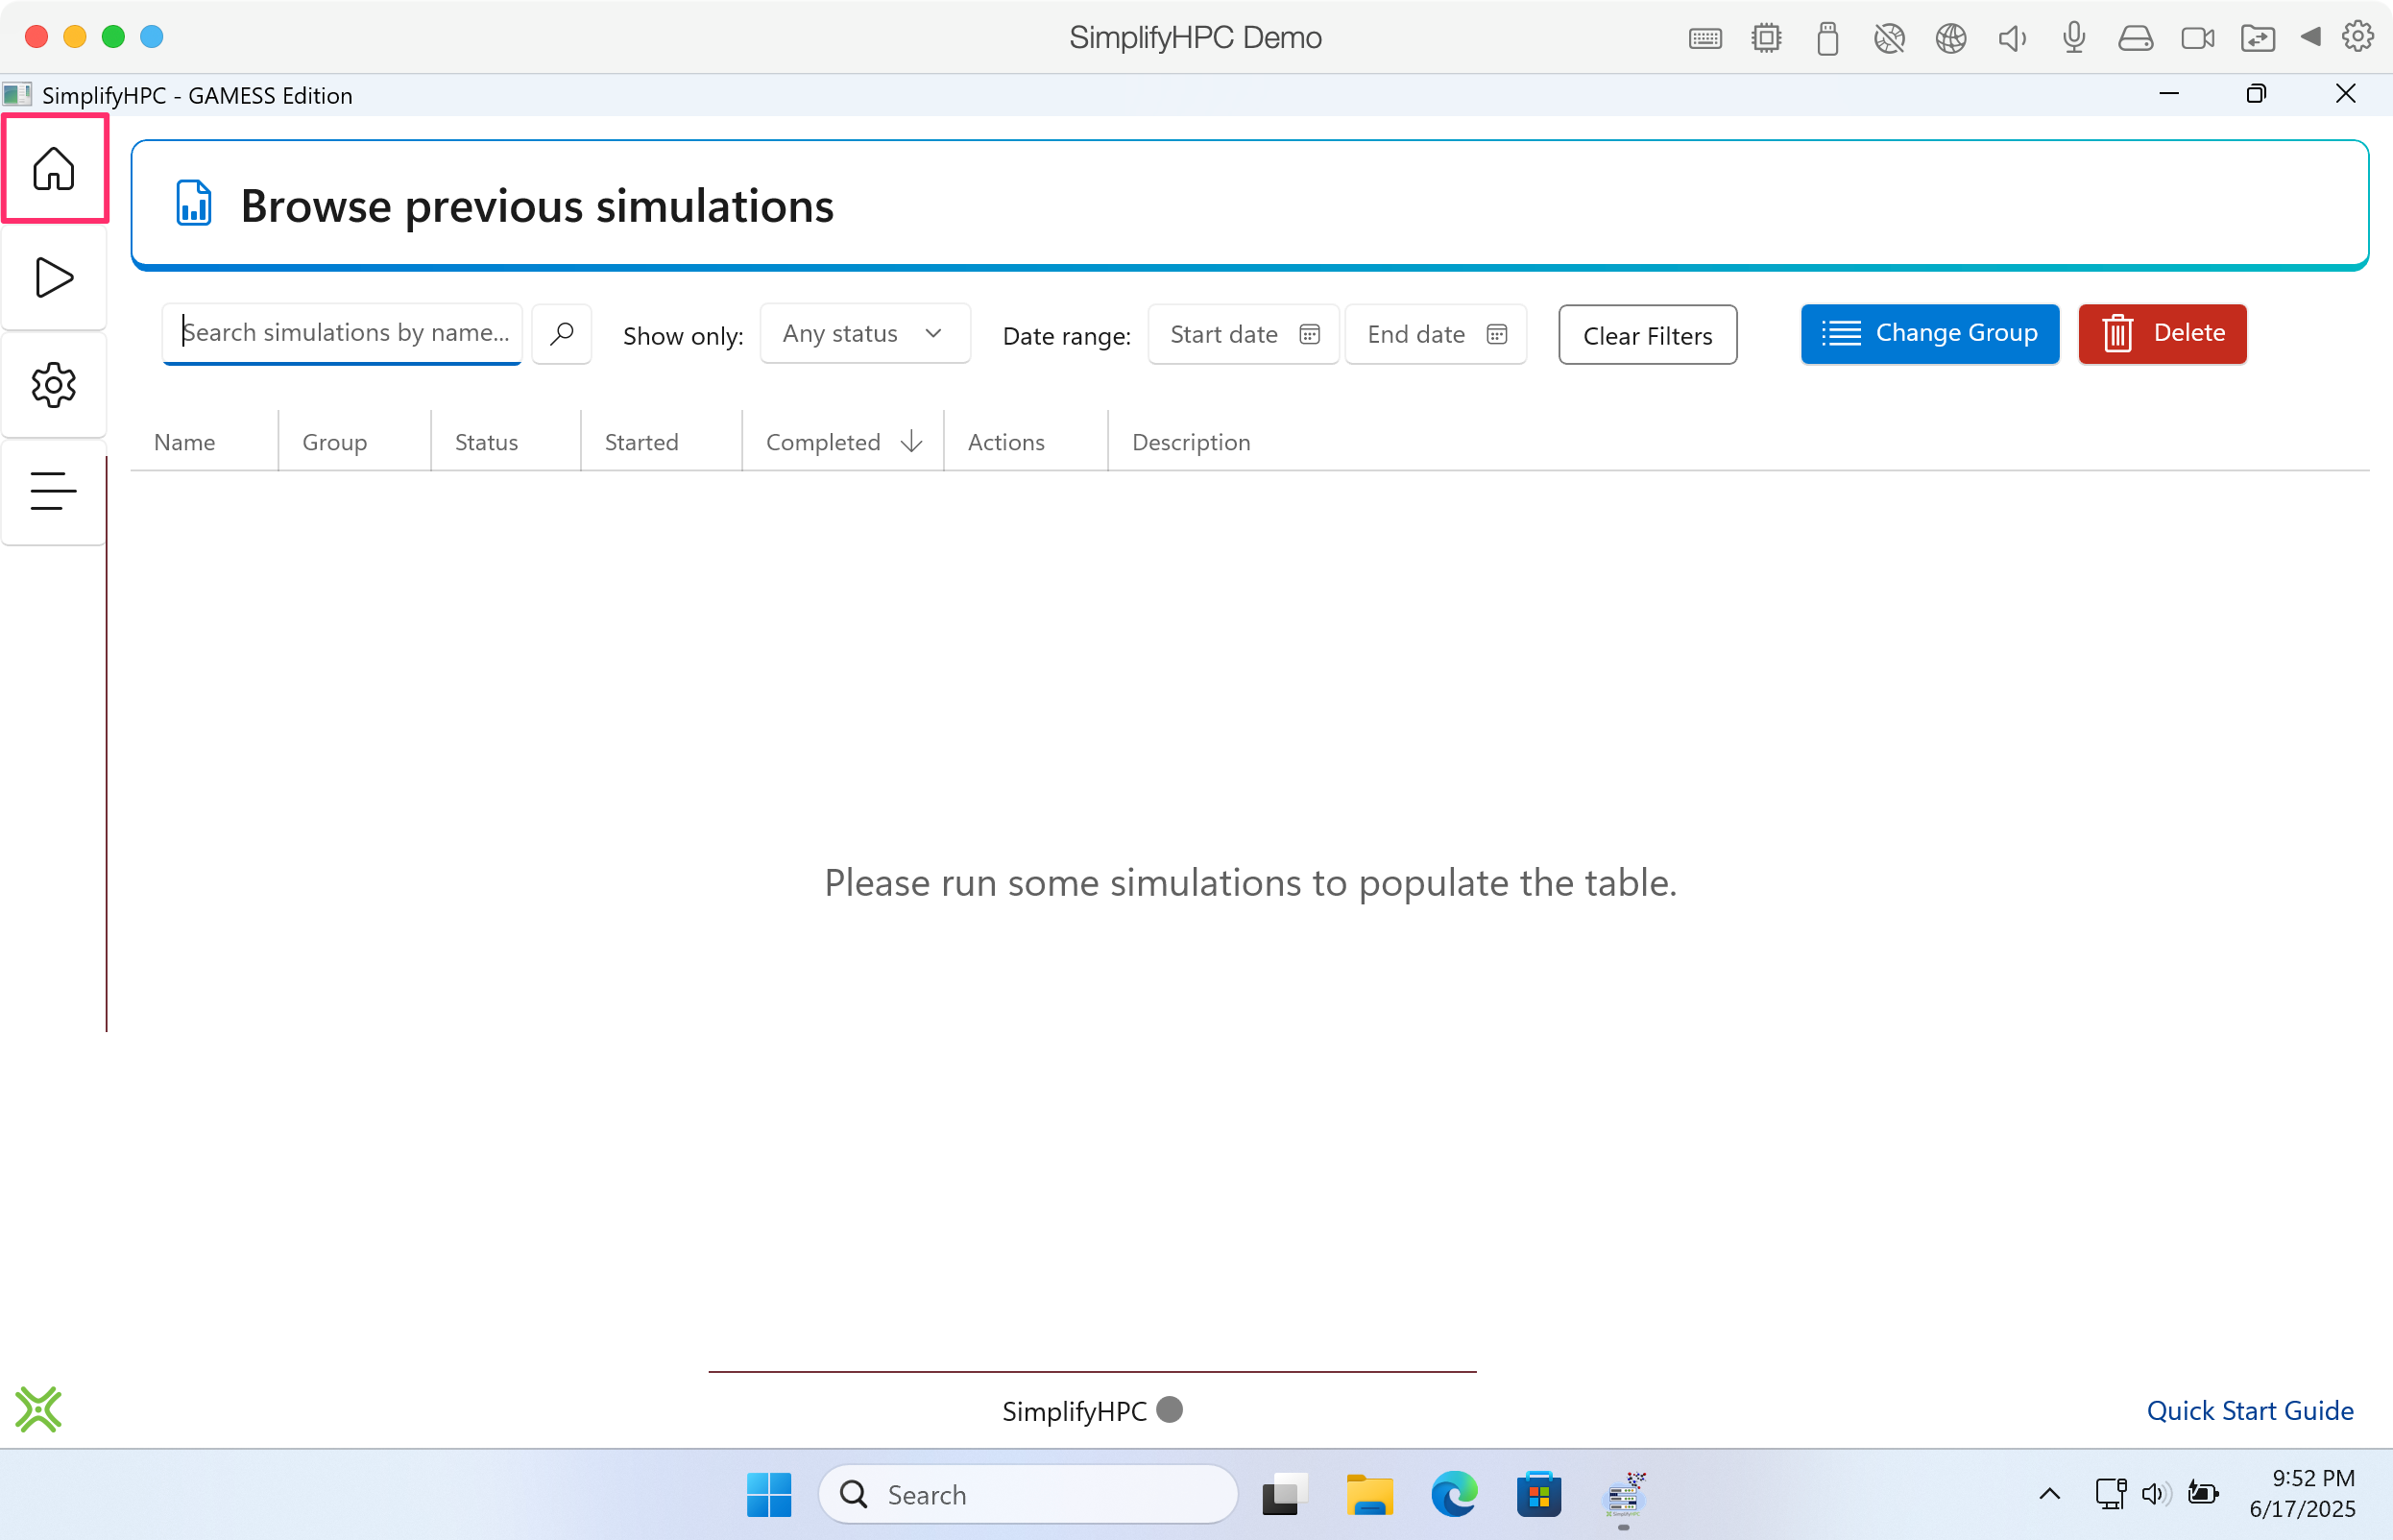
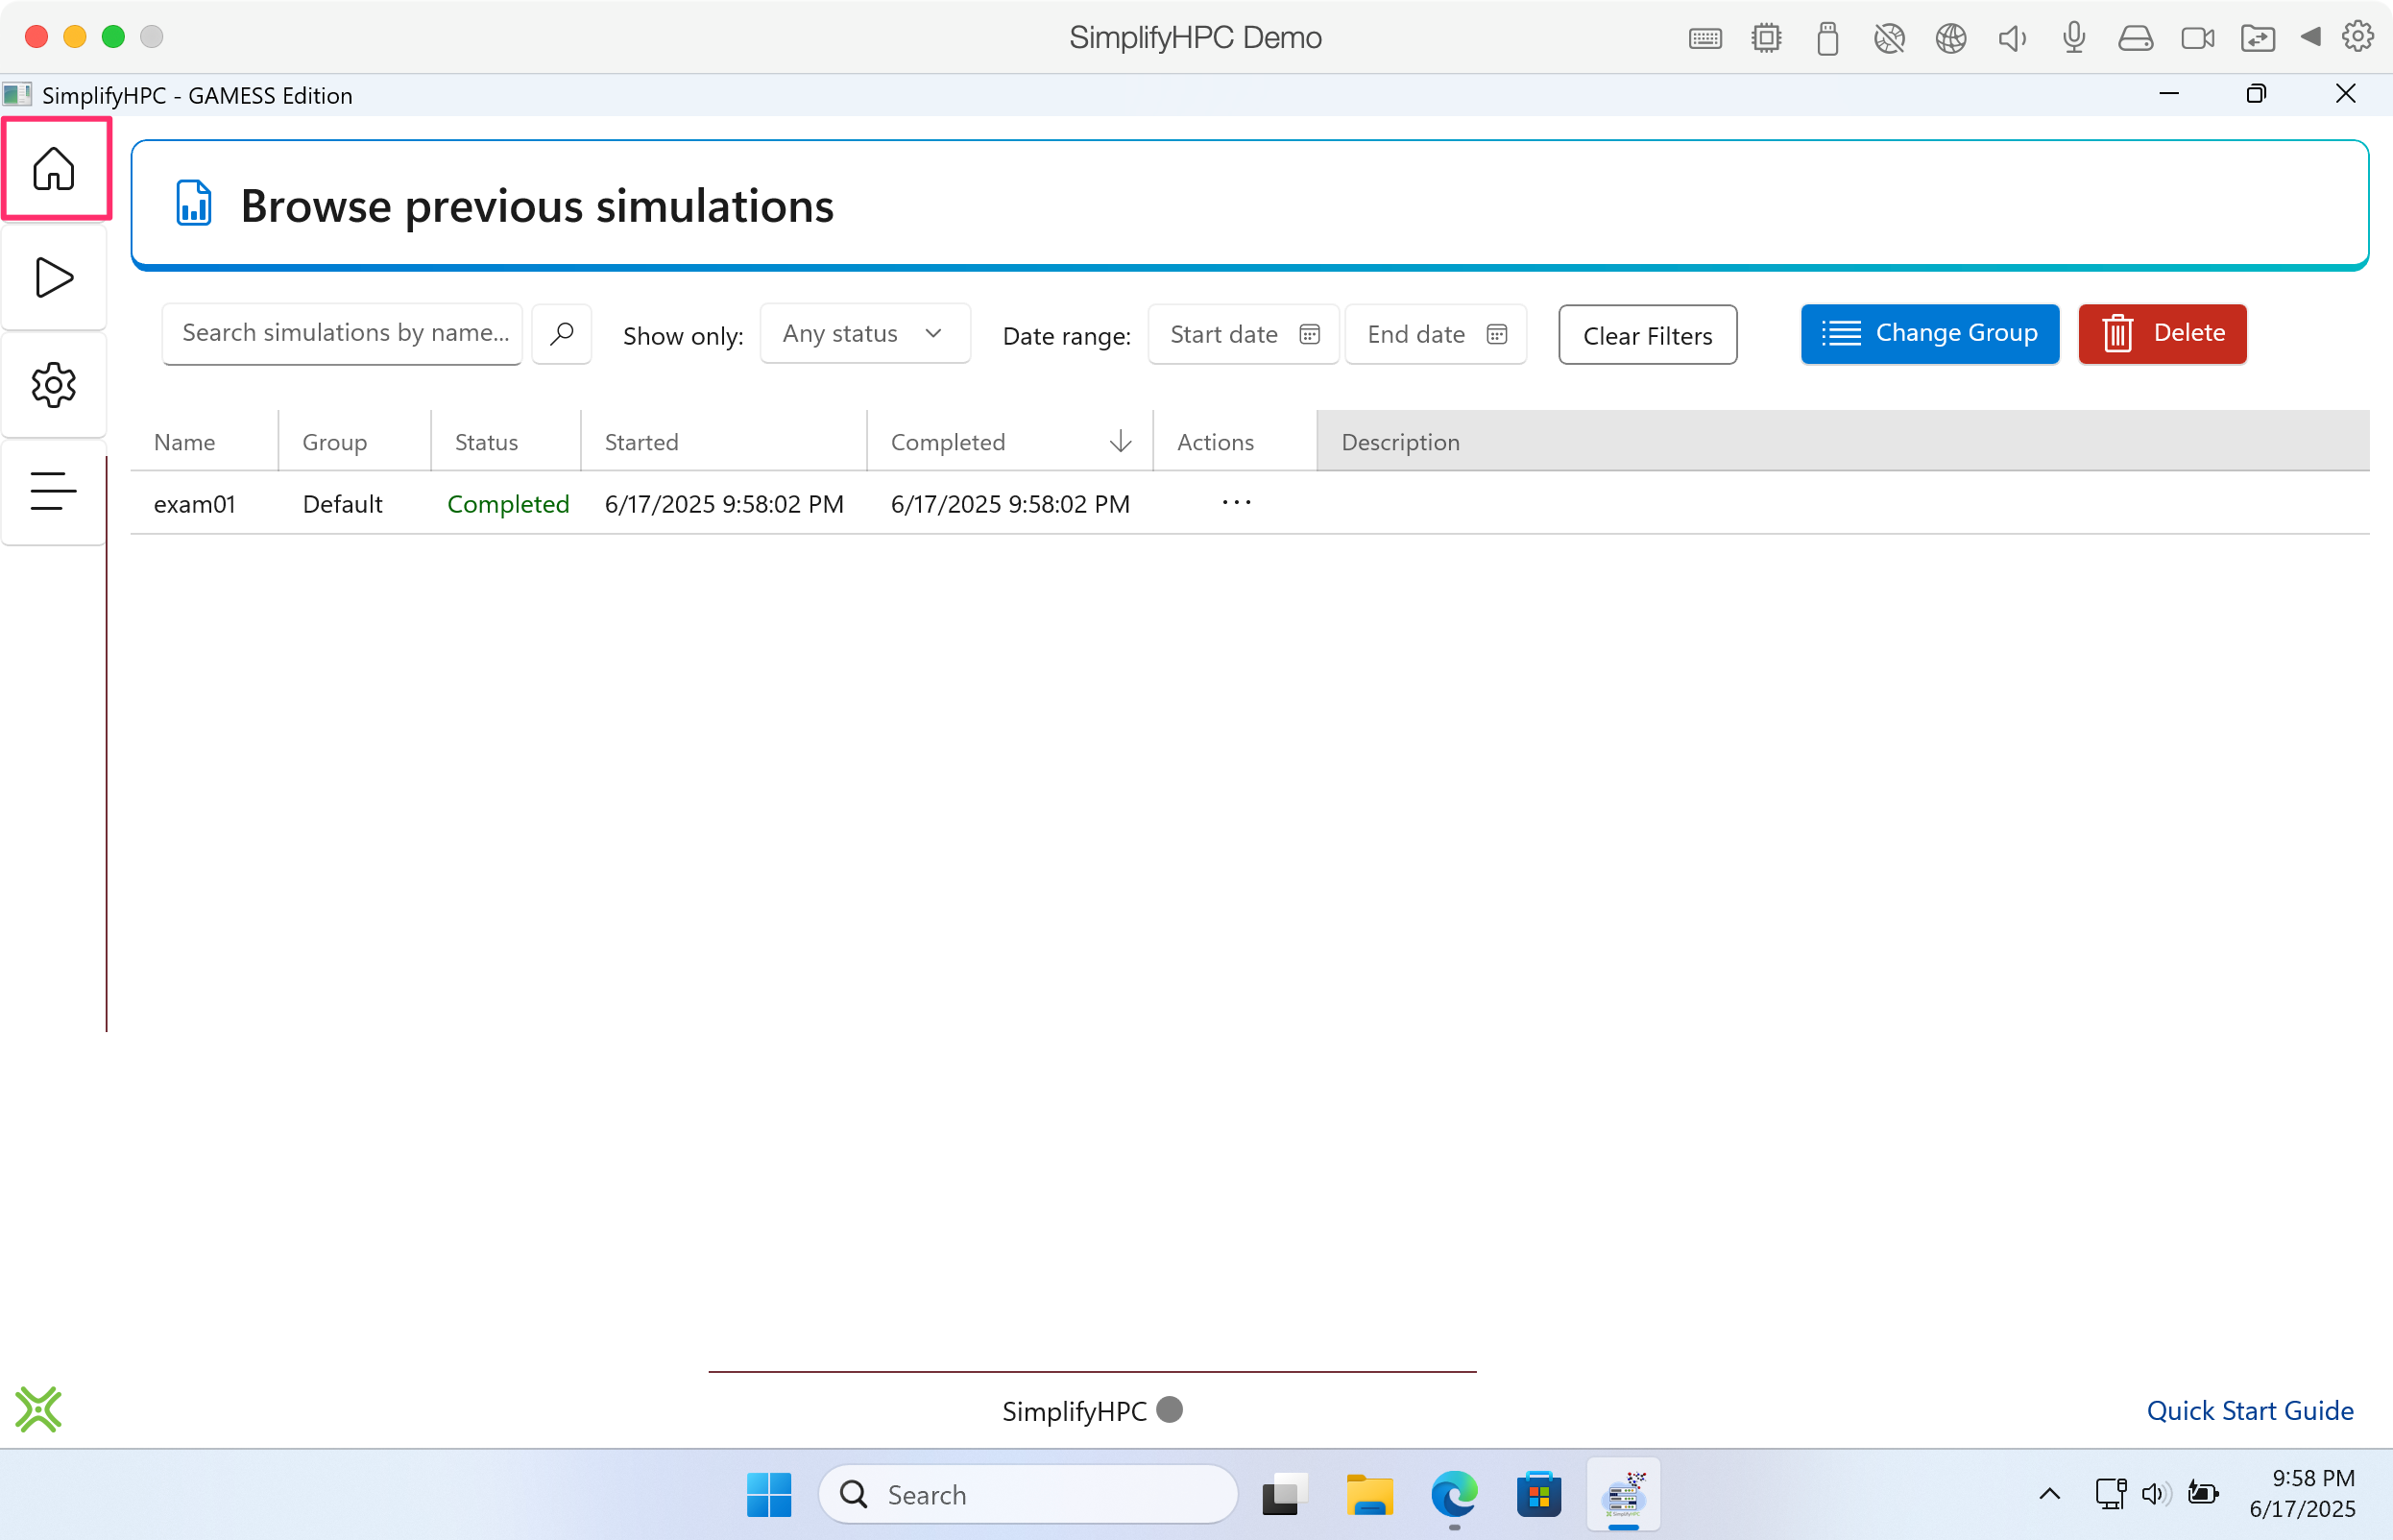
The first side navigation tab (home icon), is the Browse previous simulations page. The purpose of this page is to provide a centralized location where you can easily view, organize, and manage all previously executed simulations.
Click image to enlarge in a new tab/window
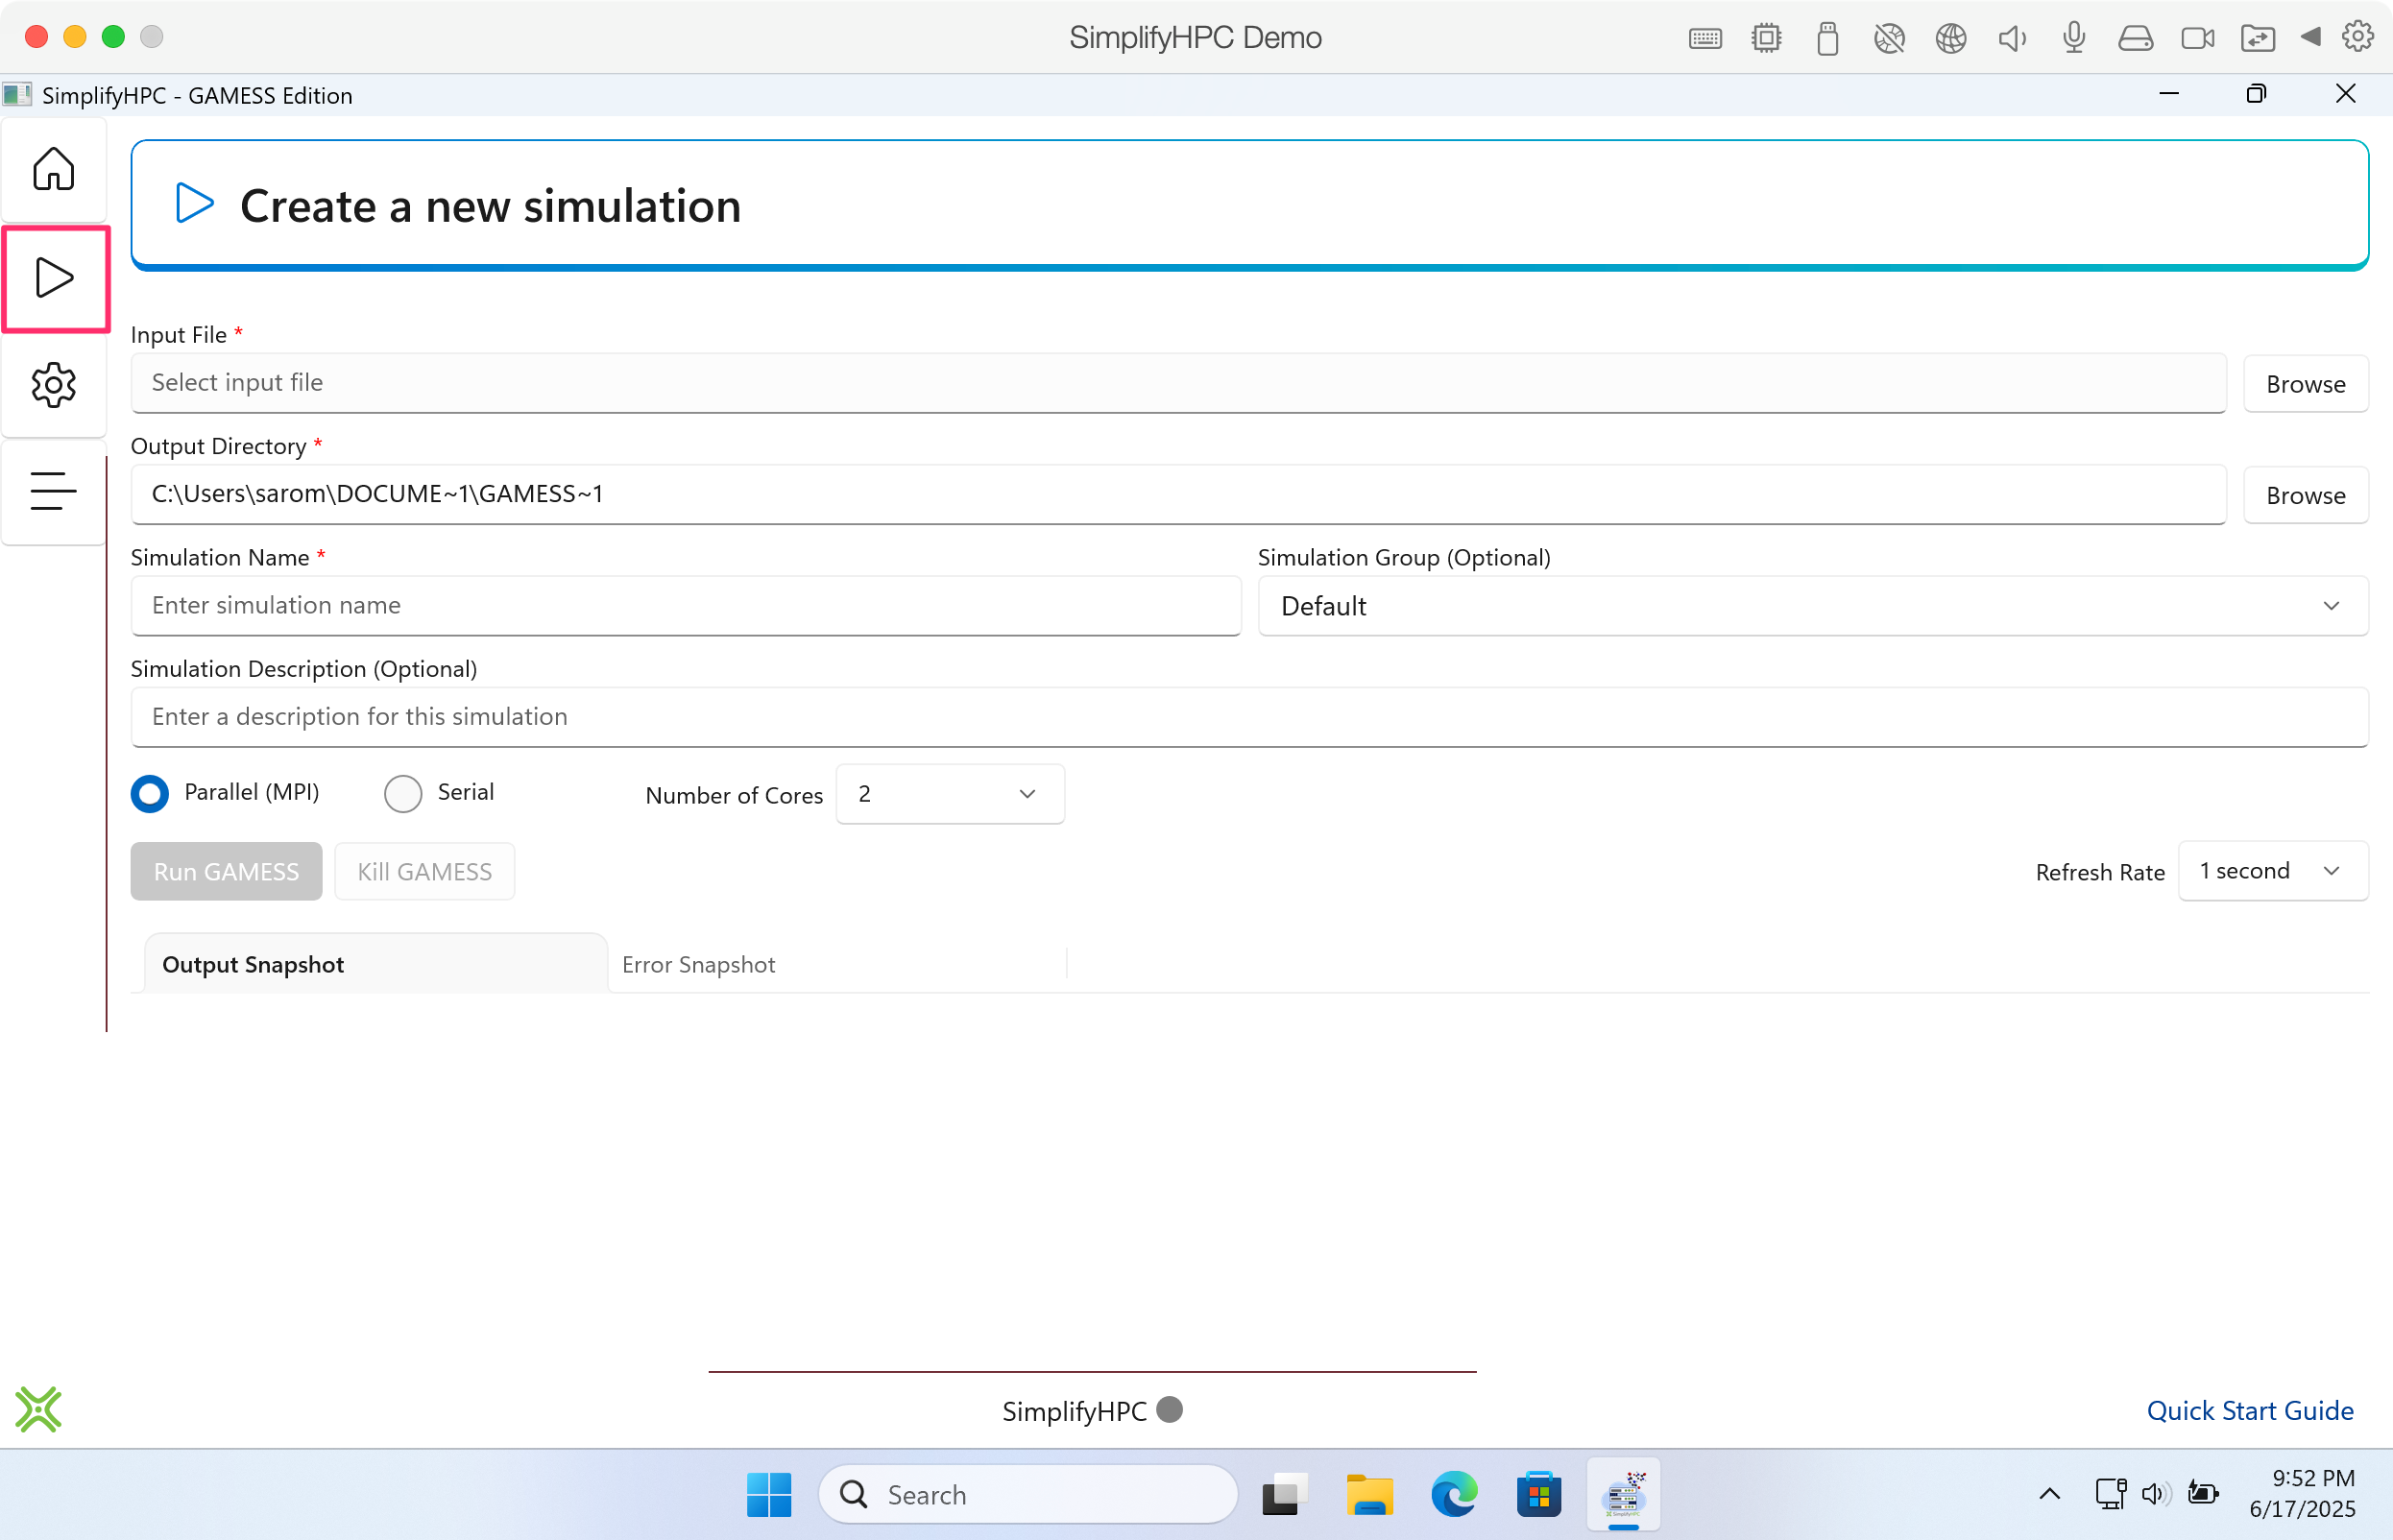
The second side navigation tab (play icon), is the Create a new simulation page. This page allows users to set up and run new GAMESS simulations.
Click image to enlarge in a new tab/window
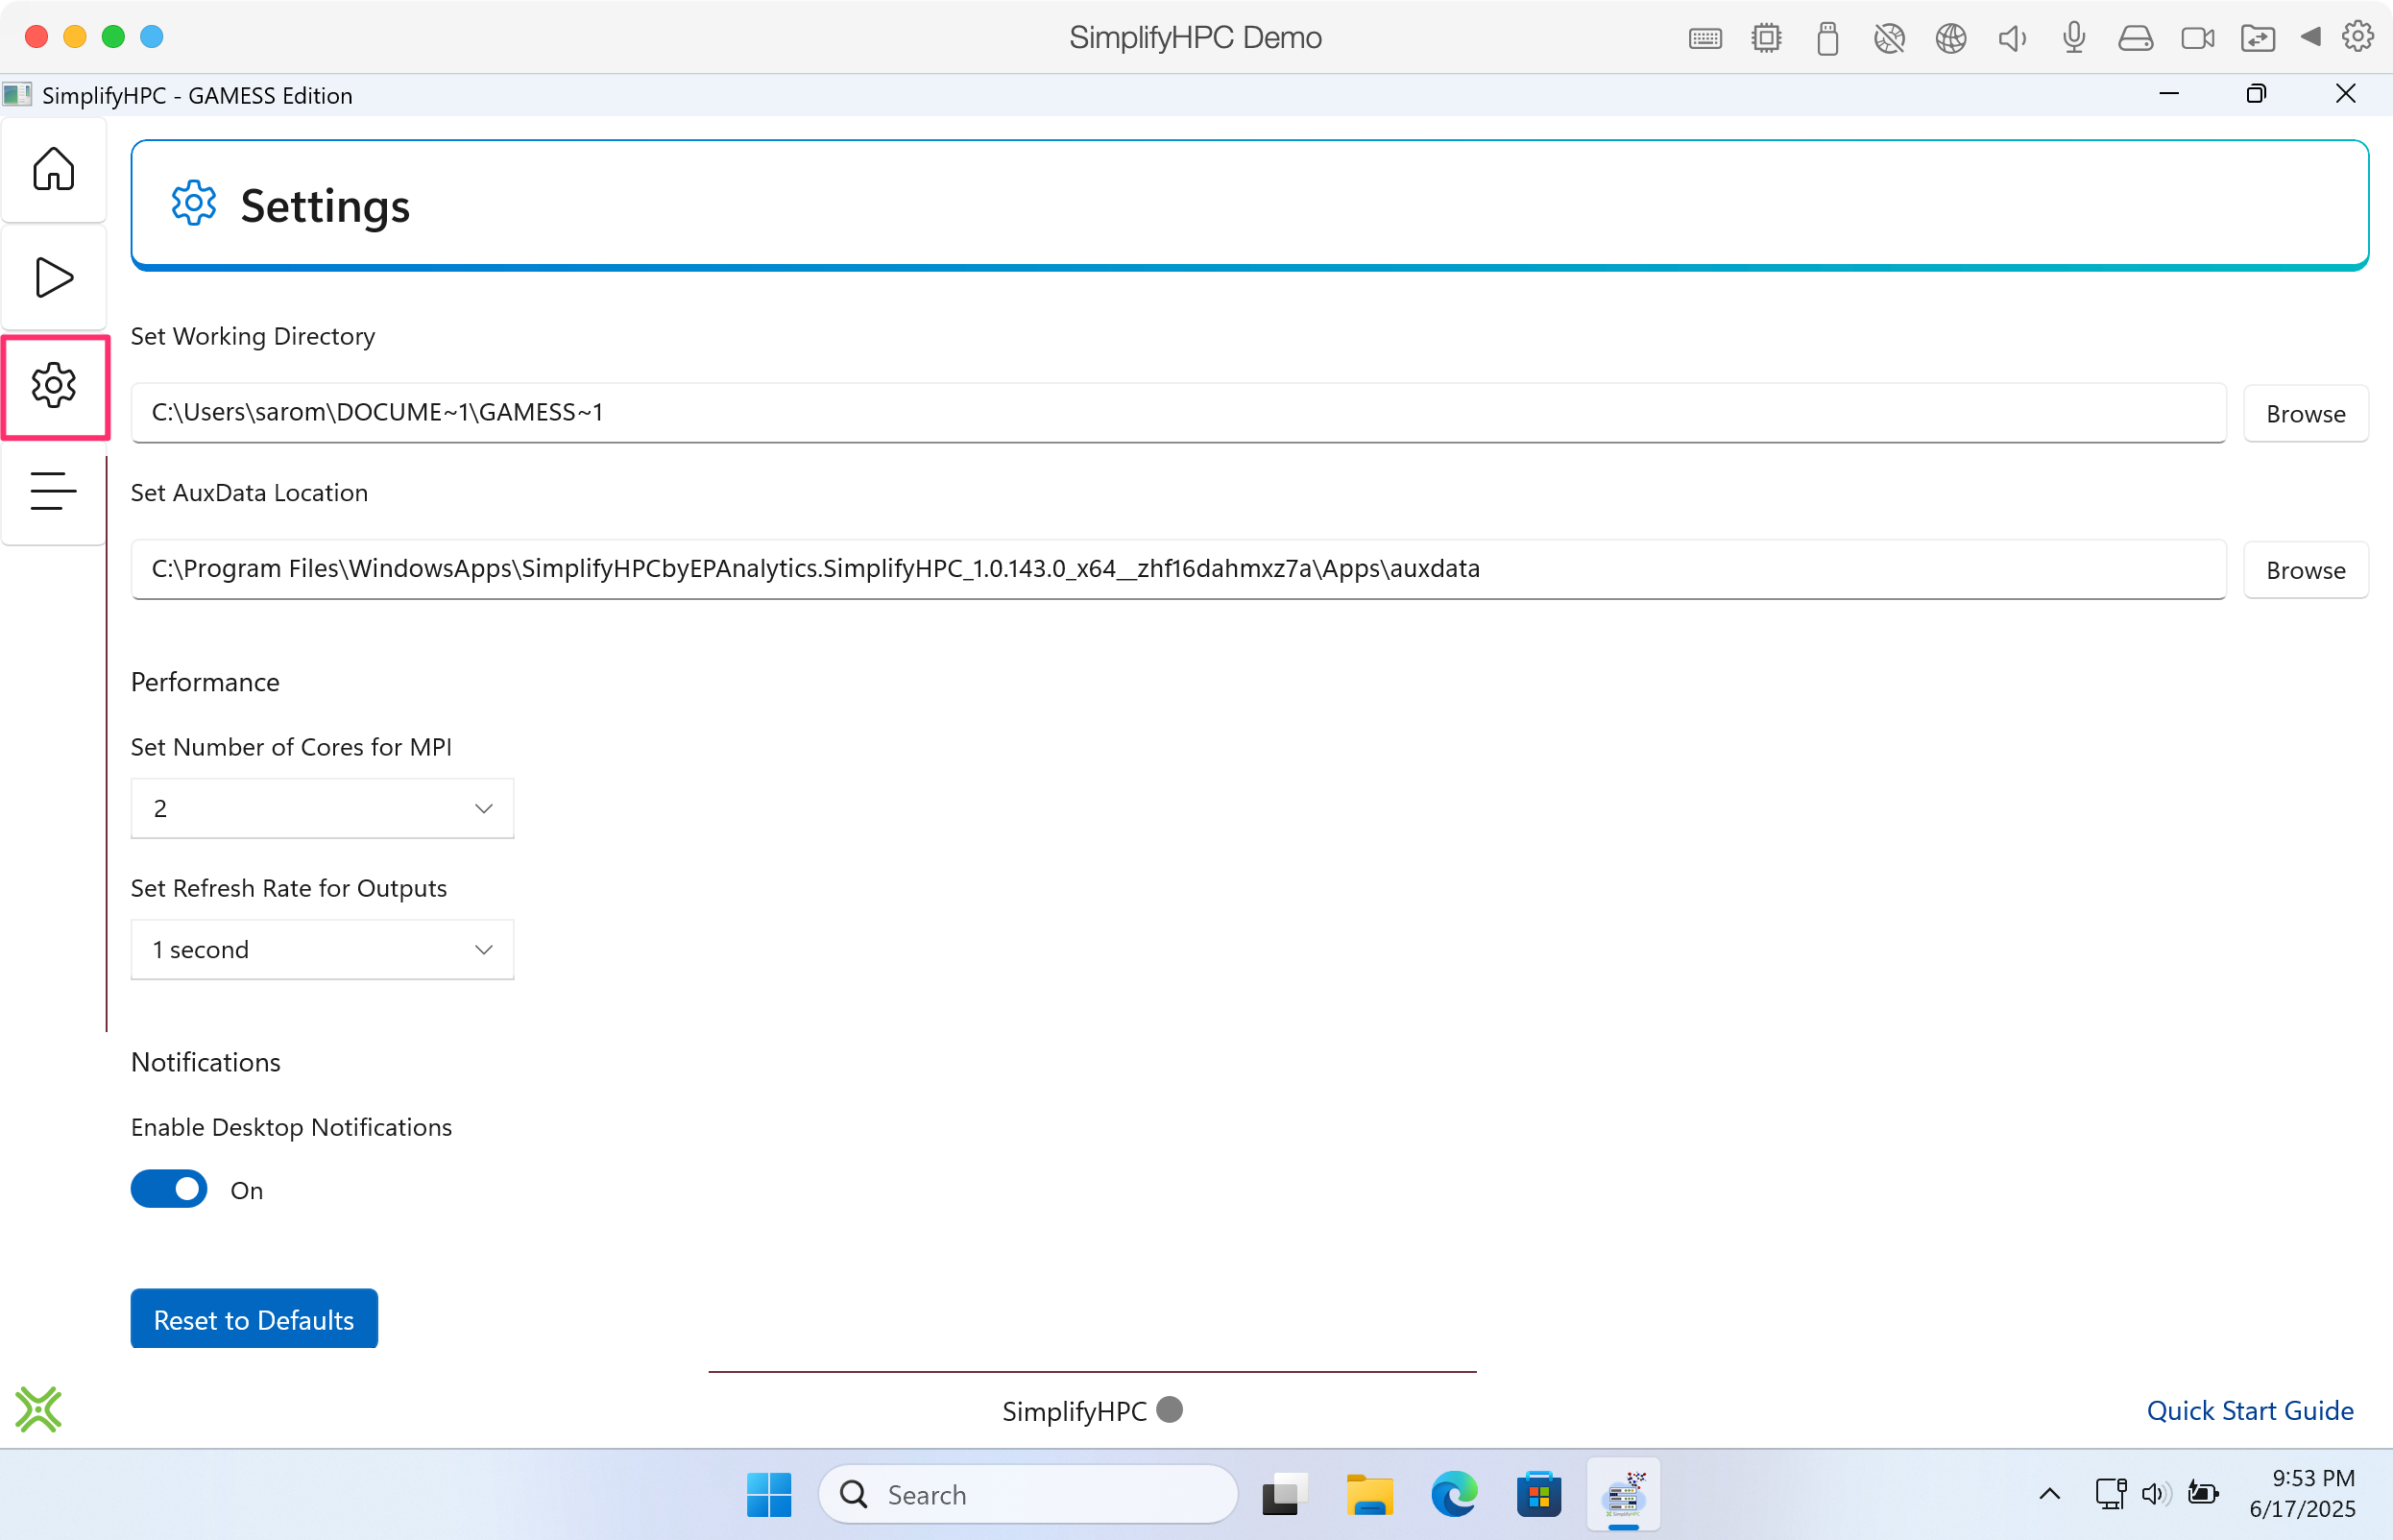
The third side navigation tab (gear icon), is the Settings page. Users can configure key preferences for running and monitoring GAMESS simulations.
Click image to enlarge in a new tab/window
Continued Settings page.
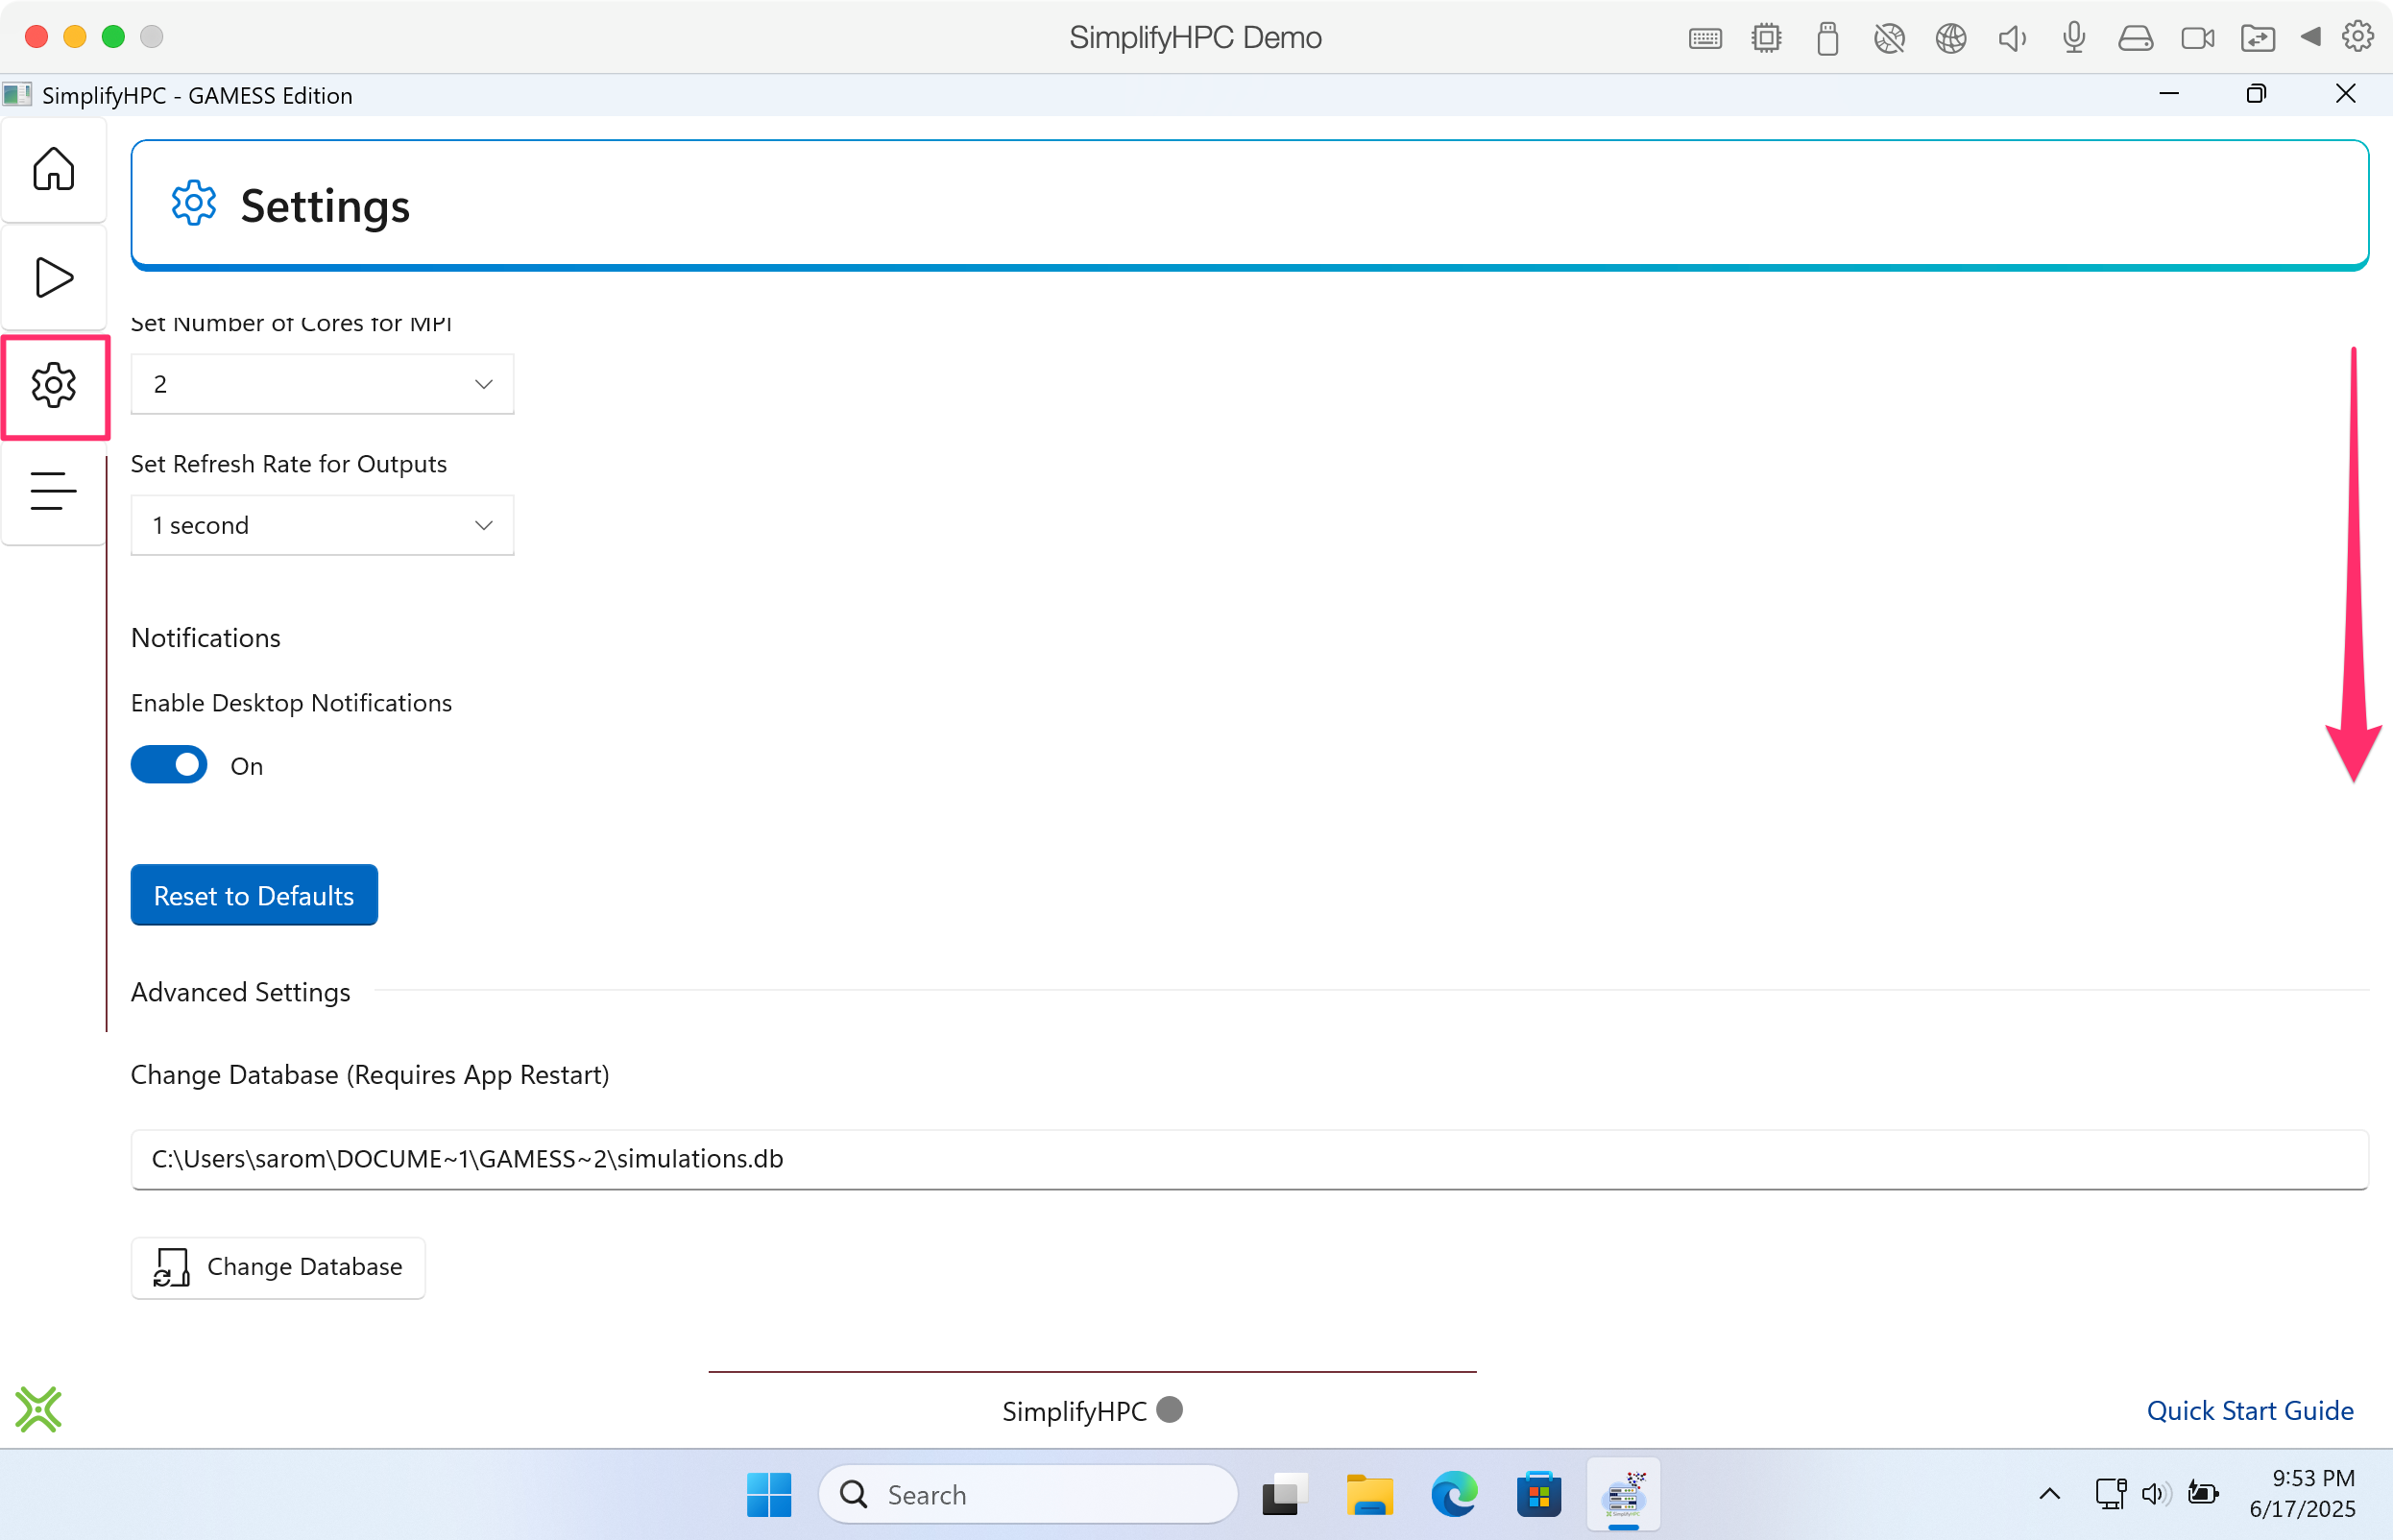
Click image to enlarge in a new tab/window
The last side navigation tab (hamburger icon), is the About page. This page allows users to submit a bug report via email and learn more about the features available in this version of SimplifyHPC - GAMESS Edition
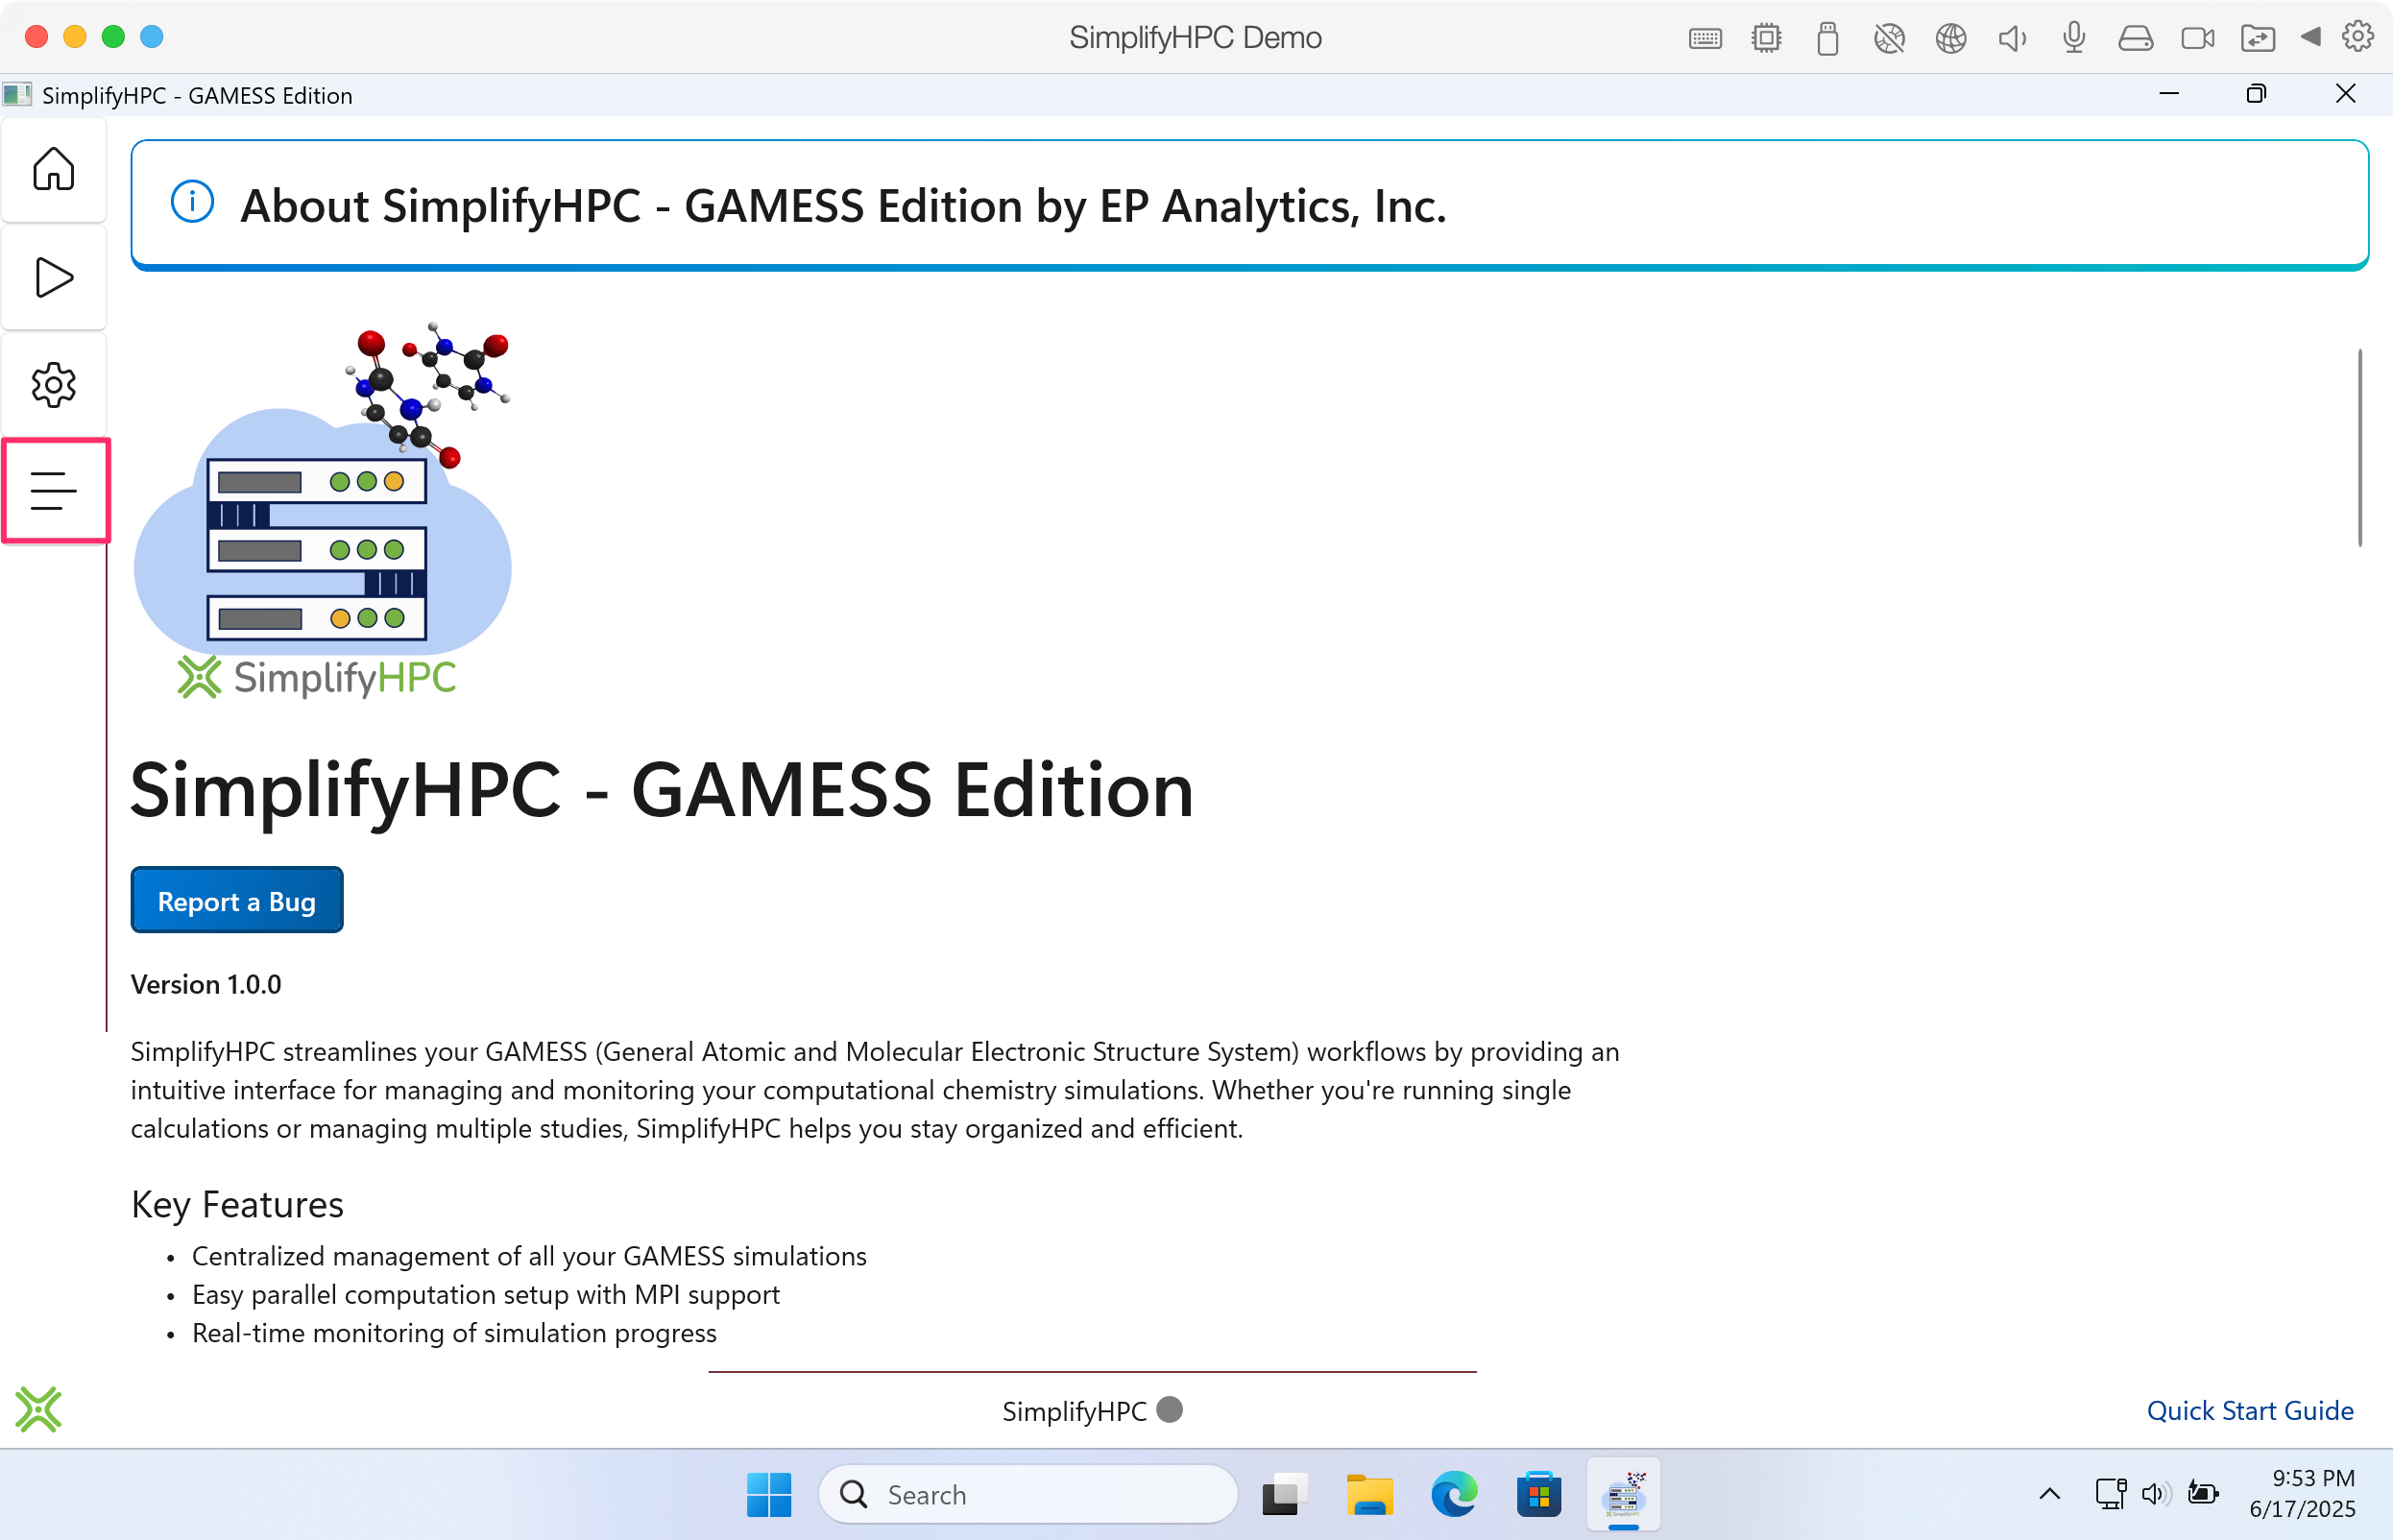
Click image to enlarge in a new tab/window
Step 15. Lets run a GAMESS simulation. The first thing we need is a GAMESS input file. Navigate your browser to the following URL:
https://raw.githubusercontent.com/gms-bbg/test-validation/refs/heads/master/travis-ci/parallel/exam01.inp
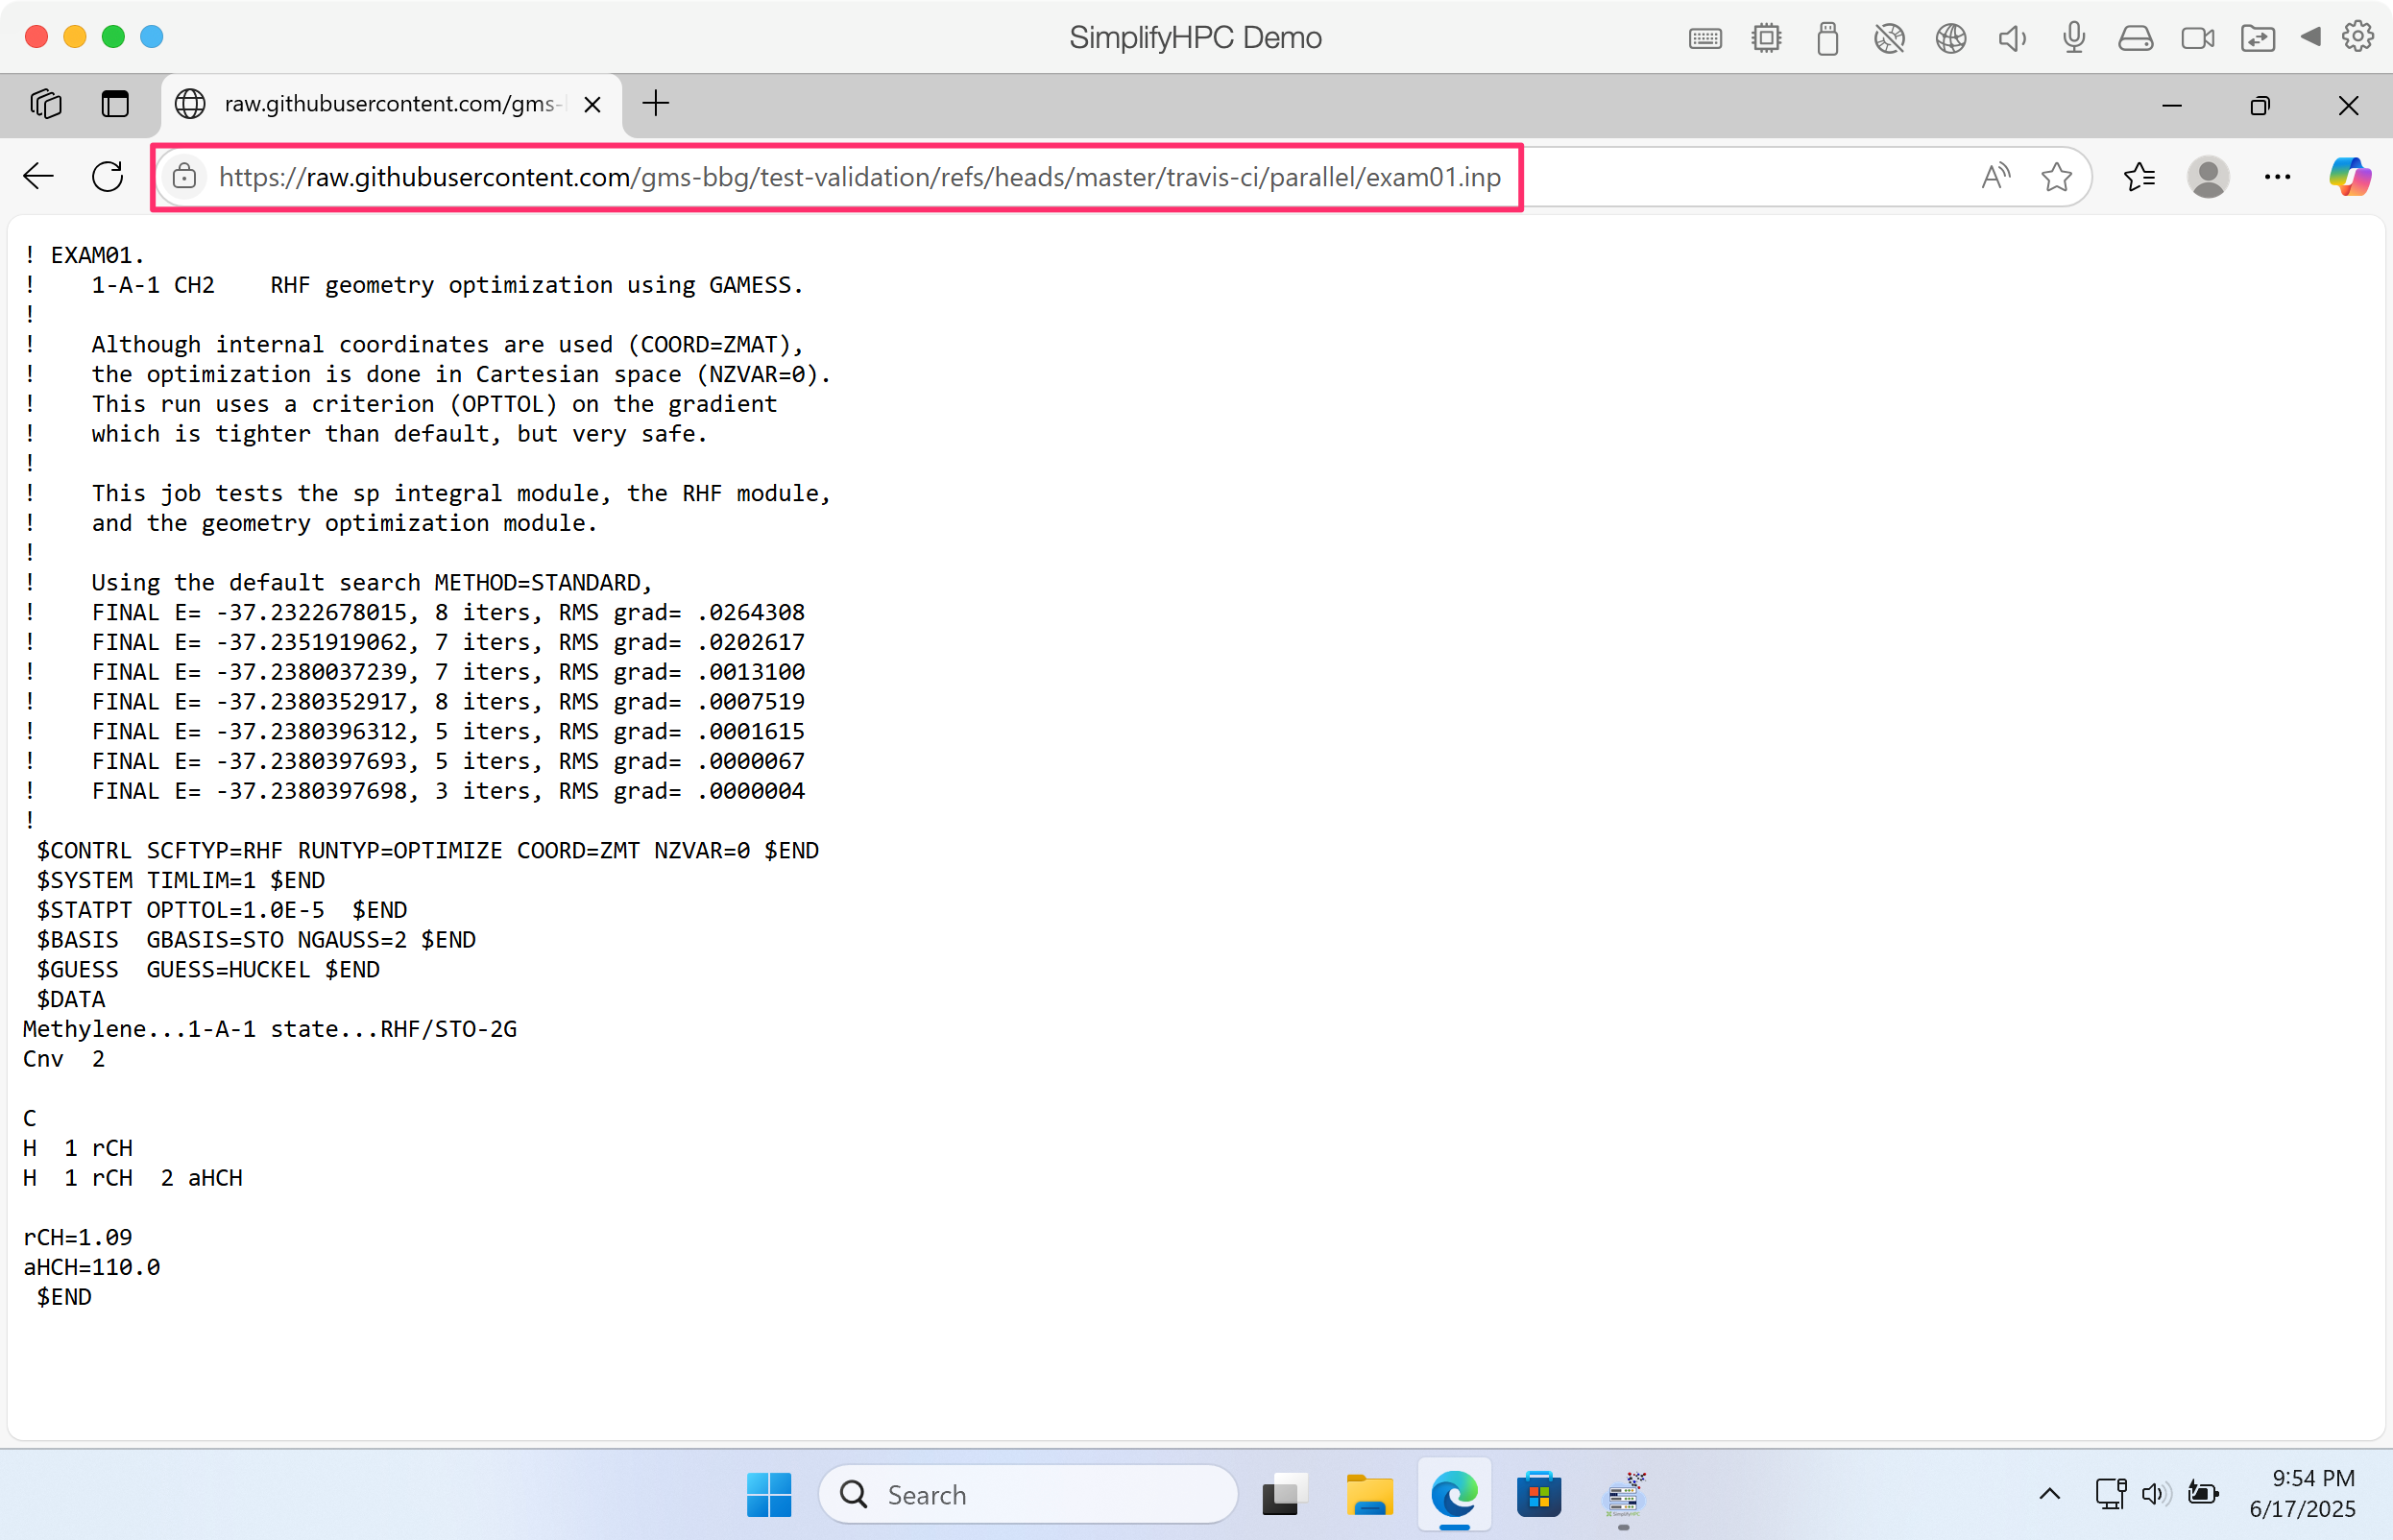
Click image to enlarge in a new tab/window
Step 16. Save the input file to your computer. Be sure to save the file name as exam01.inp and the Save as type as All files (*.*). You can save this file anywhere you like - just be sure to remember the location for the following steps.
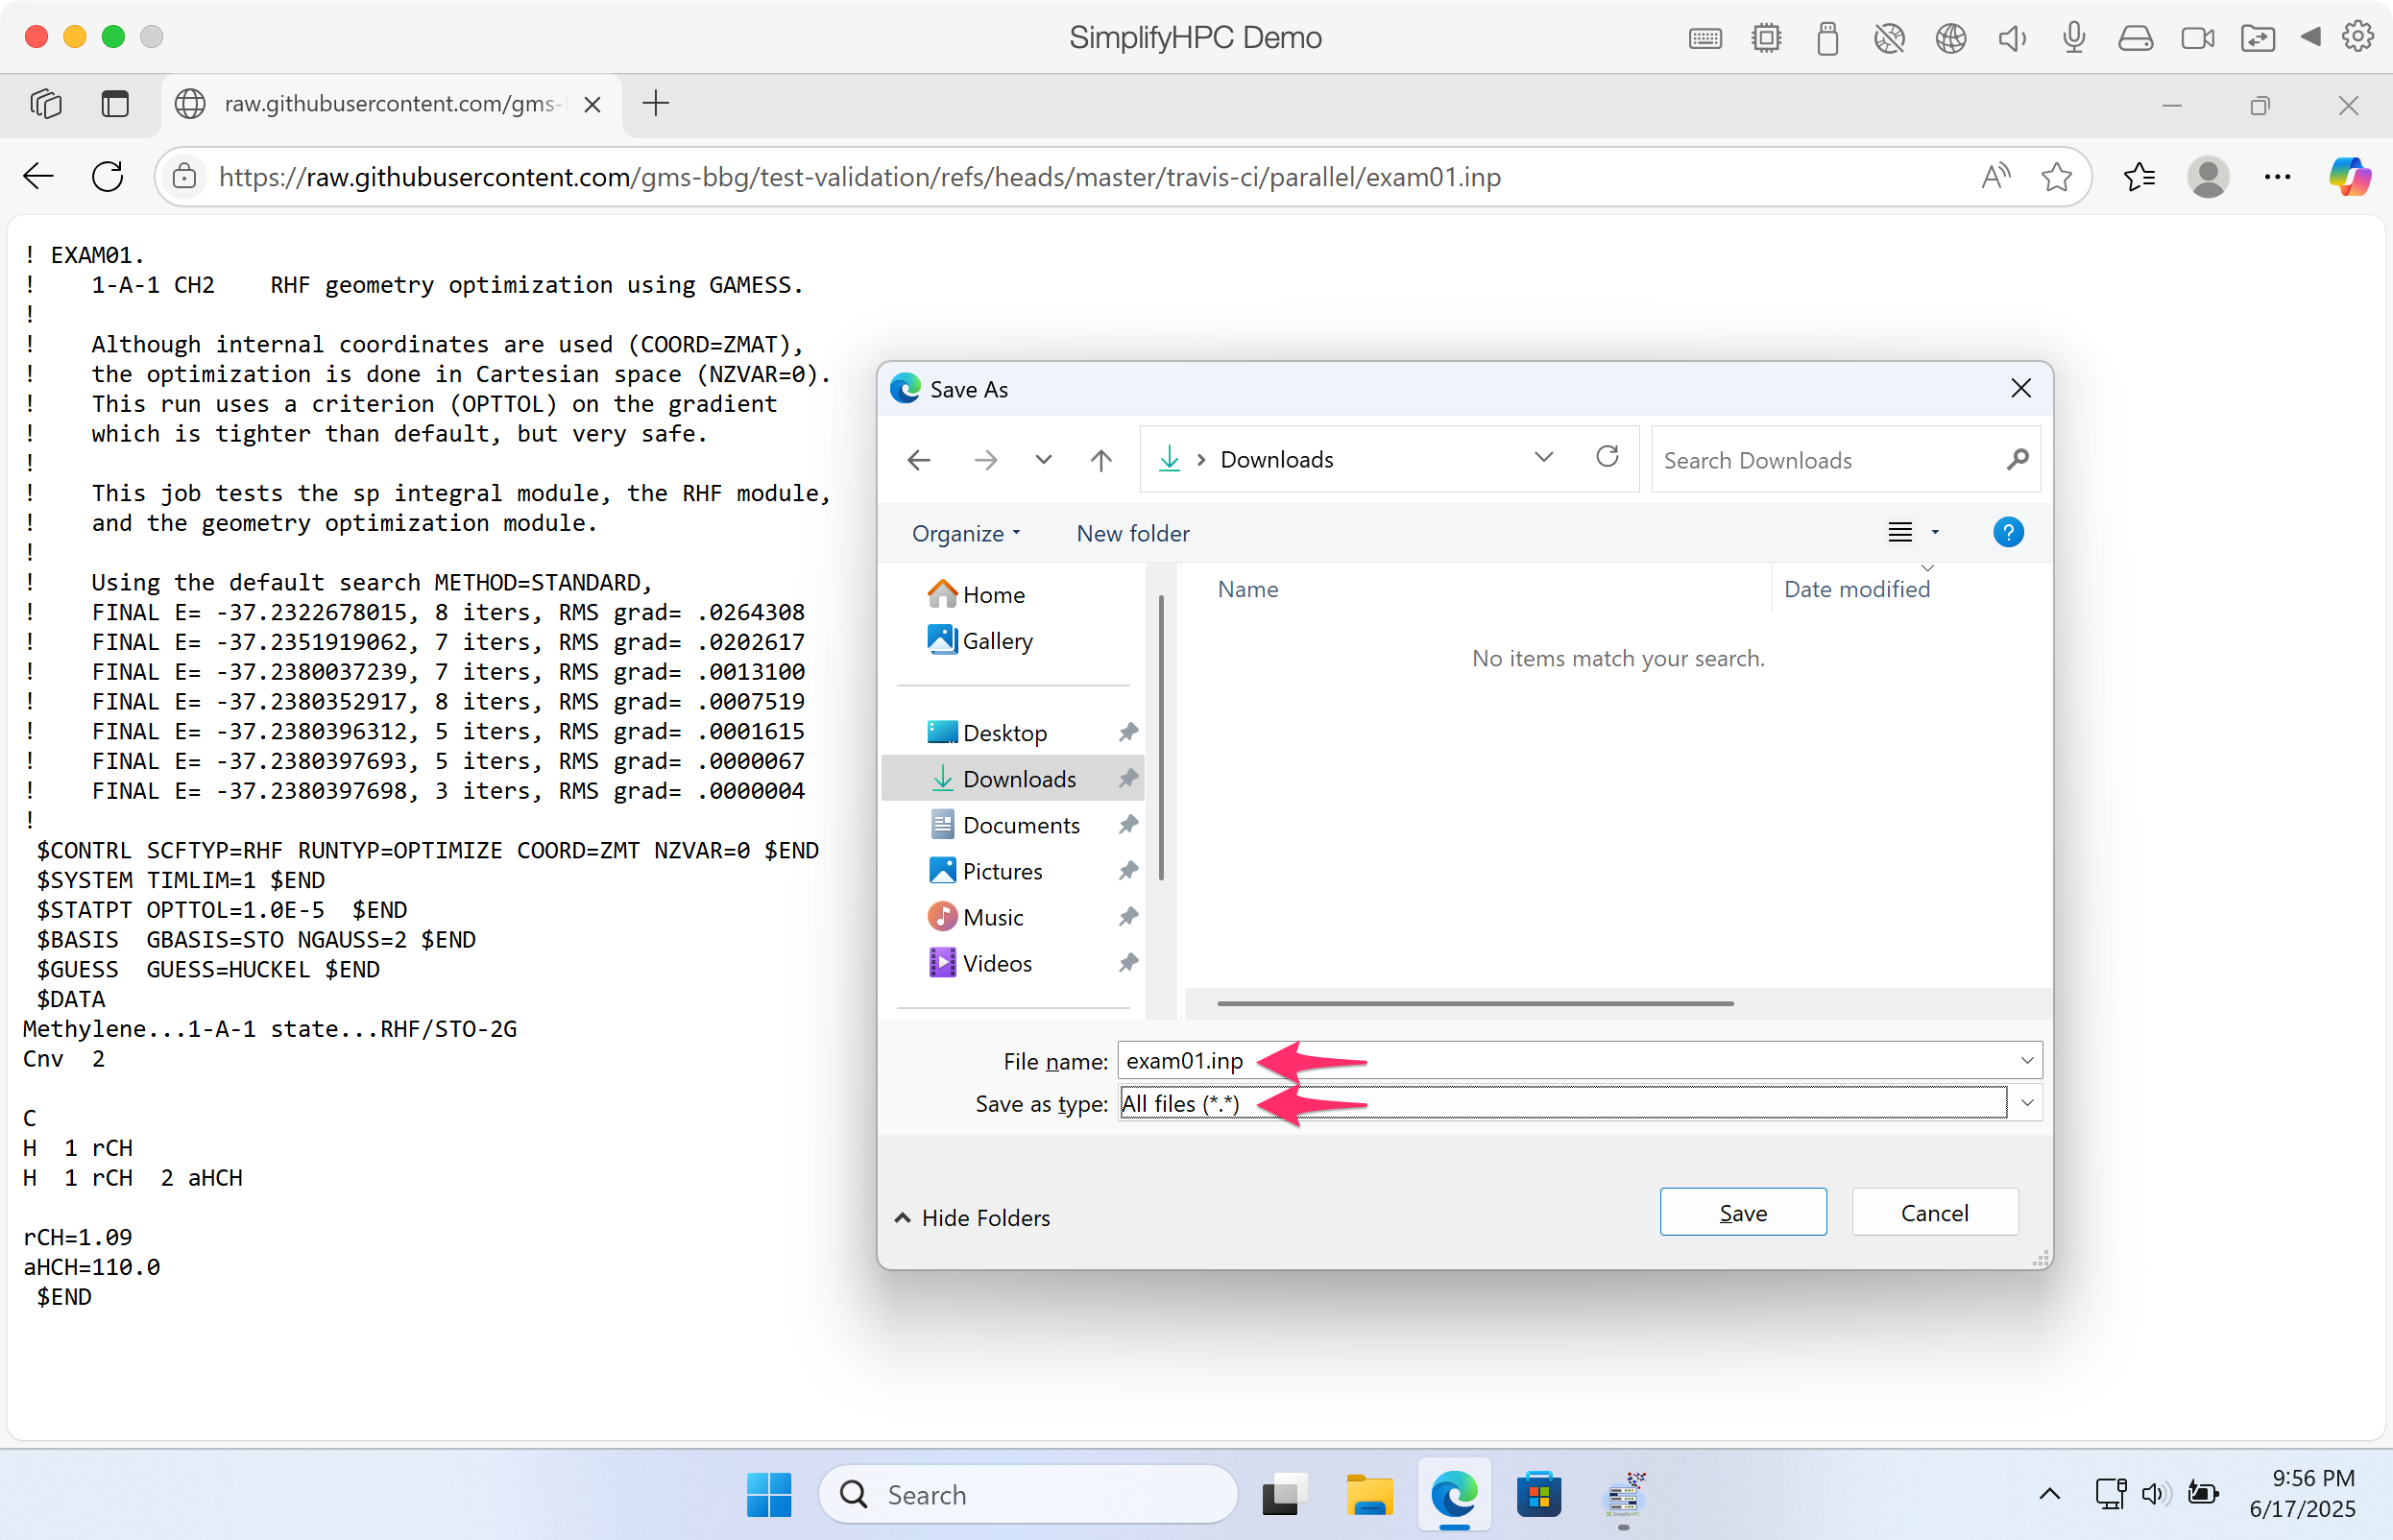
Click image to enlarge in a new tab/window
Step 17. Switch back to SimplifyHPC - GAMESS Edition and navigate to the Create a new simulation page. Click on the first Browse button to select an input file you want to run.

Click image to enlarge in a new tab/window
Step 18. Navigate to the input file you just downloaded.
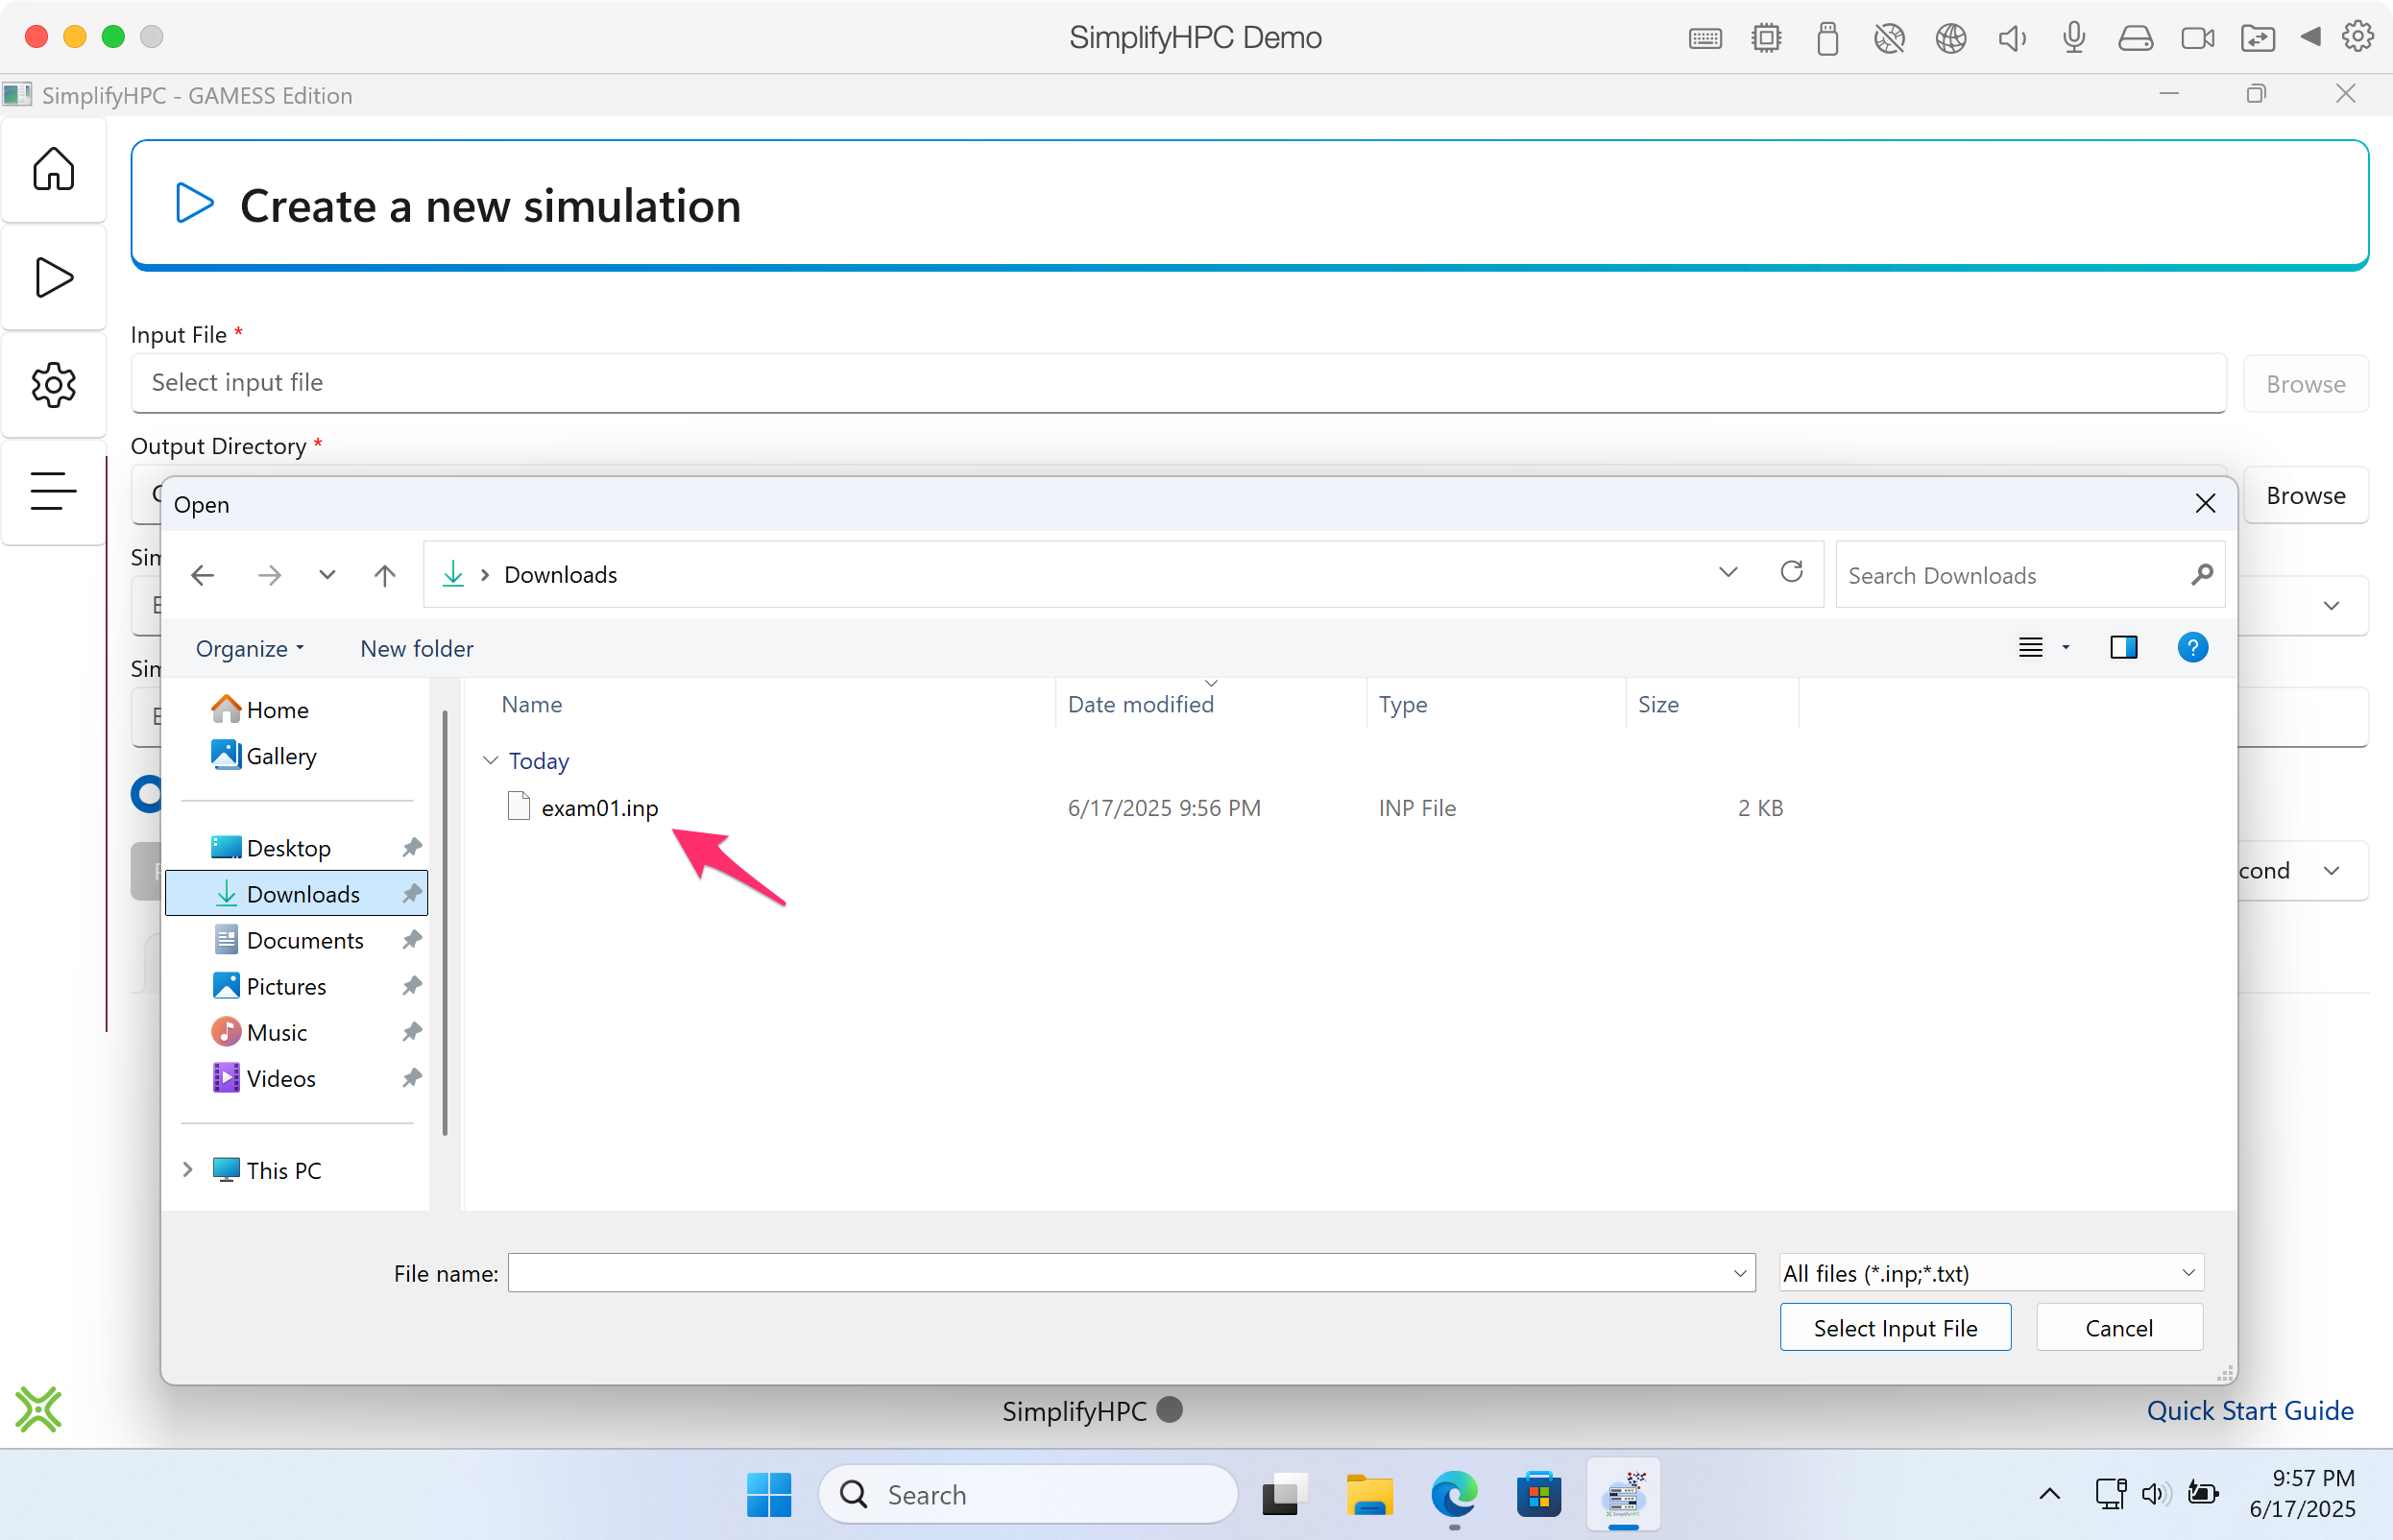
Click image to enlarge in a new tab/window
Step 19. Select the input file in the file browser and click on Select Input File.
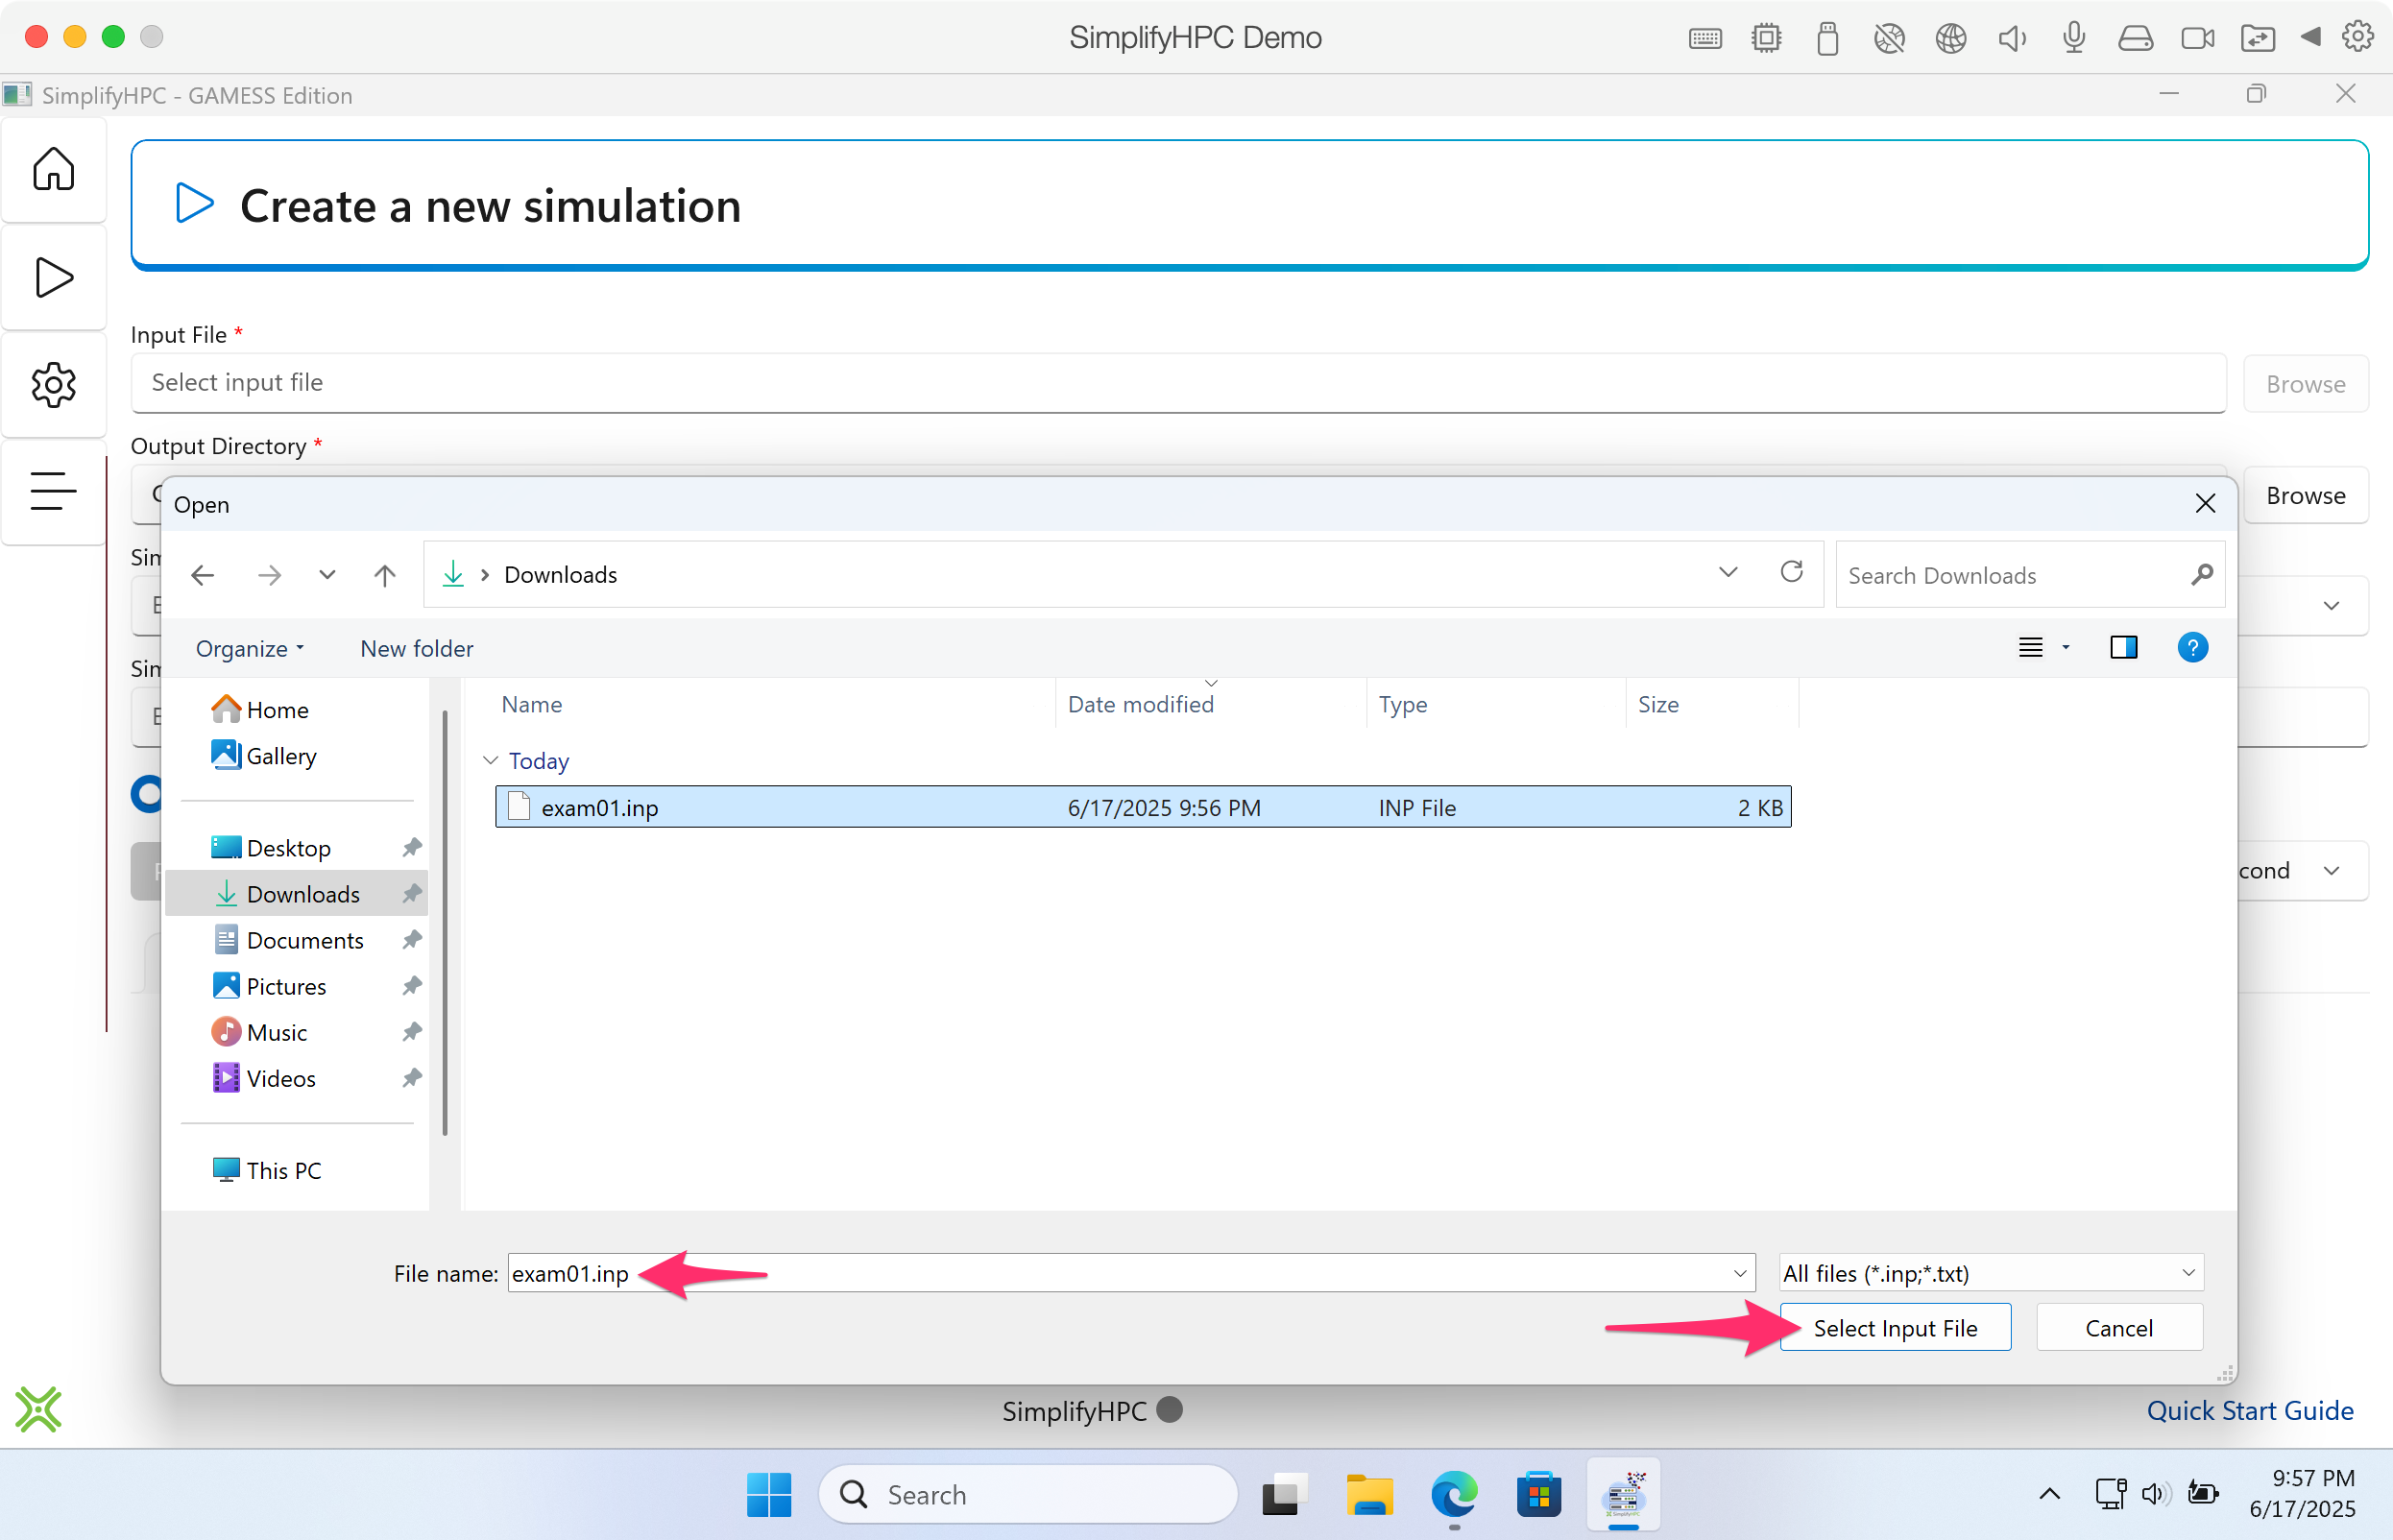
Click image to enlarge in a new tab/window
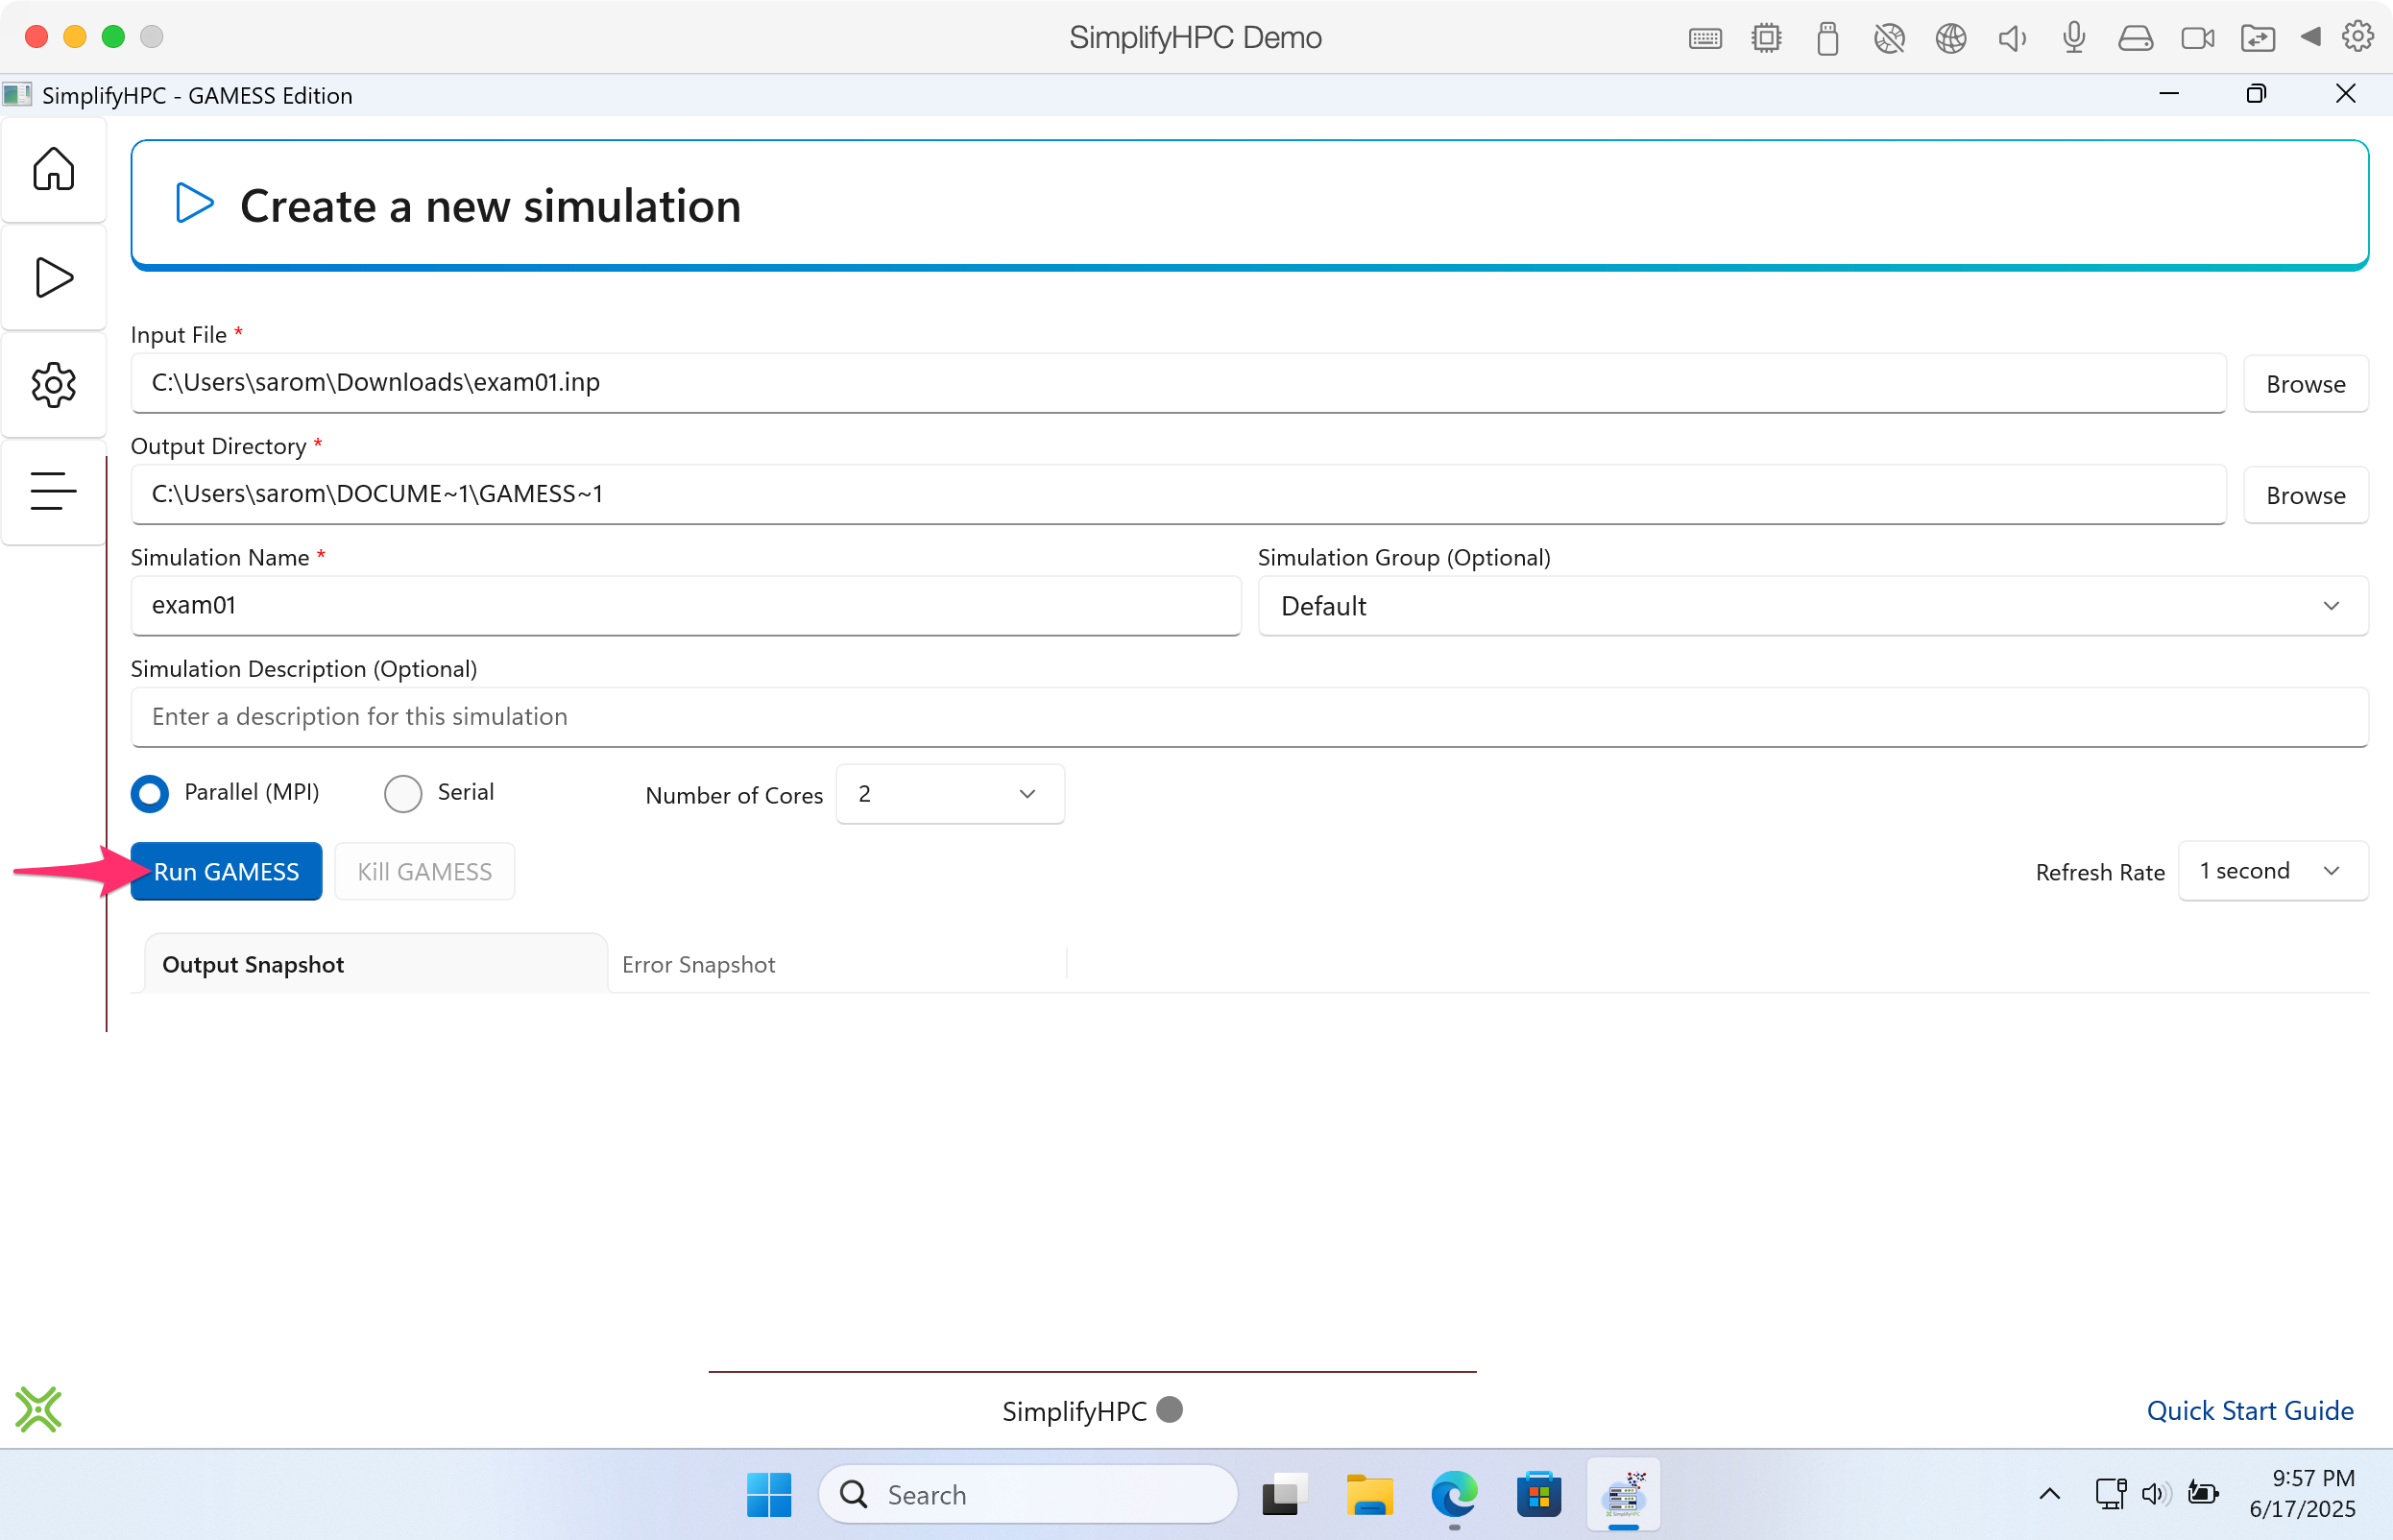
Step 20. This input file can run in parallel. So we do not need to specify anything else since the default settings are configured to run GAMESS in parallel (using 2 cores). When you are ready - click on Run GAMESS to start the simulation.
Click image to enlarge in a new tab/window
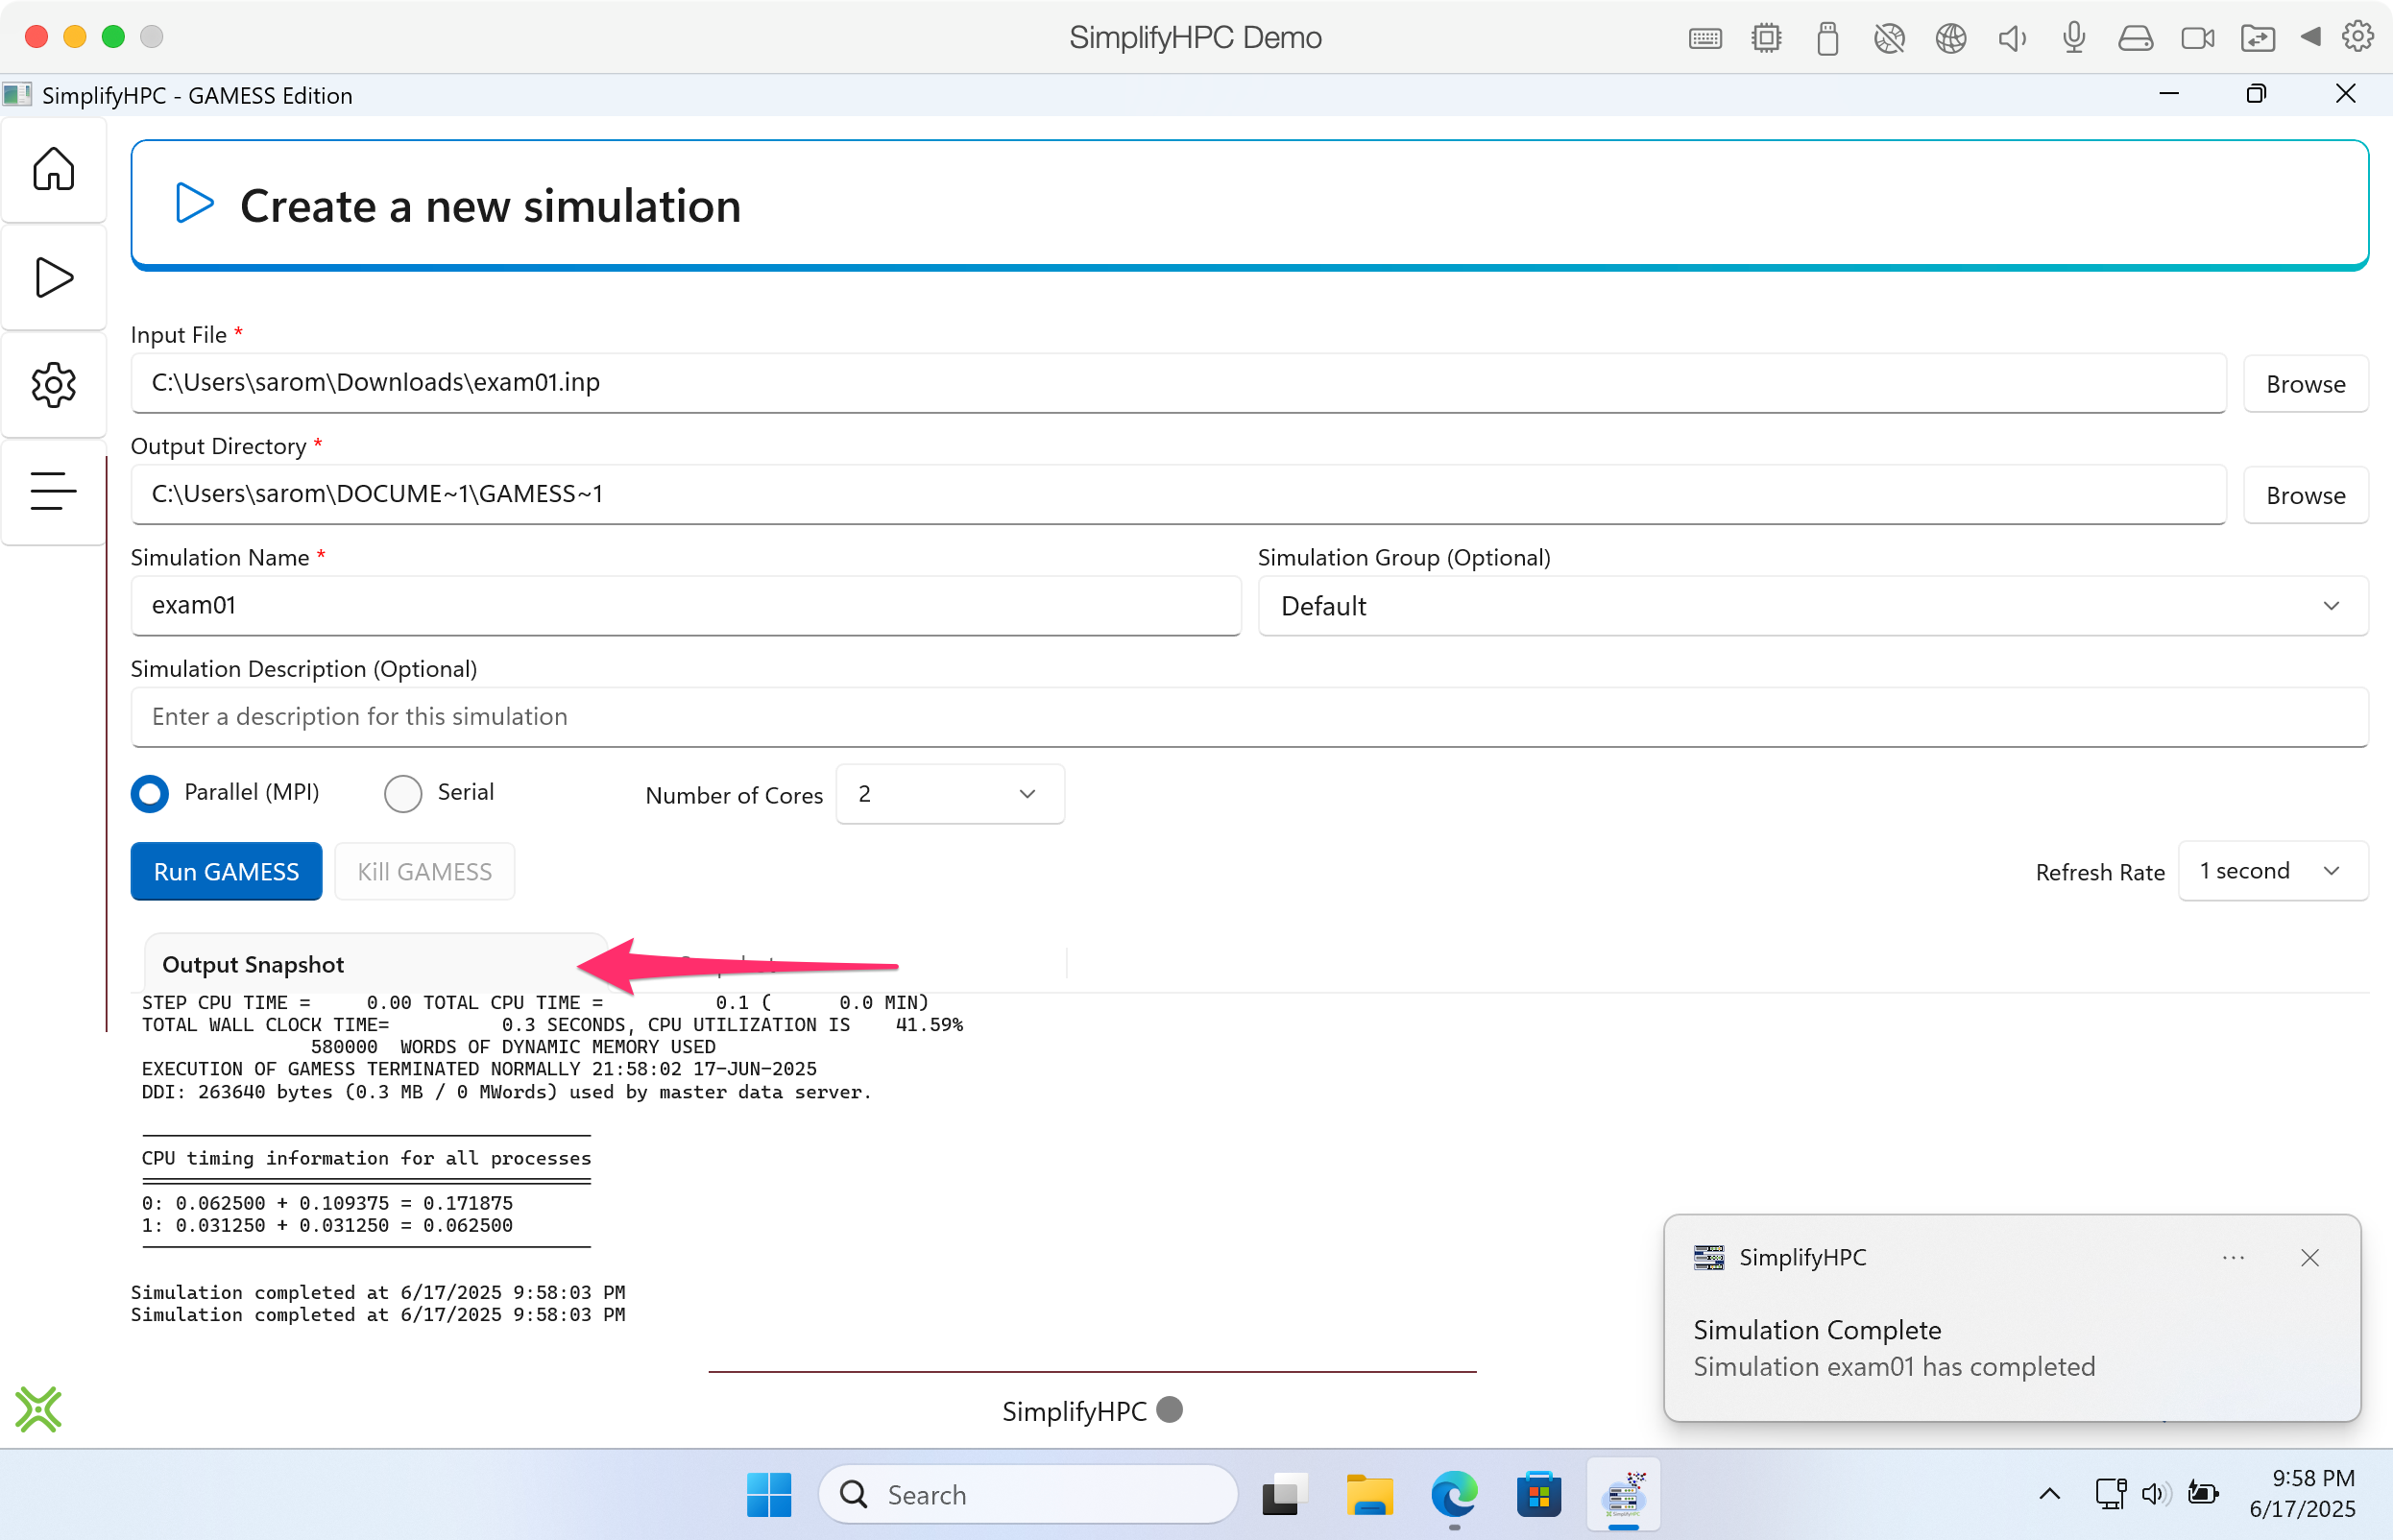
You should see output of the run under the Output Snapshot tab. You will also receive a notification when your simulation is complete.
Click image to enlarge in a new tab/window
Step 21. Once your simulation completes, you can switch to the Browse previous simulations page (home icon), to perform additional actions such as opening the log file or the simulation directory.
Click image to enlarge in a new tab/window
Step 22. Click on the ... under the Action column and select Open Output File. This will open the output file with Notepad (unless you have already configured the .log file extension with a different application).
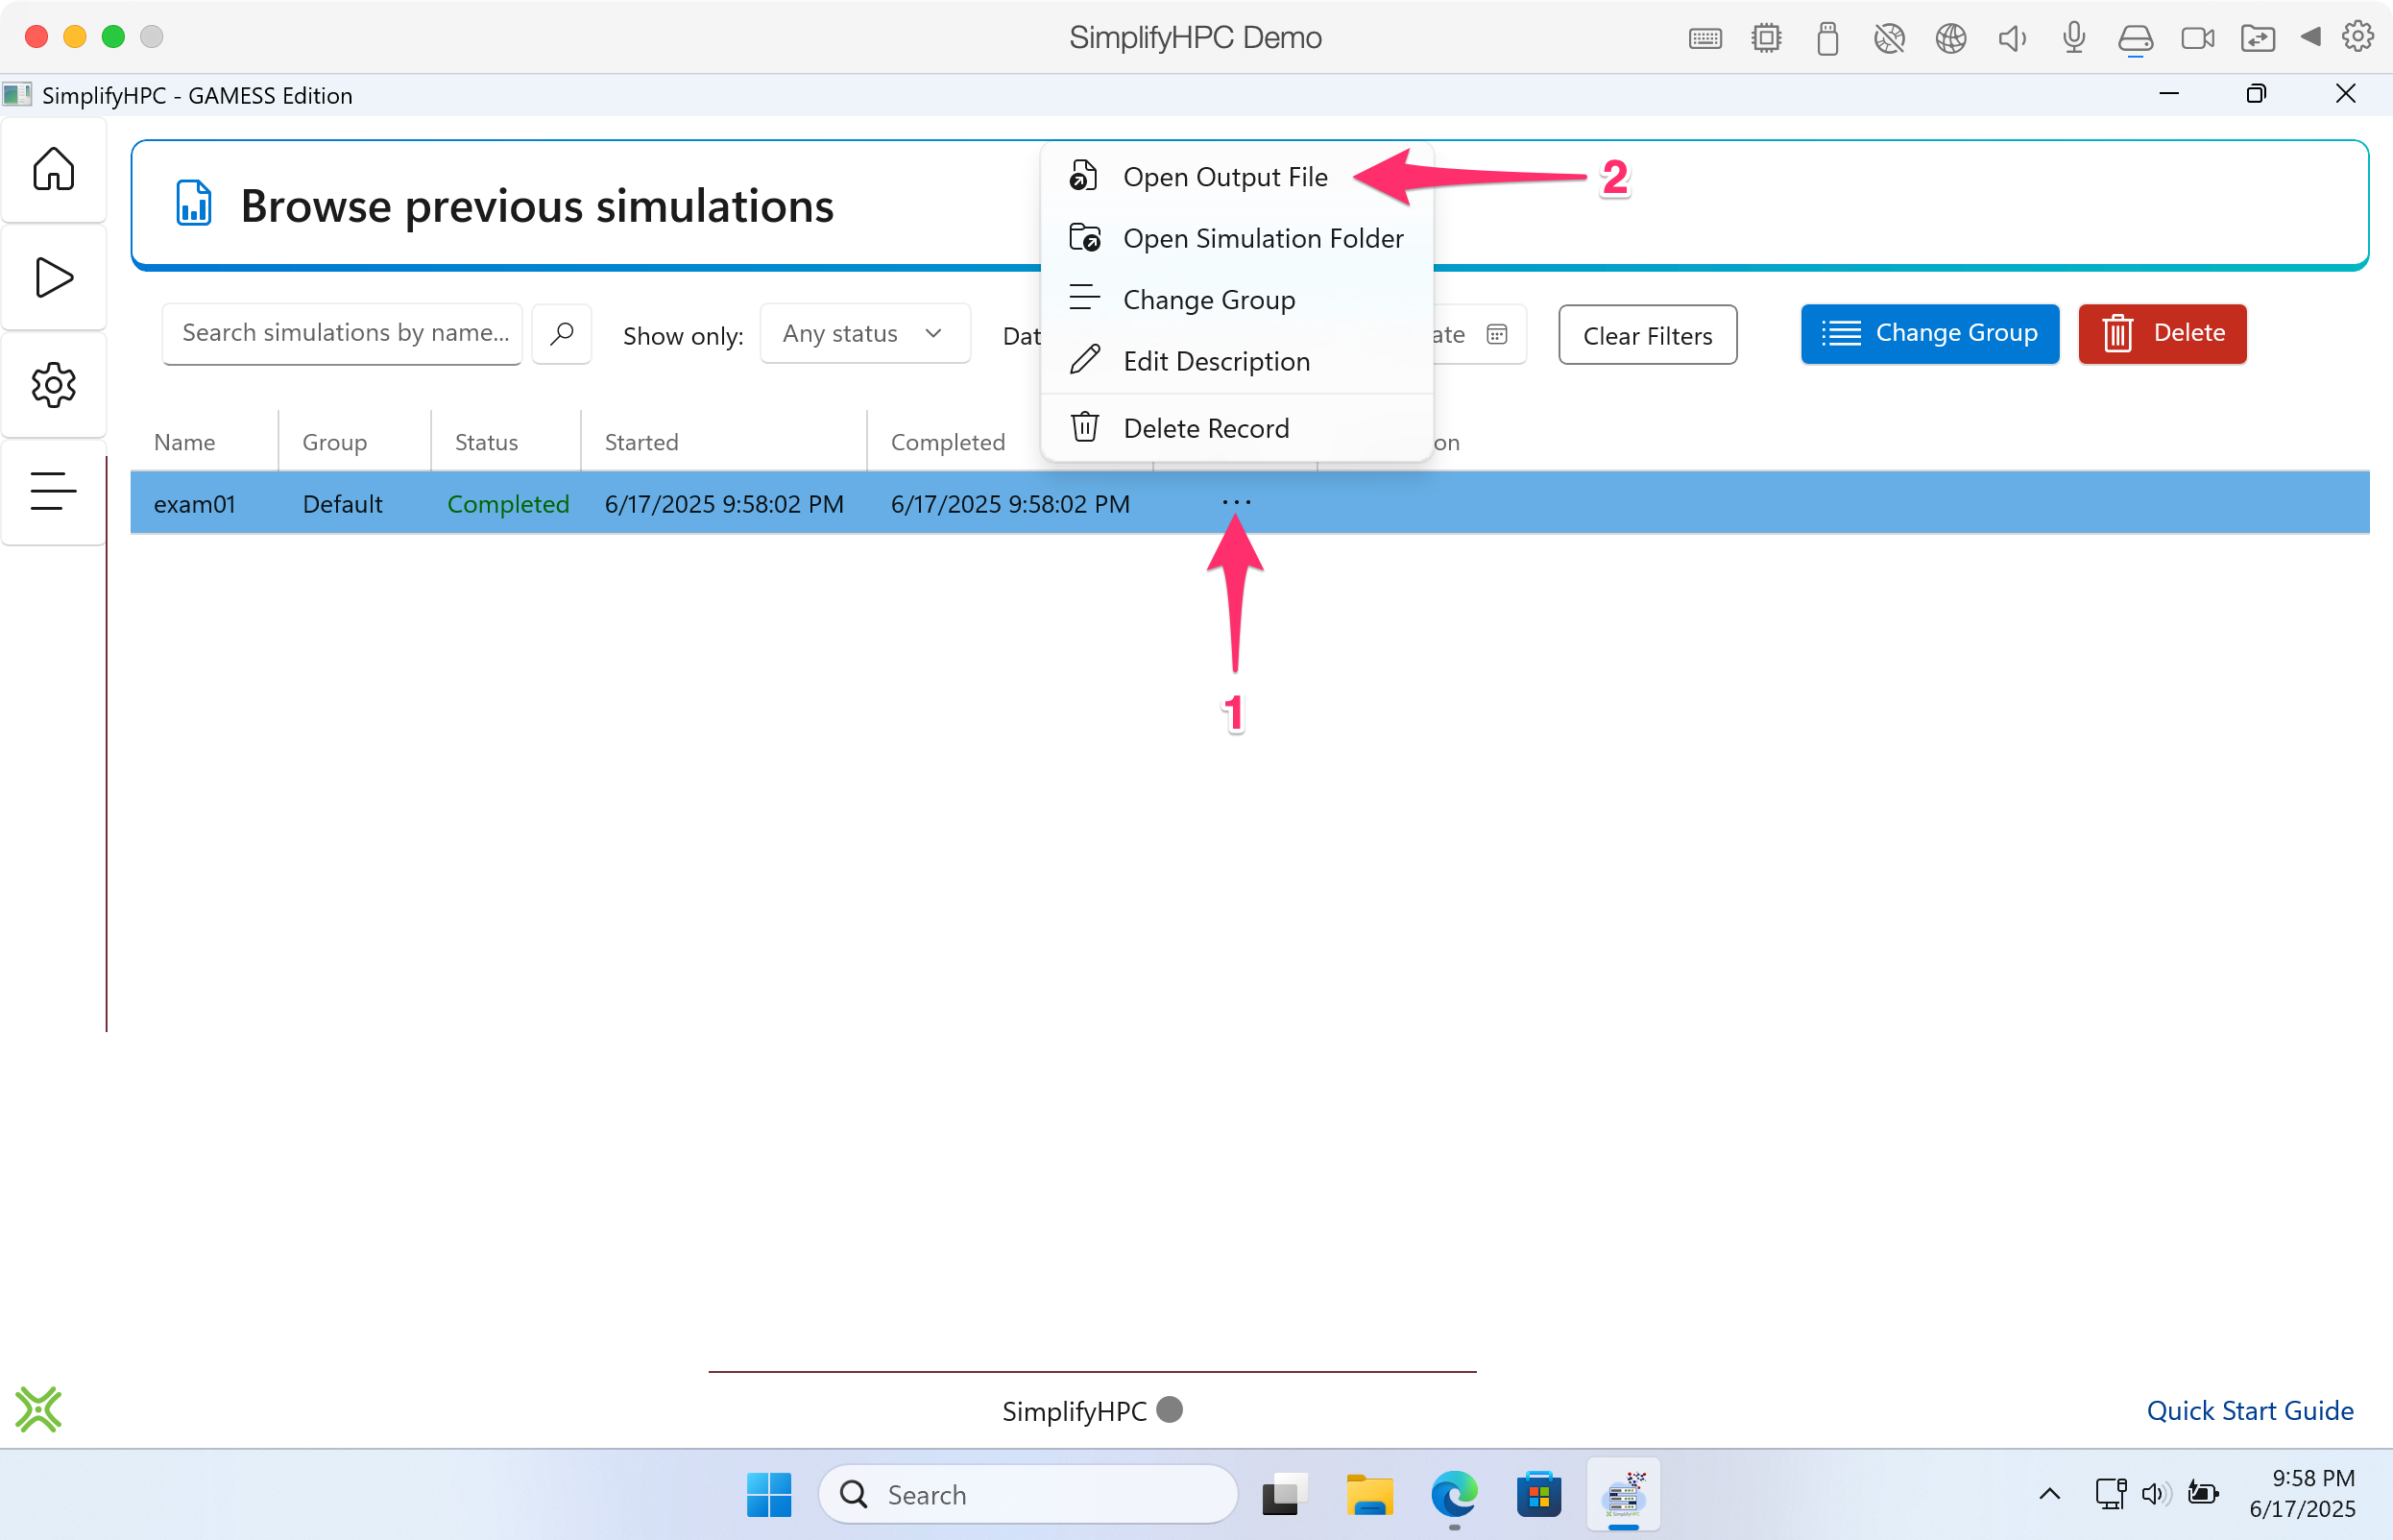
Click image to enlarge in a new tab/window
Step 23. Scroll to the bottom of the file.
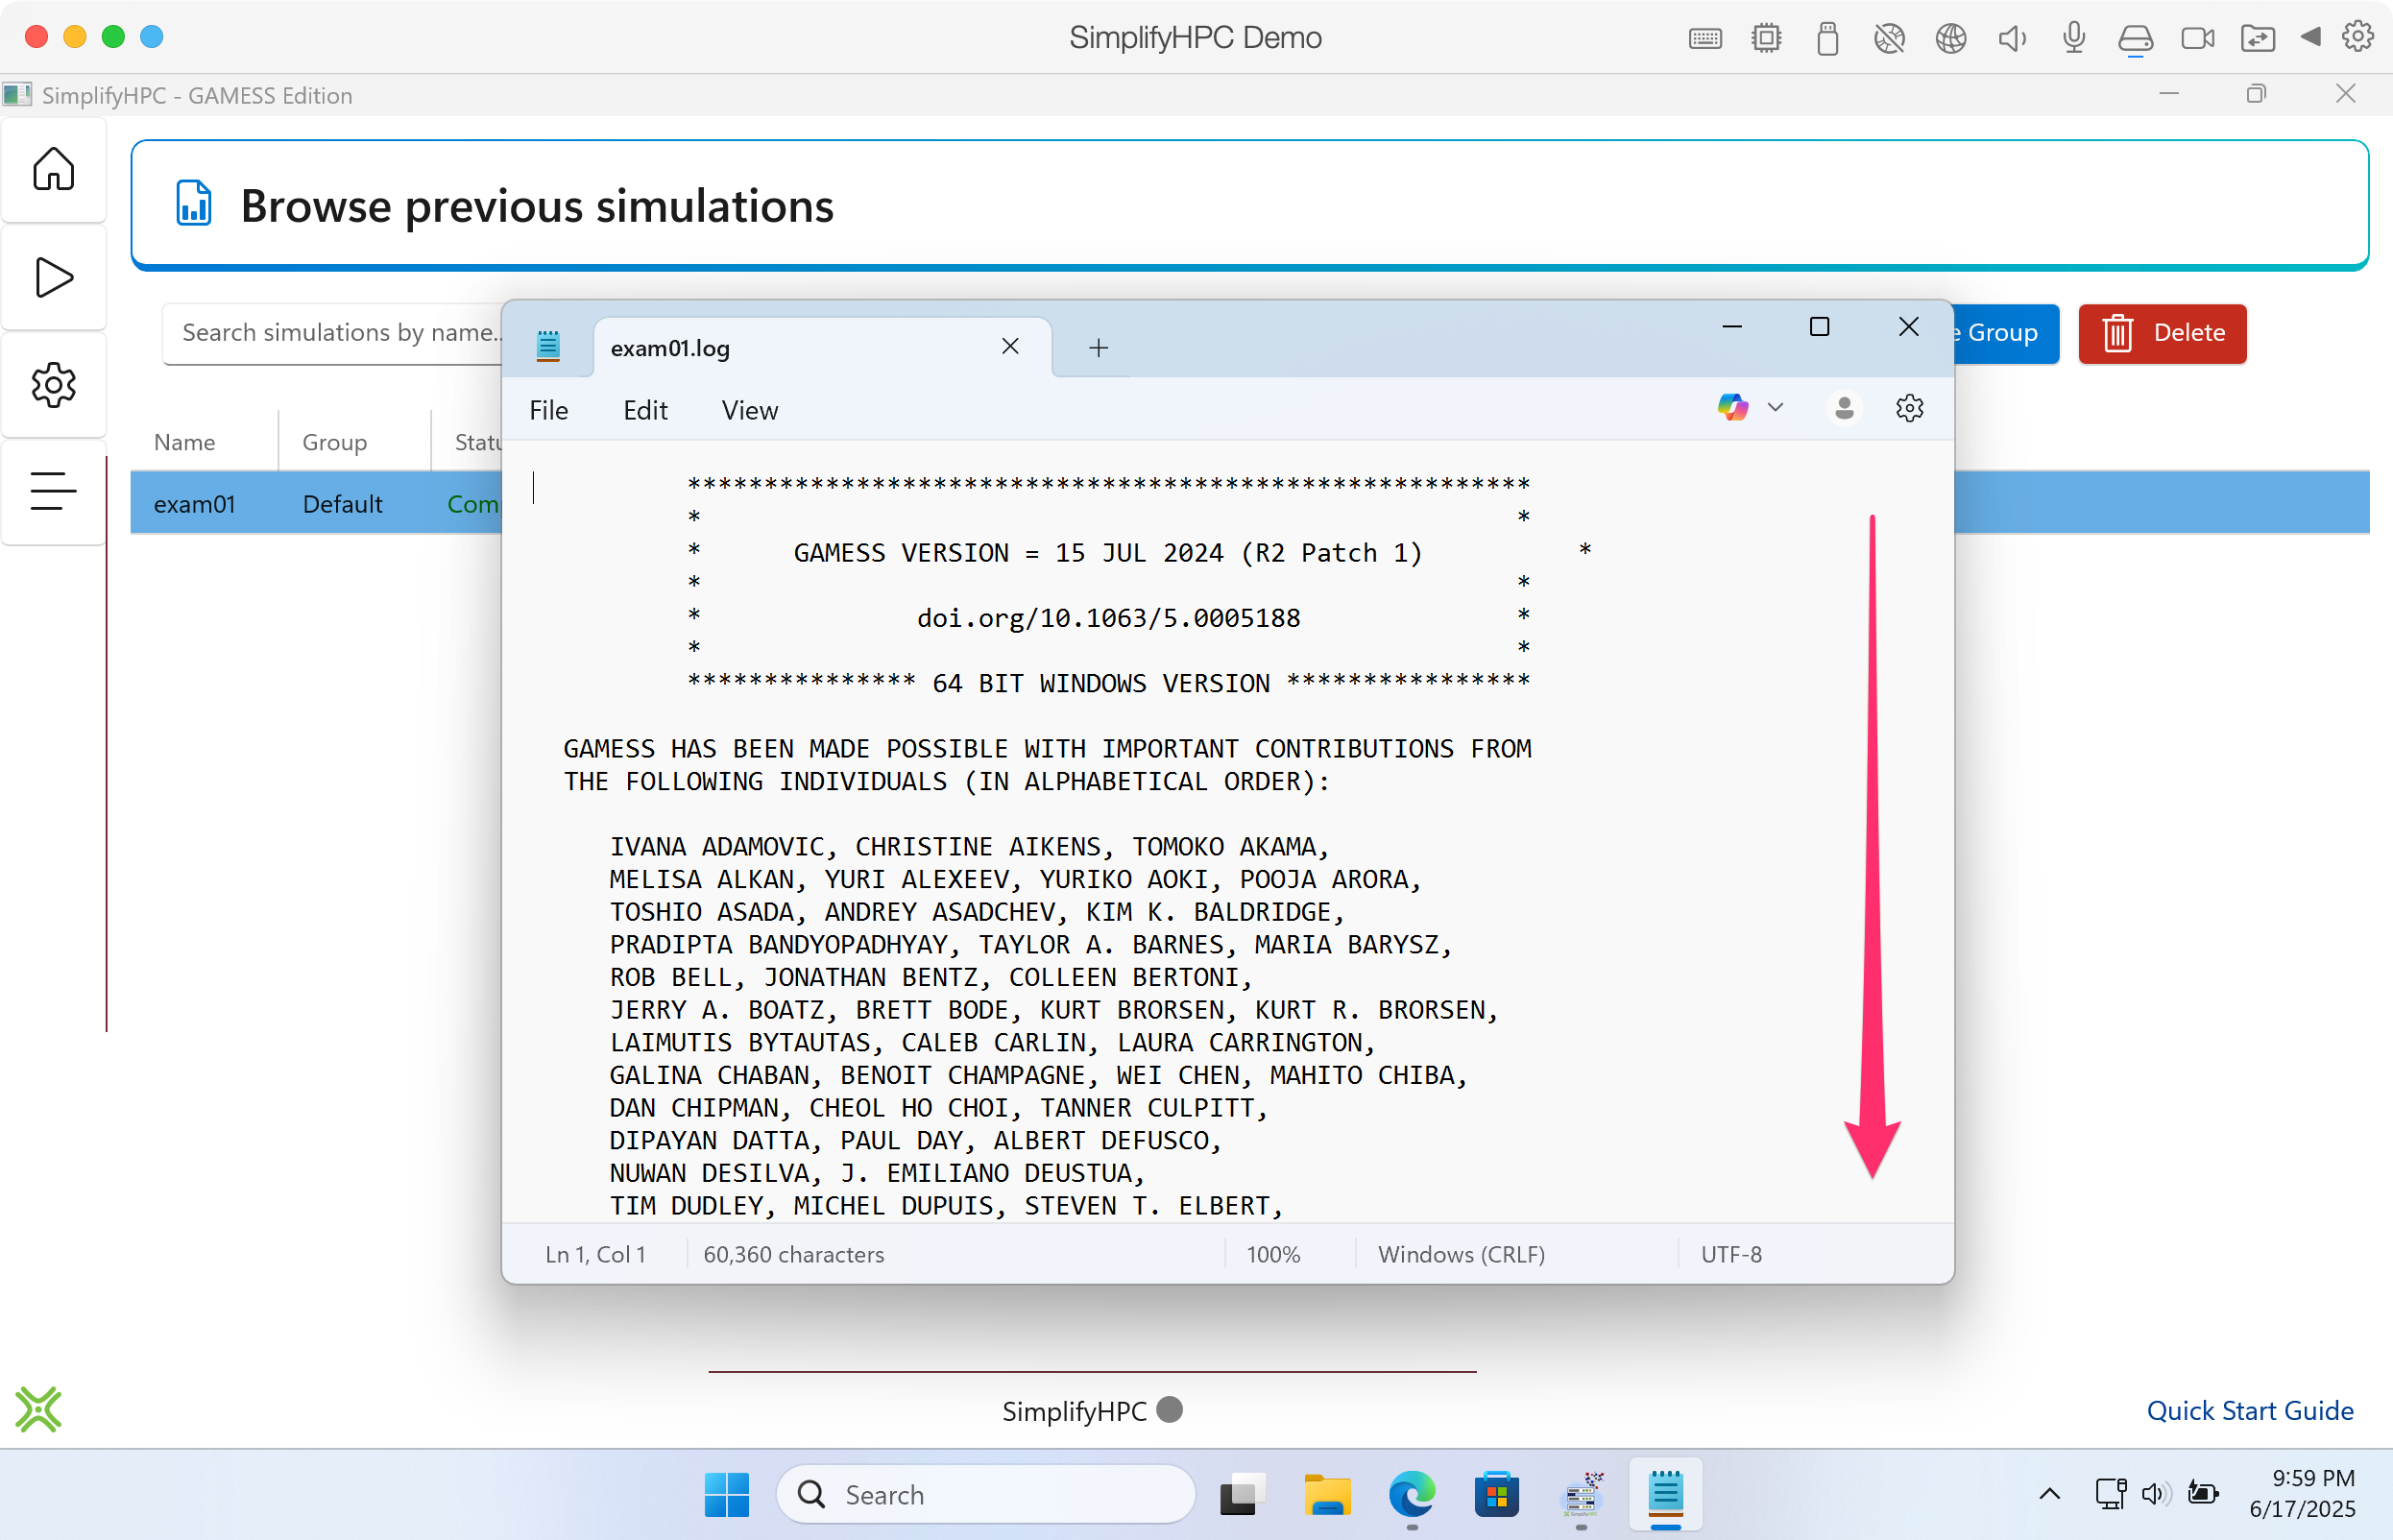
Click image to enlarge in a new tab/window
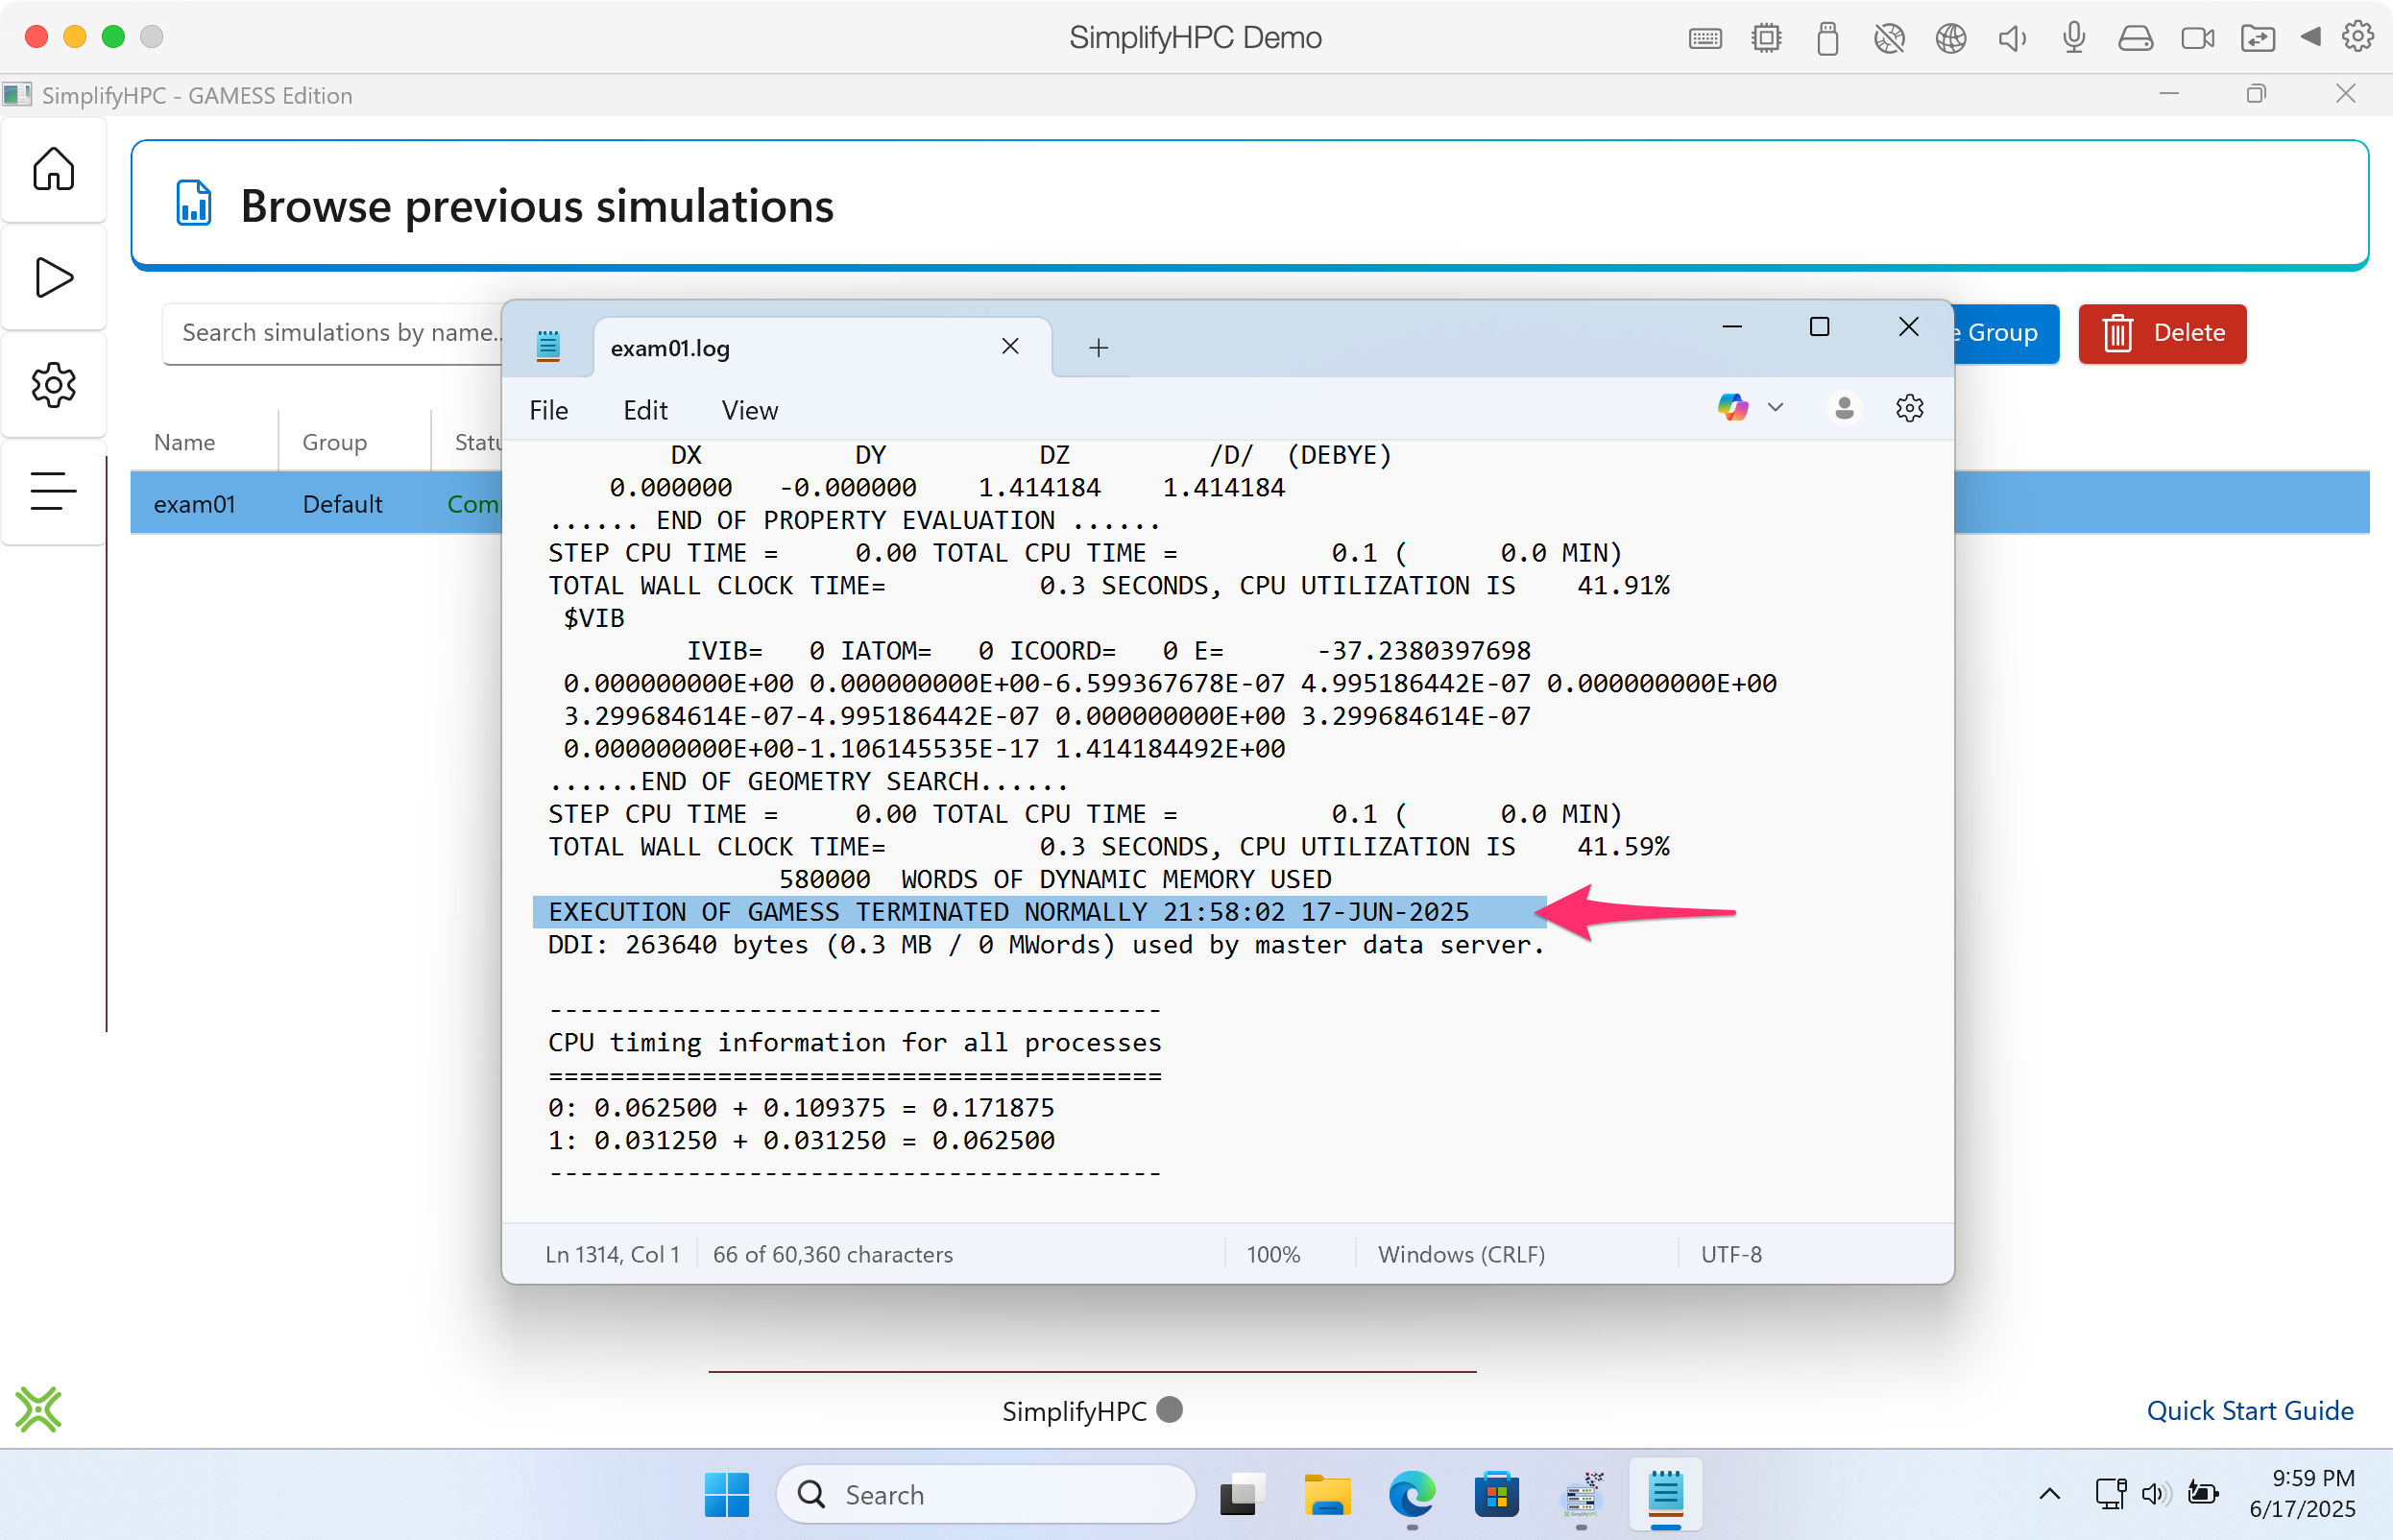
At line 1314, we see that the simulation terminated without any issues. This does not mean that the contents of the output file are chemically correct. This only indicates if the simulation encountered any problems that caused it to terminate early.
Click image to enlarge in a new tab/window
Step 24. Scroll to line 1140 and verify that the equilibrium geometry was found and that the symmetry unique coordinates match as shown to the right.
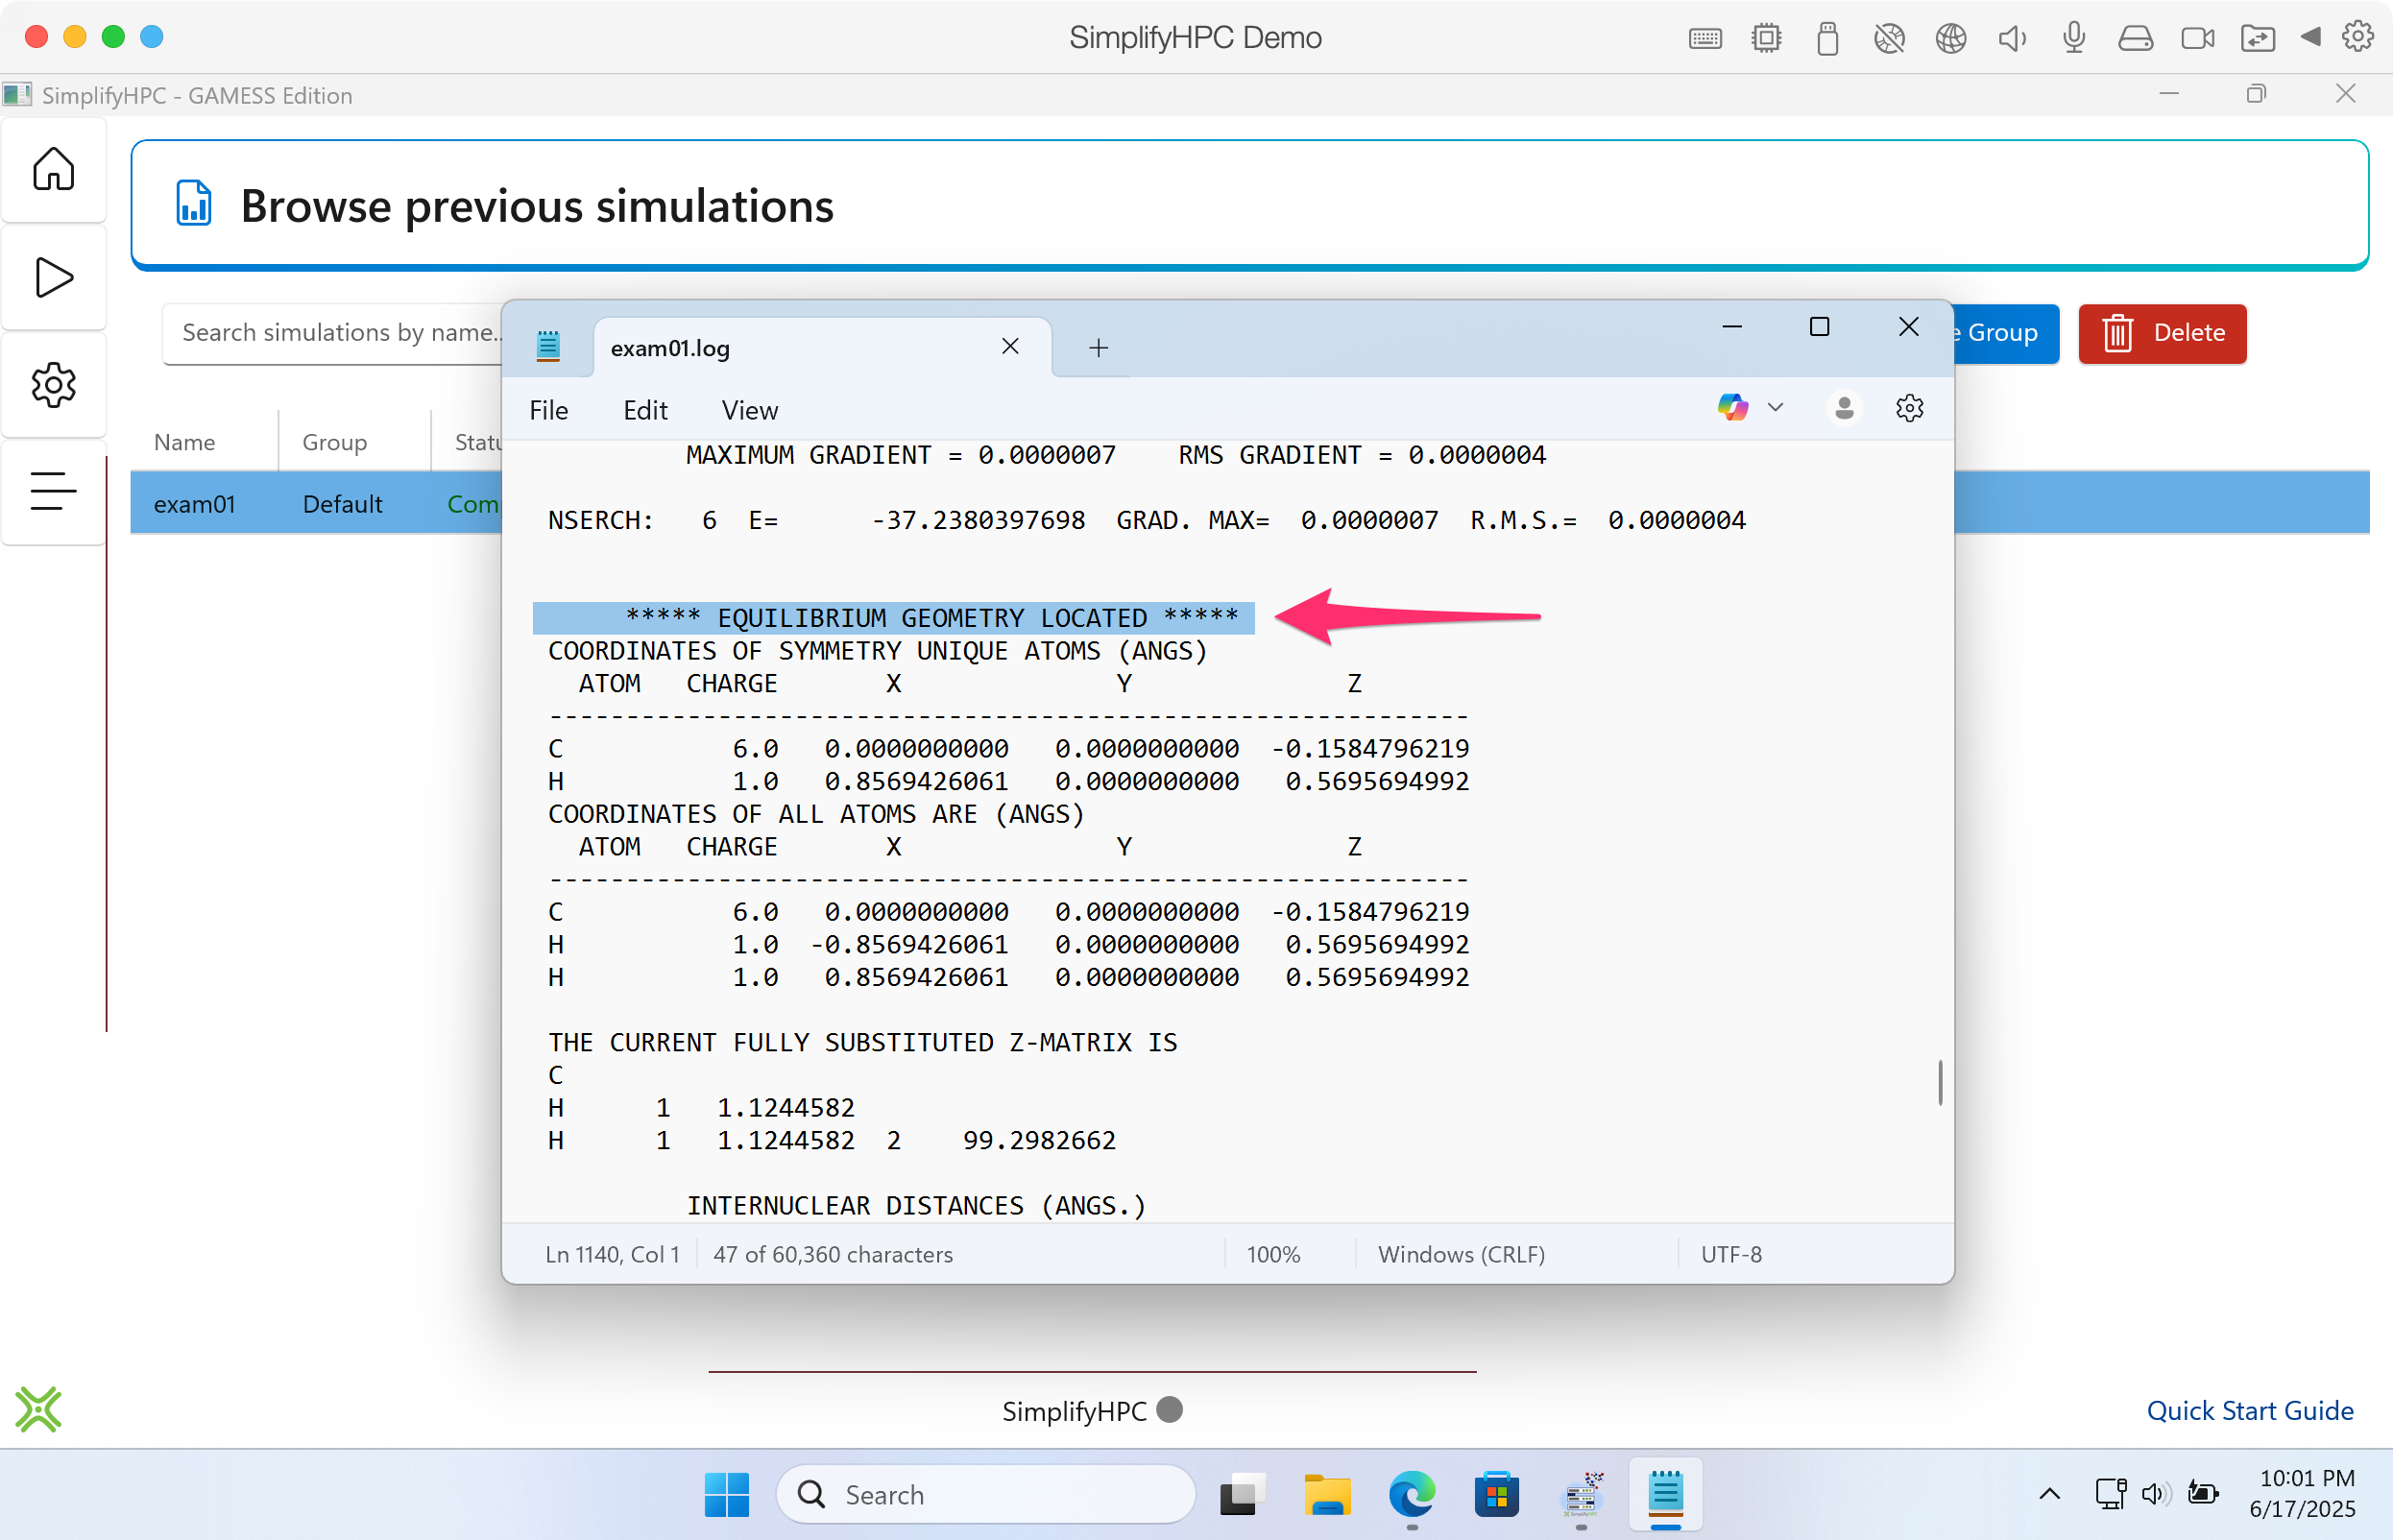
Click image to enlarge in a new tab/window
Step 25. Scroll to line 1140 and verify that the energetics of the run match as shown to the right.
If the equilibrium coordinates and the energetics matched the values in the screenshots then you have successfully completed a GAMESS calculation.

Click image to enlarge in a new tab/window
You can visualize GAMESS output files using a molecular visualization tool like wxMacMolPlt by Brett Bode:
https://brettbode.github.io/wxmacmolplt/
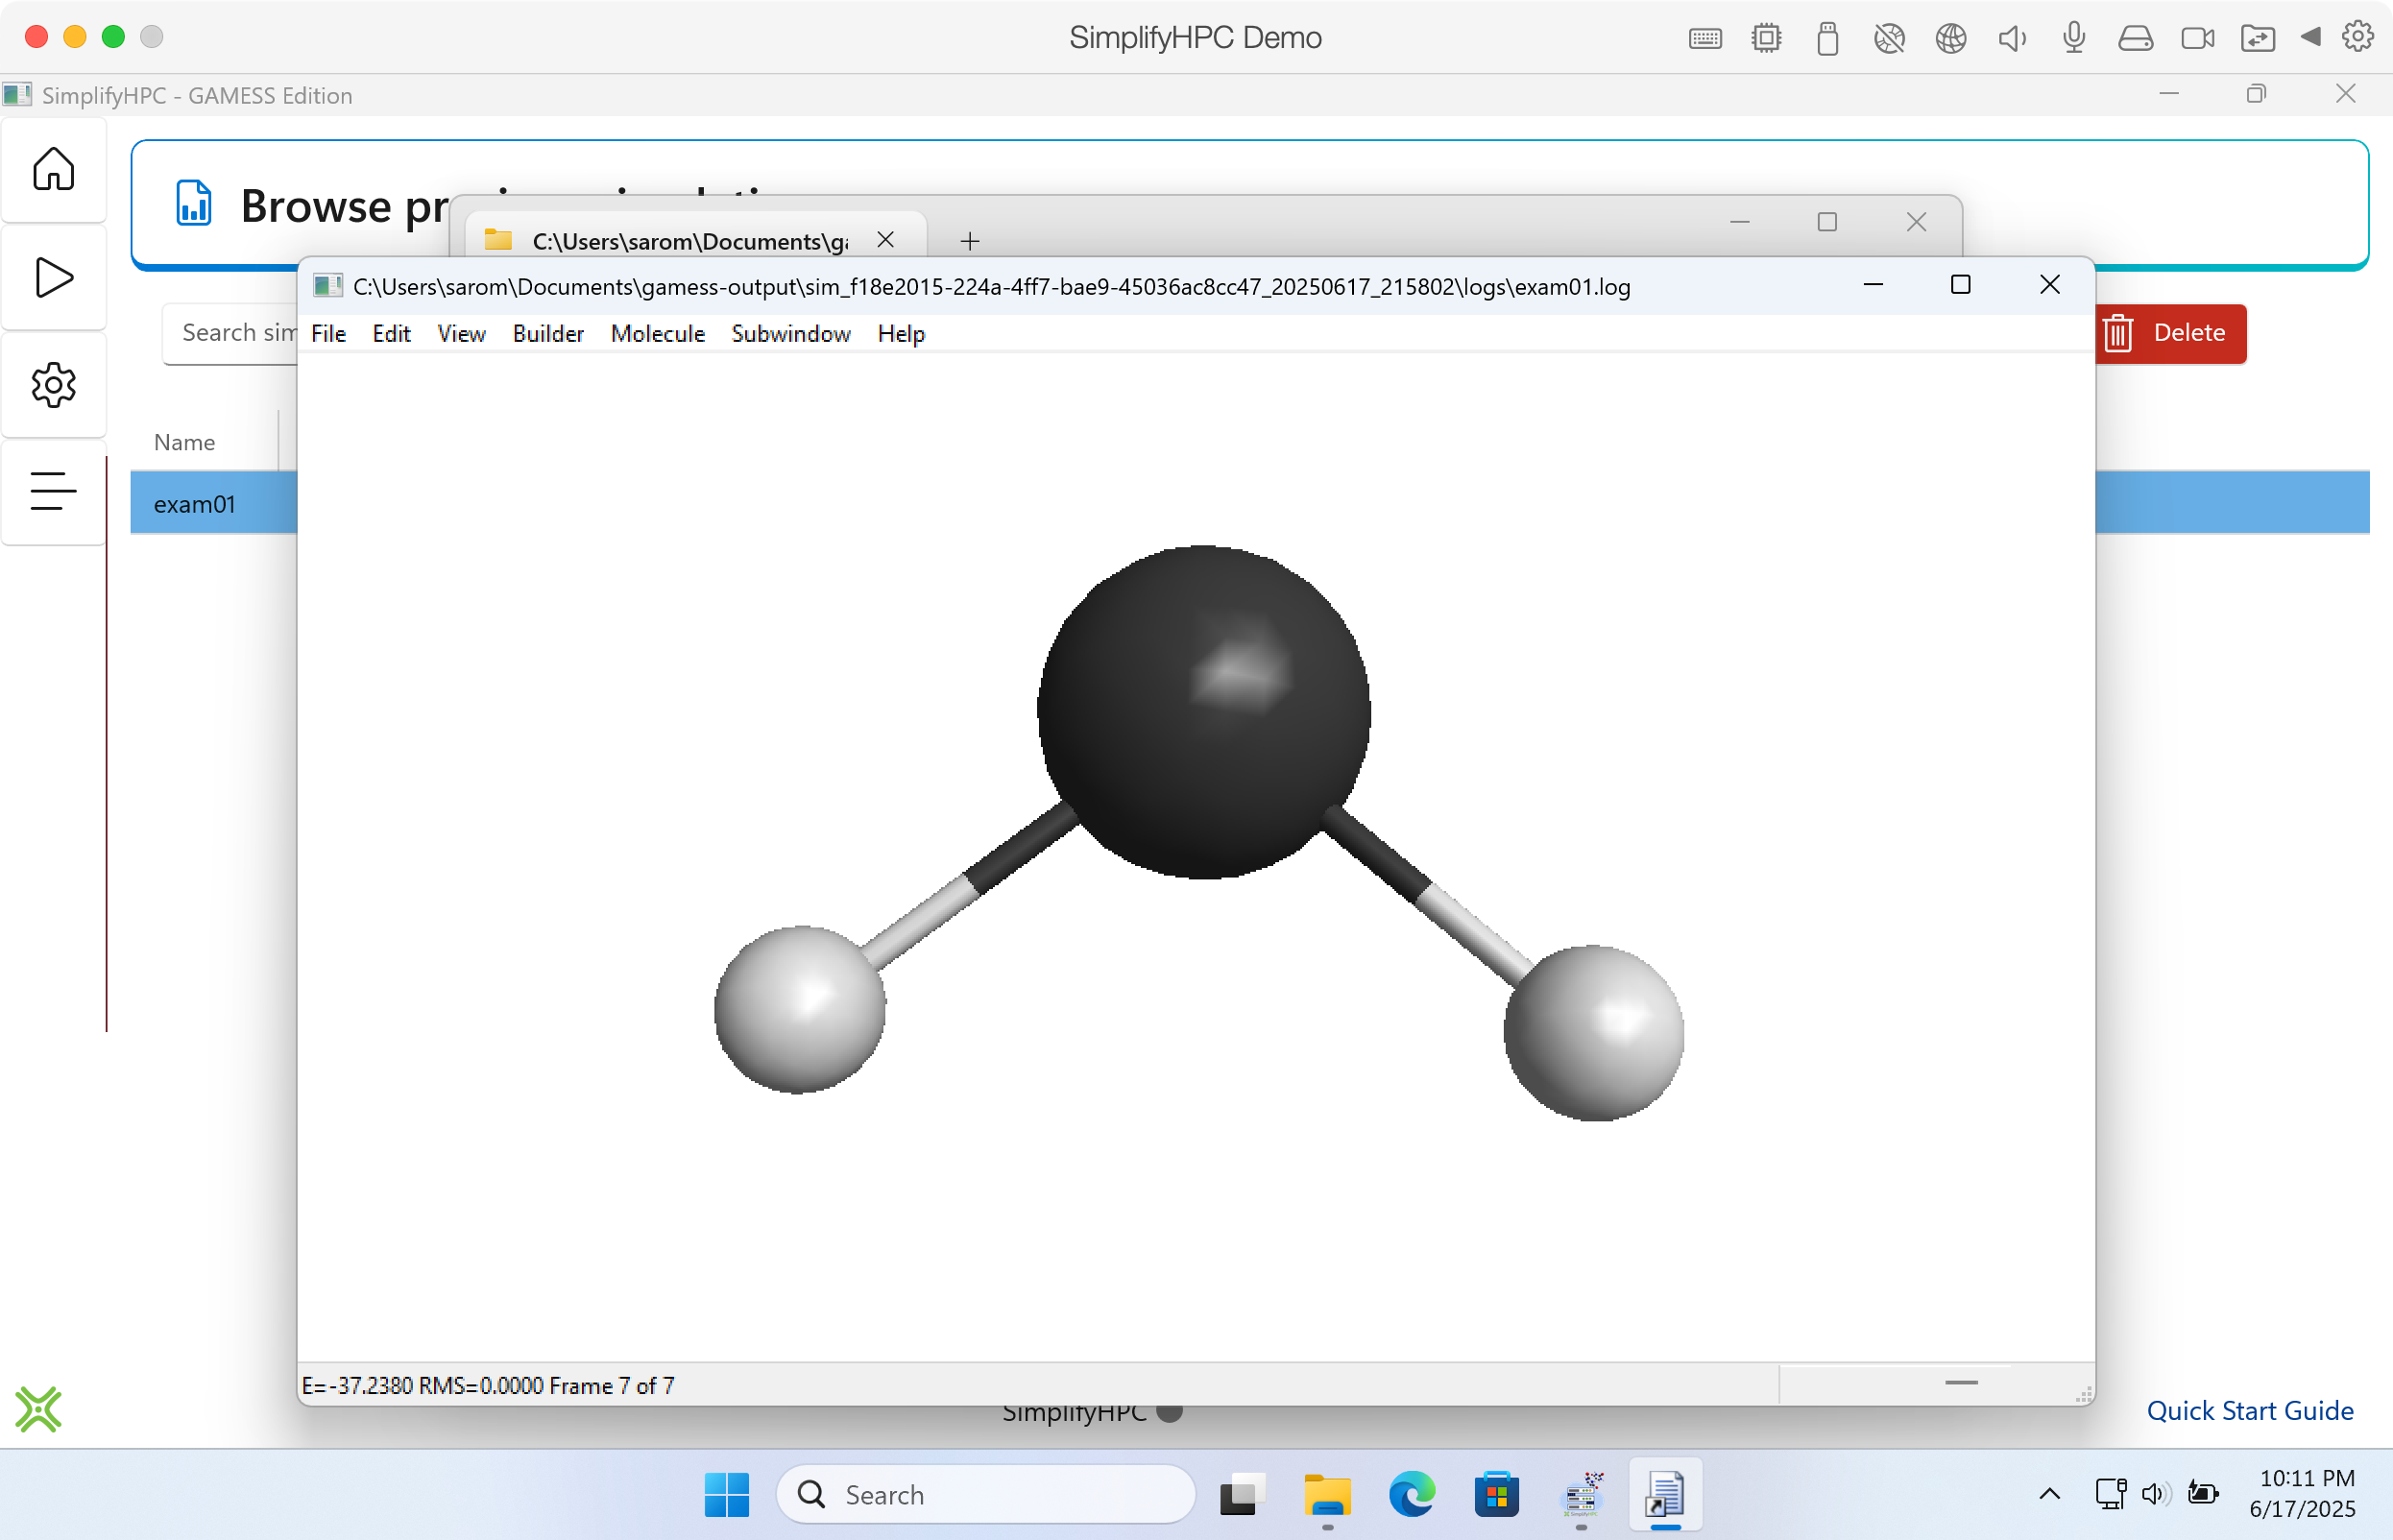
Click image to enlarge in a new tab/window